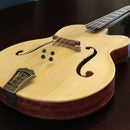
Introduction: Swirl and Water Droplet Painting a Guitar Body
Now that you have your guitar body made Its time to finish it. If you have gone to all the trouble of creating a custom instrument then why give it a solid color finish. these are a few of my finishing tricks that will give you a dynamic and striking finish for your custom creation.
Step 1: Prepar the Body
base coat the body with your choice of sanding sealer. sand the sealer to a flat surface with 320 grit. this will give the swirl a base color to stick to.
Step 2: Prepar the Tank
find a tank big enough that when filled with water you will be able to completely submerge your guitar body. It is important to keep the water in the tank around 70 deg F. Mix in one cup of borax, It will take a while for it to completely dissolve and even if it doesn't completely dissolve it will be fine. The borax helps the water surface tension keep the paint at the surface of the tank.
Step 3: Float the Pant
I use Humbrol brand enamel paint, you can find it on eBay or online. I have tried other brands but they all begin to harden quickly on the surface of the water. Some colors will require thinning, you will have to test each color to find a viscosity that works well. Use a very small amount of paint, and give it plenty of time to spread out on the surface of the water. If you don't you will end up with thick paint and an uneven surfaces. When all your colors are floating swirl them together until you get a look you are happy with.
Step 4: Dunk It!
Submerge the instrument slowly and evenly as possible. you can create many different effects by varying the way you dunk it. Zigzag, spin, rock and mixes of all three will result in very different results.
Step 5: Watter Droplet Effect
The water droplet effect is a great way to soften the hard lines of swirl and the bubbles blend well with the fluid look of swirl. This effect is not as difficult as it may seem.
Place the instrument on a flat surface. Mist the instrument with water until you get a bubble pattern you are happy with. Large droplets of water look great but they may take a long time to completely dry. From a low angle around 15 deg spray enamel paint across one side of the water droplets being careful not to disturb the droplets and trying to only coat one side of each droplet. You can accent the bubble by spraying with a contrasting color from the opposite side, again at a low angle across he droplets. allow the water to completely dry undisturbed. as the droplets dry the paint will be deposited on the body. you will need to clear coat the body without disturbing the water droplet paint as it is not strongly adhered to the body.
Step 6: Clear Coat
Clear coat with your choice of finish. make sure that you build enough thickness that you don't sand through when you wet sand and buff as it is very difficult to repair this kind of finish.
Step 7: Wet Sand and Buff....
wet sand to 2000 grit being very careful not to sand through your clear coats. buff with coarse, medium, and fine buffing compound using a hand drill buffing pad. then to remove any fine scratches hand buff with swirl remover.


