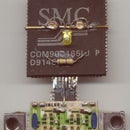
Introduction: Switchmode Step Down Voltage Regulator
Similiar to a 7805, but more efficient. Output 3.3 volts.
My attempt was to make a three pin module which could be soldered into the place of a 78xx type of voltage regulator, making use of the switchmode control chips in order to implement a more efficient solution.
This one makes use of the TC105333 integrated circuit manufactured by Microchip. This contains all the components of the power supply except the switching transistor, freewheeling diode and inductor. The TC105503 can be used for 5 volts output, thus creating an efficient 7805 replacement which needs no heatsink.
The switching device is a TPS1101 PMOS Transistor manufactured by Texas Instruments.
The freewheeling (schottky) diode was extracted from an old hard drive board. The inductor has a resistance of about 1.8 ohms and was extracted from an ancient VCR board.
With no load, and an input supply of 6 volts, this circuit draws about 17 microamperes. With a resistor of 33 ohms connected (load 100 mA) the current is about 63 milliamperes. This computes to an efficiency of around 87%.
Step 1: The Circuit
The figure shows the circuit, shamelessly copied off the datasheet provided by Microchip.
I have been more inventive with the parts. I had to get a modern P channel MOSFET from Texas Instruments because old hard drive boards were seriously deficient in this one critical component.
However, using the parts as specified would be necessary to get 1. A more compact layout 2. higher efficiency.
As it is, my circuit is small enough to fall off the desk and be lost among the crud on the floor. I feel an increase in efficiency to 90% would be wonderful, but three points less is good enough.
This small integrated circuit has a maximum tolerable input of around 12 volts. It has terminals for driving external power devices, and that makes it more versatile.
For example, replacing that inductor with a transformer and arranging things so that the bulk of the power and voltage is handled by a second hefty transistor and diode can make this little circuit control a power supply operating off the rectified mains.
Step 2: The Circuit Board
A small piece of circuit board, around the width of a 7805, but longer, was cut from double sided copper clad board, the patterns for isolating pads cut with a sharp knife and holes drilled for connections to the ground plane on the other side.
Step 3: The Components
From left to right, these are
1. The schottky rectifier diode. From an old hard drive.
2. The TC105333 integrated circuit. From Microchip.
3. The TPS1101 P-channel MOSFET. From Texas Instruments.
4. 22µF 20V tantalum SMD capacitor. From an old hard drive.
5. 47µF 16V tantalum SMD capacitor. From an old hard drive.
Diodes and tantalum capacitors in SMD packages look almost the same. The diode is distinguished by it being open circuit in one direction, and conducting in the other. The capacitors check out open circuit in both directions, after an initial charging kick.
The schottky diode is distinguished from the ordinary kind by it having a much lower forward voltage drop.
In addition, a 470 K resisor and a 10nF capacitor were also used.
Step 4: Partly Assembled
The picture shows almost all components soldered in position, except the inductor and the connecting pins. The green wire connects the shutdown input of the ic to a pull up resistor placed upright against the positive lead of the input capacitor.
A large area is left for connecting the inductor because the efficiency of the circuit under load is determined to a large extent by the losses in the inductor. It should have low resistance and an inductance greater than 33 microhenrys. Several could be tried in position or one could be wound on ferrite core.
The input current passes through the MOSFET and its "on" resistance determines loss within it. The output current is carried by the freewheeling diode while the MOSFET is off and so the voltage drop across it contributes to the losses. Schottky diodes have lower voltage drop than ordinary diodes and so are preferred in this position.
Thus it is possible to assemble and test circuits using modern integrated circuits with little effort since very few external components are needed to make them work.
The manufacturer has very compelling reasons to put everything on one board, because additional boards increase the manufacturing and handling and testing costs.
The amateur constructor, on the other hand, is well advised to go to the other extreme and assemble his project using a large number of circuit modules which can be tested independently.


