

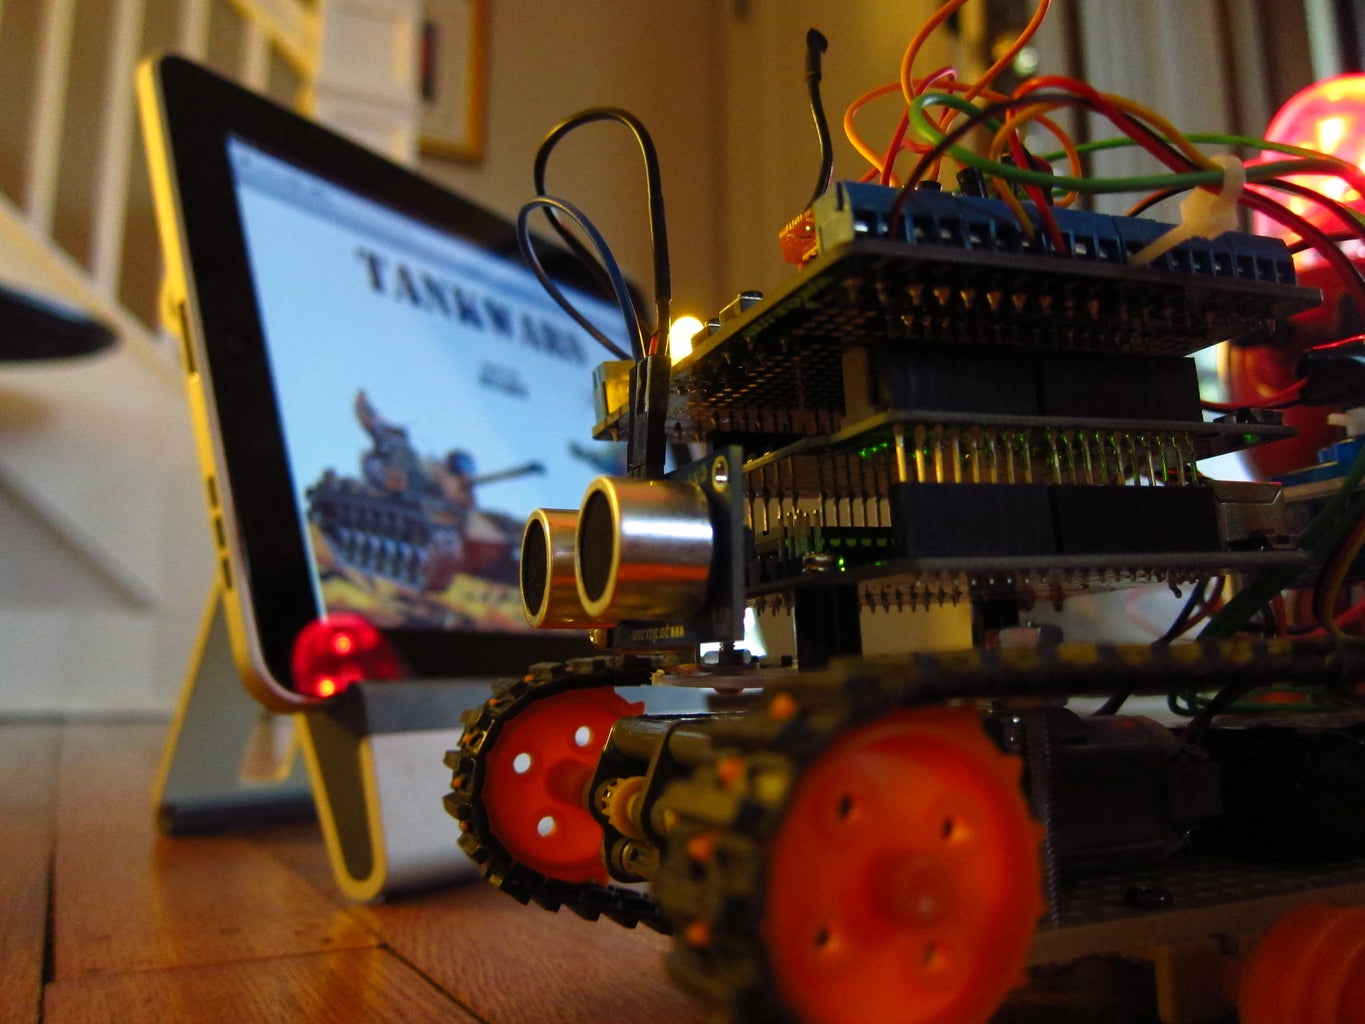
Introduction: TankWars: a Physical Video Game


The tank and the target are Arduino's equipped with RN-XV WiFly modules, the iPad is using a PHP page to send commands to the tank and read the status of the target.
Robots, tanks and lasers, what more do you need?
This is an improved version of my last instructable, which was a much more basic version. Check that out here: https://www.instructables.com/id/Tankbot-Internet-Controlled-Tank-Robot/
Step 1: Parts

For the tank you will need:
-Tamiya Dual Motor Gearbox: http://www.sparkfun.com/products/319
-Tamiya Tank Treads: http://www.sparkfun.com/products/321
-Universal Mounting Platform: http://www.sparkfun.com/products/10016
-Arduino Uno
-Arduino Motor Shield
-Sparkfun ProtoScrew Shield: http://www.sparkfun.com/products/9729
-Laser Pointer
-Parallax Ping: www.parallax.com/tabid/768/ProductID/92/Default.aspx
-Mini Servo: http://www.hitecrcd.com/products/analog/micro-mini/hs-55.html
-Nuts, Bolts, Standoffs, Plexiglass
-Dynamite Prophet Sport II : http://www.dynamiterc.com/Products/Default.aspx?ProdID=DYN4063
-Dynamite 7.2v Battery: http://www.dynamiterc.com/Products/Default.aspx?ProdID=DYN1466
-WiFly RN-XV : http://www.sparkfun.com/products/10822
-XBee Breakout: http://www.sparkfun.com/products/8276
For the target you will need:
-Arduino
-WiFly RN-XV : http://www.sparkfun.com/products/10822
-XBee Shield : http://www.sparkfun.com/products/9976
-Solar Panel: http://www.radioshack.com/product/index.jsp?productId=12609998
-Toy Robot
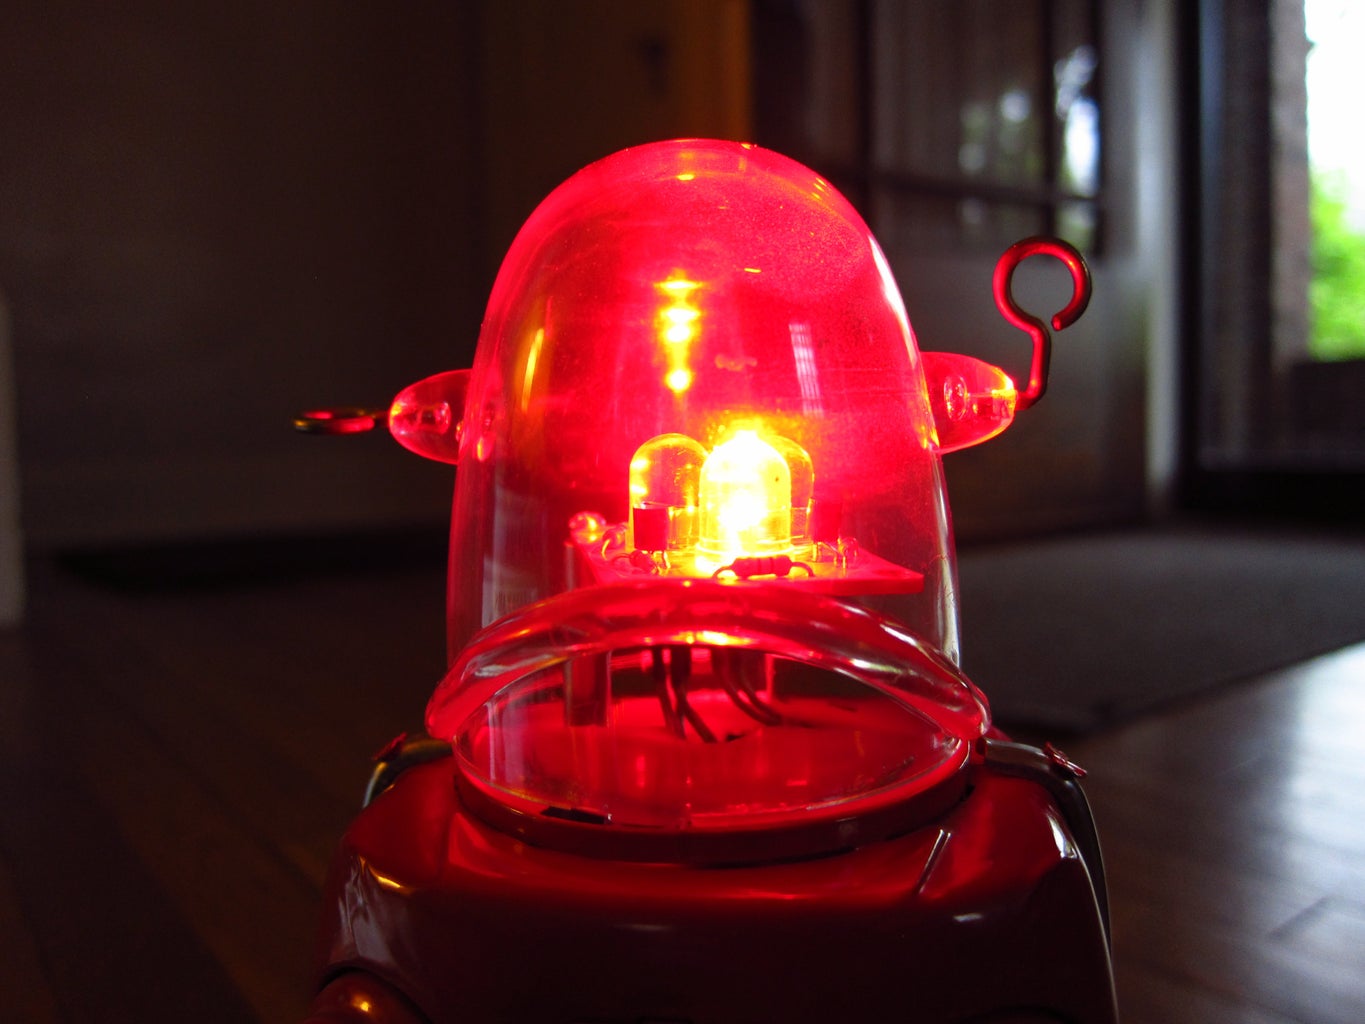
-Sparkfun TriColor LED :http://www.sparkfun.com/products/10111
Step 2: Tank Build

One of the failings of version 1 of the tankbot was that it was missing an object sensor in the rear. This version has Parallax Ping sensors front and rear.
You will need to assemble the following:
-Gear Box
-Tank Treads
-Universal Platform.
I used nuts and bolts to create a platform above this for the Arduino, Servo and PING.
I copied the dimensions of the Universal Plate set for the plexi glass second platform.
The laser pointer can be attached to the servo horn.
But what was really tricky for me, the Arduino Motor Shield uses up a ton of pins, but you cannot see it quickly as it is wired internally. I found it helpful to just quick sketch it out.
Step 3: Tank Power


The tank motors require a lot of power and I did not want to wear down AA batteries or 9v's that quickly. The RC car community has spent a good bit of time figuring out small power. So I picked up a Dynamite 7.2v 1750mah battery and Dynamite Sport II charger.
Then used a plug to connect to the motorshield's screw terminal.
Step 4: Tank Code

For the tank you will load the code on this page. It requires the awesome WiFly libraries from http://arduinology.blogspot.com. They are included in the code attached.
Attachments

Step 5: Tank Building

When I built the tank I went through a lot of small steps, first I just assembled the body and drove it forward.
Next I added the PING sensor and had an autonomous object avoiding tank.
Then I added the WiFly and could control it over the internet.
Next I added the servo and laser on a small platform.
Lastly I added the rear ping sensor.
Step 6: Target Build

The target in this version is much improved. The previous version was really hard to hit. I used a large solar panel module from Radioshack to use as a laser sensor.
The way the sensor works to avoid false positives is that it takes 5 readings of light levels (voltage) over 5ms. Averages them and takes 5 more readings, if the difference is greater than 5 percent then it registers as a hit You will still get some false positives, but they are few and far between.
Step 7: Target Build Lights
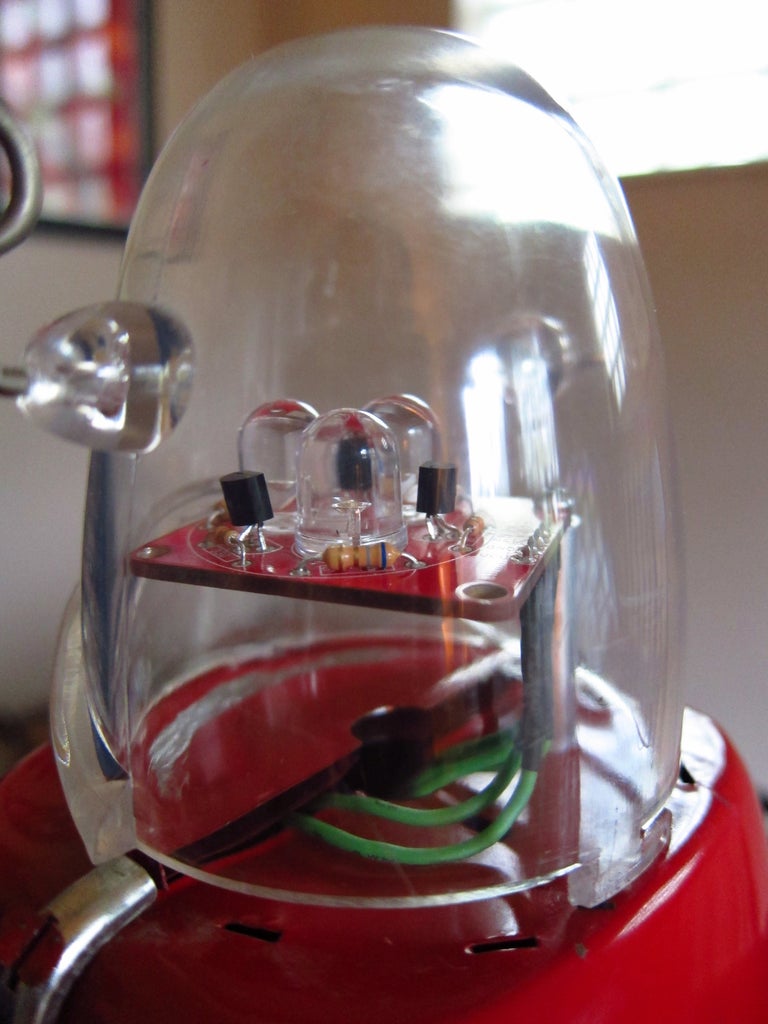
I attached the tri color led board on the top of the robot.
Step 8: Target Build Panel
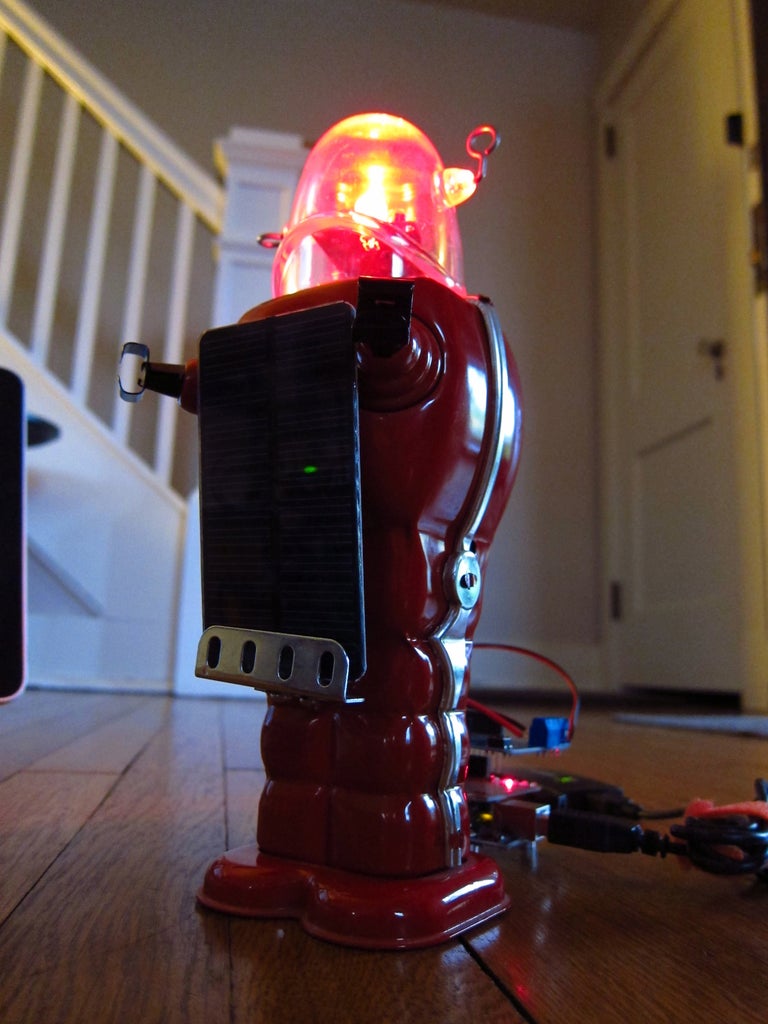
I attached the solar panel on the front of the robot and drilled a hole to run the wires through the robot.
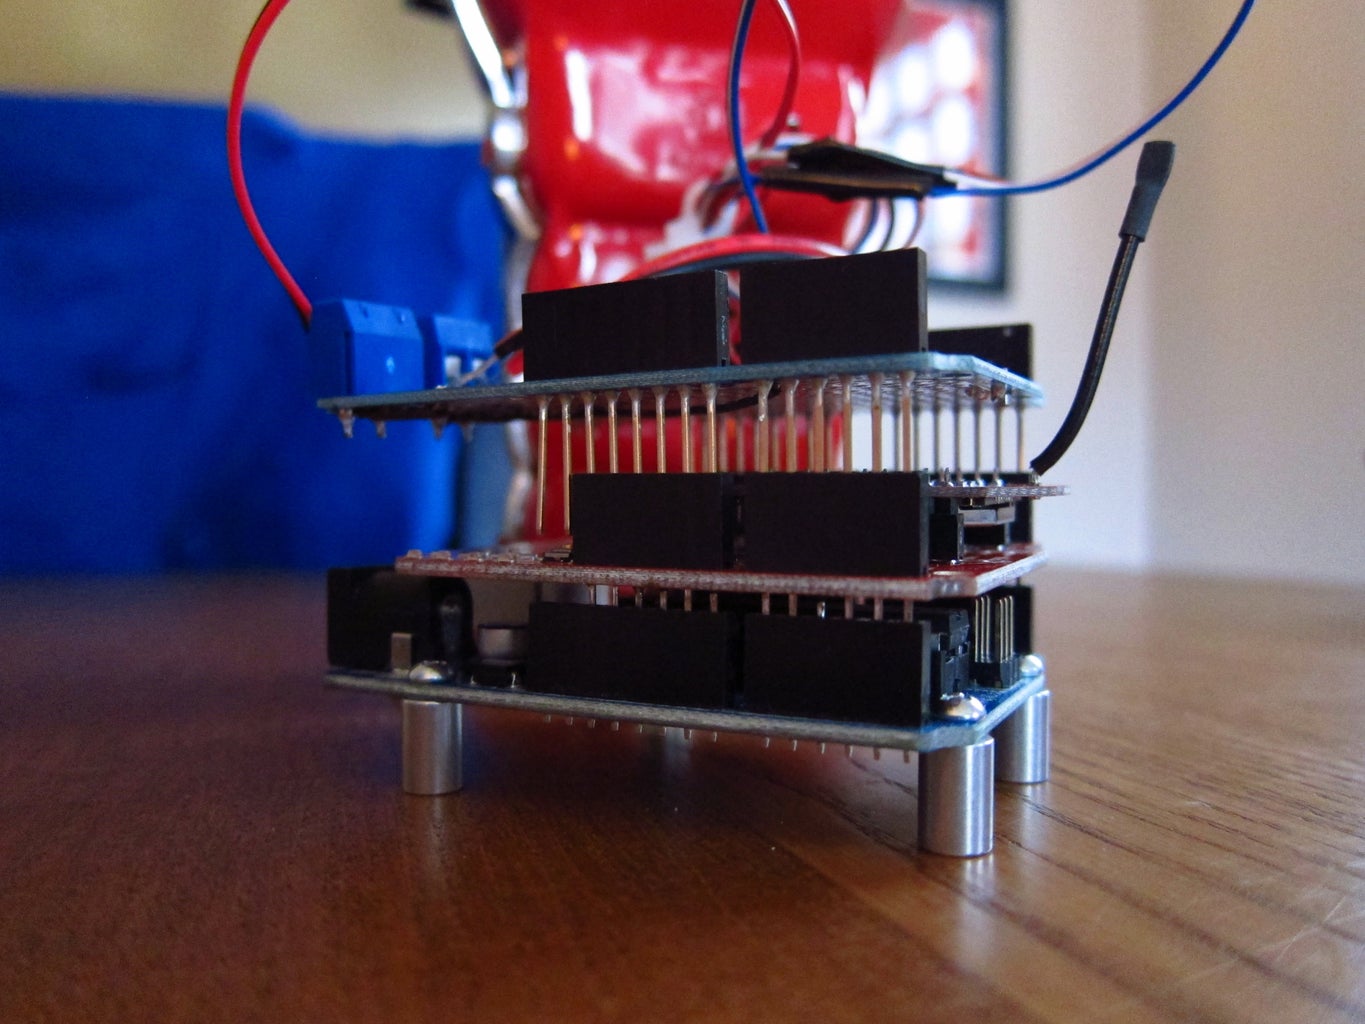
Step 9: Target Build Arduino
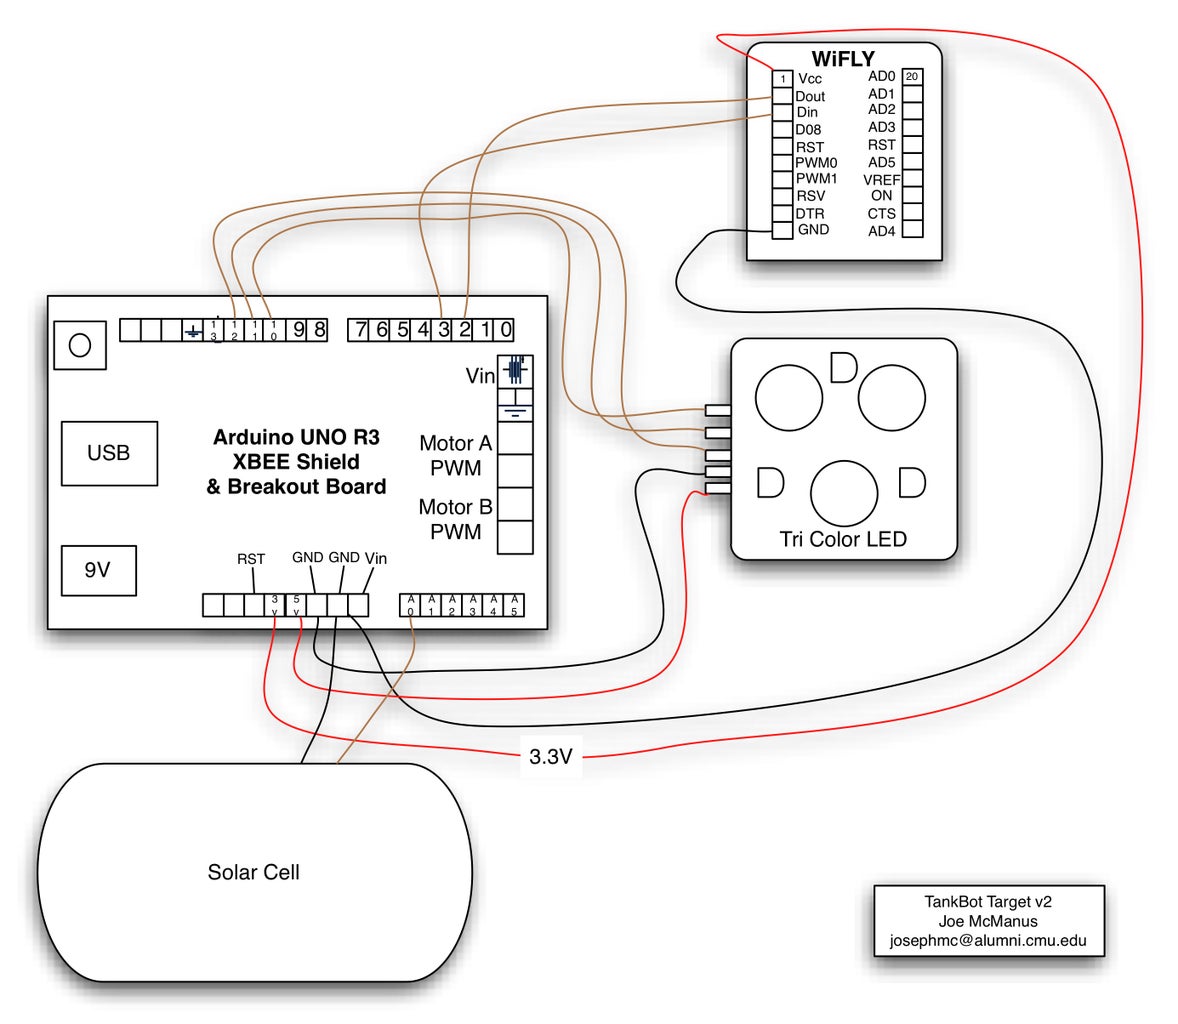
I attached a drawing of the wiring I used for this.
Step 10: Target Build Out the Back
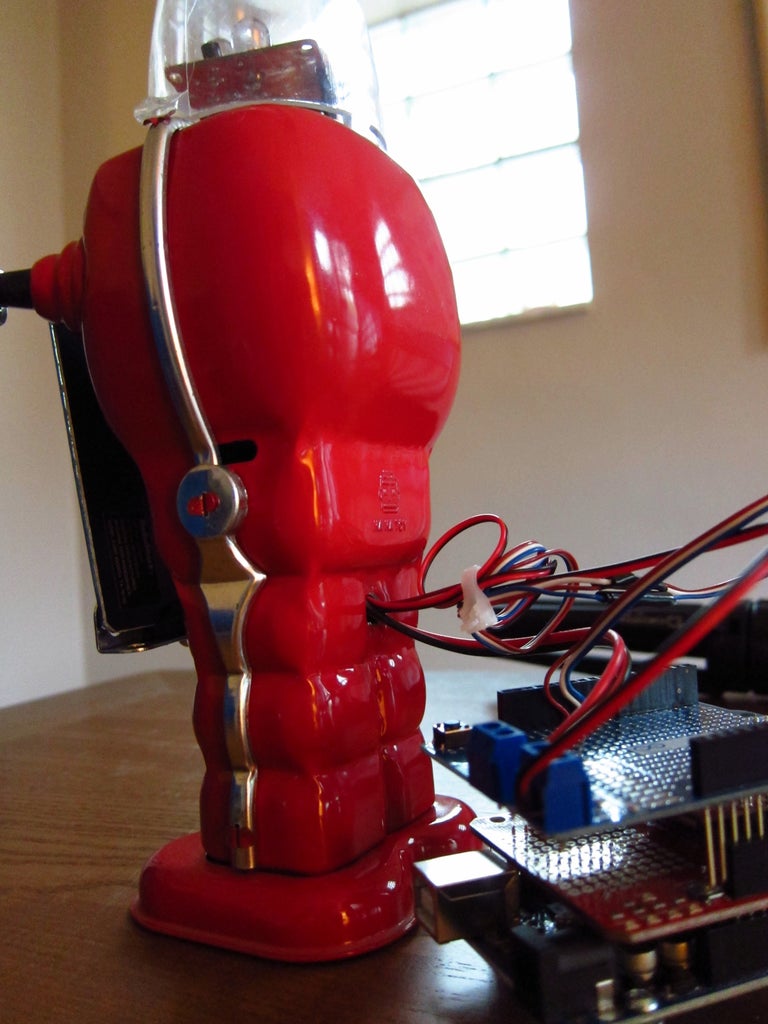
I ran the wires out of the back of the robot body for looks.
Step 11: Target Code

Load the code in the attached file to control the target.
Attachments
Step 12: Web Interface


Place the files attached on a web server, or a machine running a web server with PHP enabled. This will work on OSX, Linux, etc.
Attachments
Step 13: Thanks
Please let me know if you have any questions.

First Prize in the
Arduino Challenge

Participated in the
Robot Challenge


