

Introduction: Team Valor Light Up Badge for Pokemon GO


Since Pokemon GO came out, I've wanted to make something to related to the game. I wanted something I could make in an afternoon that I could use right away, so I thought of a blinking Team Valor badge to represent the best team in Pokemon GO. The circuit is simple, I am using a square wave oscillator that is driving an NPN transistor which lights the LEDs. The real challenge comes in the enclosure. I laser cut a cut-out of the Team Valor Emblem and glued it to one side of a piece of non-glare acrylic. When the LEDs turn on, the emblem is displayed in all its glory.
Additionally, I am entering this Instructable into the Beyond the Comfort Zone Contest. For this contest, I have to explain why this project is beyond my comfort zone. I usually do purely circuit design projects i.e. breadboards. Doing a project that was heavy on the crafting and utilizing my artistic side was a bit different than what I am used to. I learned how to design for a laser cutter and how to put together a design than can be semi-fashionable and decorative as opposed to simply being on a breadboard.
Anyways, enjoy the Instructable!
Step 1: Gather Your Tools


All the materials should run you about <$10 (minus the laser cutter of course and soldering tools)
1 x Team Valor Emblem -- Moltres cut-out on black cardstock
1 x 3 in by 3 in piece of acrylic
1 x acrylic cutting knife
1 x 2 in by 2 in piece of aluminum foil
1 x 2 in by 2 in piece of white paper
12 x 5mm LEDs
2 x MCP6002 Op Amp
4 x 10k resistor
3 x 100nF capacitor
1 x 3.3M resistor
1 x perfboard
Copper tape
Hot glue
Tape measure
Soldering tools
Laser cutter
Step 2: Prepare the Cut-out of Moltres (Team Valor Emblem)


This part will be really easy if you have a laser cutter. I found an image of the Team Valor Emblem online on Jackaloupe's blog and then used an online image to .DXF (common file type for CAD drawings) converter to prepare the image for the laser cutter. Then I uploaded the DXF file to a laser cutter I have access to at school and viola! We have our Moltres cut-out.
If you do not have access to a laser cutter, I would suggest a hobby knife and transparency from your local Hobby Lobby.
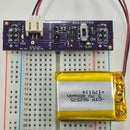
Step 3: Build the Circuit

This part is pretty straight forward. Follow the schematic and solder your components onto the perfboard.
Step 4: Placing the LEDs Onto the Acrylic


Glue the LEDs on to the piece of acrylic with LEDs on opposite sides of the acrylic facing each other. Then place glue to fill the space between all the LEDs. The hot glue acts as a light diffuser. Thanks Kurt E. Clothier!
Step 5: Attach Aluminum Sheet Behind LEDs


I also attached aluminum onto the acrylic behind the LEDs. Aluminum reflects the light outwards so this helps diffuse the light even more.
Glue a piece of white paper to one side of the aluminum and then glue the aluminum to the backside of the acrylic (where the LEDs are). I glued one side of the aluminum to white paper so that the aluminum does not get into contact with the circuit board when we lay the LEDs onto the perfboard. Aluminum is obviously conductive so it would short everything out. On that note, make sure the aluminum does not touch the LEDs. I made my piece of aluminum about 2.5 inches by 2.5 inches so it fits inside the acrylic.
Step 6: Place the LEDs Onto the Circuit Board


The LED pins are really long so you can bend them and get them into the perfboard. Remember the LED connections. Connect the anode of the LEDs (longer leg) to the supply voltage and connect the cathodes (shorter leg) to the collector of the NPN transistor. I used copper tape to help me get all the connections together without having to do a ton of individual wiring. If you lay the copper tape down on the board, you can bend the LED pins on to the copper tape and solder them down.
Step 7: Attach Your Team Valor Emblem


Glue (or however you prefer to attach it) your Team Valor cut-out onto the front side of the piece of acrylic.
Step 8: You Are Done!
Attach the batter and watch it light up!

Participated in the
Summer Fun Contest 2016

Participated in the
Beyond the Comfort Zone Contest

Participated in the
Makerspace Contest


