

Introduction: The Art of Black and White Digital Photography


Thus, this will be a beginner's guide to black and white photography. In this Instructables, we will learn to think in black and white, learn how to set up our camera, look at some examples of how we can use black and white photography to enhance our craft and lastly, we will look at some post processing tips. Techniques and opinions in this guide should not be taken as hard rules for black and white photography or photography in general. There are no absolute rules in photography, only suggestions. Experiment and see what works for you. Discover your own style.
Requirements:
- Point and shoot digital camera or DSLR
- A basic understanding of photography principle
- A computer
- Post processing software (Photoshop, Lightroom, Aperture, Gimp, iPhoto, etc)
- and most important curiosity to learn
Step 1: Thinking in Black and White

Before we start taking photos of things we think will look good in black and white, we need to be able to think in black and white.
How do we do this? The following are a few areas to think about before you should click your shutter button.
Light
Learn how light works. Photography is the art of capturing light. Without light, there would be no photography. The basic light principles have been the same since the first cameras came about. A medium, either film or a sensor captures light changed over time. Seeing how light is hitting the subject wil affect contrast. Brighter environments then to provide lighter tones of gray to white, and the opposite is true, less light appears darker or black in black and white photography. Remember you can control light with your shutter, aperture, and ISO
Color
Black and white photos are not just black and white, there are many shades or tones of gray. Thus, when thinking about black and white compositions, remember that colors will be implied and exist. Colors could be used to your advantage. Color tones could be altered when converting to black and white. With the example image, the green moss is not present in the photo due to it being a dark shade of green. so the green blends in to the rocks. If the photo was colored, the rocks would not be as striking as the green moss will become more of a distraction.
Contrast
In black and white photography, there are no colors. Everything is presented as white, tones of gray and black. Try to see the world or find subjects with in terms of contrast. Contrast is defined as the difference between the tones. Photos with high contrast means there is a lot of white and blacks, but very little shades of gray. Low contrast photos appear mostly black or white with some grey. Most photos are just normal contrast with a mix of black, white and grey tones. How do we see this contrast played out in the color worked? Many photographers prefer high contrast black and white photos as they create a stronger subject. However, lower contrast photos can also be useful in softening the subject. The photo example is a high contrast photo. High contrast photos tend to provide very striking outlines of the subject. The black rocks are being outlined by the white mist of the water. Composition wise, the black rocks in the mist creates an atmosphere of mystery.
Simplicity
My opinion is less is more with the photo composition. Try not to clutter the photo with too many details. A single strong subject is easier on the eyes when creating a message or story. This is more true for black and white. A beautiful and vivid landscape will be various shades of gray in black and white and may be more confusing in black and white.
Post Processing
Have an idea on how you plan to process the photo since what you see when you take the photo, might not represent what you want as your final result.
Have these things in mind and composing a better black and white photo will be easier. These are not all the things to consider about black and white composition, but its a start to get you thinking in black and white. Remember to practice and figure out what works for you.
Step 2: Setting Up the Camera

Take Color Photos
Do not be tempted to just set your camera to black and white in the settings. Take the photos in color. Why? First, this will allow you more practice to visualize your composition in black and white without the aid of what your camera telling you how a monochromatic photo "should" look like. Second, by taking the photo in color, you preserve all the color tones, white balance and exposure. This will allow greater range of post process editing compared to editing an already black and white photo that came off that camera. When you take a photo in black and white, all the color tones will be discarded leaving less information for the post processing software to use. If you do not intend in editing your photos, then you can shoot in black and white.
Shoot in Raw
If your camera supports Raw format, use that format instead of the jpeg format. Just as shooting in color, raw format preserves more of the photo's information. Raw format is essentially the raw data collected from the camera's sensor with all of the camera's settings. This will allow a greater range in post processing. Jpegs are compressed photos, so many of the image's information will be lost during jpeg processing done by the camera. There are plenty of websites out there that shows how many stops of light or amount of color tones are lost during jpg compression compared to the raw format. All dslrs and some high end point and shoot cameras will allow this format. The downside to shooting Raw is that not all photo editing software supports raw formats.
The image example was shot in raw and was a tad underexposed due to the window. Because raw formats preserve more sensor information, I can fix the exposure in Lightroom with the recovery slider. With this correction ability from Raw, we can see the contrast between the bright window and the dark stairs.
Now that we have an idea of how black and white photography works, what are some things we can do in black and white photography? Read on to find out.
Step 3: Using B&W to Create Low Key and High Key Effects


Low key and high key are two popular techniques people use in black and white photography.
Low key photos are mainly black or of darker shades of gray. The small bits of white in low key photos draw the viewer towards the subject. In this example, the harsh light hits the wall, and the light reflection reveal to us the contours of our subject. This is an easy way to create interesting photos at night without the need to run high ISOs or slow shutter speeds.
High key is the exact opposite of low key. High key photos are predominantly white or lighter shades of gray. The darker areas draw the viewer to the subject for high key photos. High key in the example can be used for abstract art as a predominately white photo can be devoid of details. The focus can be on the abstract lines or patterns that are darker.
Step 4: Using B&W to Reduce Distractions


Black and white photography at times can reduce elements that are distracting in our composition by controlling the light and colors. Black and white can also hide noise problems due to high ISO usage. Here are a few examples of what I mean.
The first photo is a night of San Francisco from Pier 7. If you do a search of pier 7 on google, you will find a lot of photos showing the skyline and the pier. Some of these photos may appear cluttered especially at night with all the colors and light from the building. However, I wanted to take a photo that showed more of the pier. By underexposing and converting to black and white, the distant skyline fades into the background, but the light from the foreground lights up the details of the pier. You can see the planks on the pier and the slabs of wood used on the benches. The without the skyline as a distraction, we can easily see the leading lines created by the lights.
In the second photo example, this is a photo of San Francisco from Sausalito. The clouds are moving in as if rain is coming. For this photo, i wanted the clouds to be the center of attention. By converting to black and white, we can really see the clouds pop out. Normally, when we observe a scene where it is about to rain, we see the colors of the water, the colors of the buildings, bits of blue sky peaking through the clouds. When we remove the colors and convert to black and white, we see contrast. The strong contrast between the rain clouds, white clouds and the sun cutting through the sky creates a situation of high contrast. The high contrast gives the clouds that stunning pop in black and white.
For the third photo, we can use black and white to hide color noise. The photo was shot at ISO 1600. So there was some noise. By converting it to black and white, the color noise becomes a fine grain reminiscent of film. This can be a great way to create elegant low light photos while giving it a film feel.
Step 5: Using B&W to Emphasize Subject


While we saw that black and white photography can be used to reduce distractions, we can also use black and white photography to increase emphasis towards the subject. This is particularly useful with high contrast. The dark shadow of the coffee cup against the brightly lit chair allows us to focus on the cup even though the cup is off to the side of the photo.
In the second photo, the great contrast between the white cat fur, the black eyes and the black background draws the viewer towards the cat's eyes and face. In this photo, a side light is coming in from the left side of the photo lighting the cat's white fur while the rest of the subject and background was dark. FYI, the cat was hiding behind a desk in the dark. This is somewhat a low key photo as well.
Step 6: Using B&W to Create Mystery


Photography is not exclusively used to present the obvious. Using black and white effectively, we can add some mystery to our photos.
In our first photo example, I took this photo in a San Francisco park. As the darker trees fade into the white fog, the changing shades of gray into pure white adds a sense of mystery to the photo. Whats beyond the fog? is a cliff or is it more trees? If this photo was in color, we might be more focus on the trail and the colors of the trees and not notice the encroaching mysterious fog. To enhance this photo some more, i reduced the exposure. If we took the photo in color with a reduced exposure by a stop or two, we might have color detail lost in the dark areas. This can be hidden in black and white photos and be used to our advantage.
In our second example, using a low key effect, we add mystery to the car. The glow of the headlights draws our eyes in and the ambient lighting outlines the car's body, yet it is dark and we wonder what the car is up to. The low key look with the glow of the headlights gives the car a menacing feel. We are not sure whats going on, but we are curious about the car. Additional vignetting was adding in during post processing to help create more focus and mystery.
Step 7: Using Black and White to Reveal Hidden Details


With only black and white contrasts, we can reveal the details, textures and patterns that was lost in color.
We see the first example photo is of the beach. Specifically, ripples of sand. While walking around, we will normally notice these ripples, but in color, these ripples do not stand out as much. What we see in color are shades of yellow from the sand. In black and white, the darker gray shades stand out a lot more than color. This contrast can be further enhance with post processing. We see from the photo, the ripples are very prominently displayed. We see here, the patterns, details and the textures of the sand was brought out with black and white processing.
In the second photo, we see tentacles. The high contrast of the suction cups reveal to us the roundness of the cup. When devoid of colors, we do not notice the rest of the tentacle but only the cups. The rest of the tentcle fades into the gray and black.
In the third photo, by controlling the lighting, we can see the textures on the face. The light helps use create areas of high contrast where details are revealed. If this photo was in color, we might not have the same contrast, thus, we will be less aware of the textures on the face.
Step 8: Basic Post Processing

In this section, we will look at some basic post processing settings we can use to enhance our black and white photos. The example photo was taken from Lightroom, similar controls could be found in other post processing software. We will go through each setting and what you can do with it to improve your black and white photos. The Lightroom settings you see correspond to the night photo of the Palace of Fine Arts. The photo was taken in Raw format with a Canon Powershot s95 point and shoot.
Histogram
The histogram shows the distribution of tones. The left side is black, and the right side is white, the middle is gray. In the example, most of the photo is of darker shades. You can use this tool to monitor your distribution when you start editing.
Treatment
The treatment is the type of photo you are editing, either in color or black and white. I prefer changing the treatment to black and white. You also create a black and white by desaturating, but thats not truly black and white as the color information is not being discarded. Some programs call this feature "gray scale".
White Balance
While the photo is black and white, adjusting the white balance will still affect the photo. As with color photos, adjusting the white balance will alter the tones of gray. You can play with this to adjust your gray shades or tones if you like. I did not adjust WB in my example.
Exposure
Similar to color photos, adjusting exposure alters the lighting in the black and white photo. Exposure has a lot of ability to alter the contrast of a photo. Using the exposure can easily allow you to enhance low key or high key photos. I liked the overall exposure so I did not adjust the exposure in my example.
Recovery
Recovery allows you to bring back highlight detail. This can be great if your camera over exposed something you didnt want to over expose. This works even more effectively in black and white in my opinion than in color. Recovery at times in color seems understated, but in black and white, you can see the details come back right away. Since this was a night photo, and I wanted to display some of the details of the Place of Fine Arts, I adjusted the recovery to bring back some details due to the bright lights.
Fill light and Blacks
These two sliders can help you add more light or blacks to your photo. Both of these can greatly increase or degrease the contrast of the photo. As you can see, I adjusted both the blacks and fill light to increase contrast.
Brightness
You can play with this to brighten up your photo. I do not usually move this slider too much in black and white as the photos can easily wash out.
Contrast
This slider is self explanatory, increase contrast on the slider will increase contrast in photo. I increased the contrast to the maximum to really allow me to show the details of my subject.
Step 9: Conclusion


In conclusion, we see that light, colors and contrast play a large role in how our black and white photos work. We ran through a few examples of what we can do with black and white to enhance our photography. And lastly, we learned about the basic settings we can adjust to tweak our photos during post processing. I hope you enjoyed this overview of what black and white photography can offer. I hope you enjoyed some of the photos I've taken.
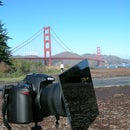
As mentioned before, you do not have to take what I've written as hard rules for black and white. Be creative. Sometimes the unconventional can be the most compelling. Do not be too caught up in equipement and camera settings right away. The intro photo was taken with a point and shoot, not a $3,000 or even a $1,000 DSLR. Learn to see light and composition first then move on to adjusting your toy.
Other things to consider
- Check out black and white photography books or photo web sites if you're interested in learning more. Sometimes it is easier to learn and be inspired by looking at other photos than simply following rules or suggestions.
- Consider mixing HDR photography with black and white
- Use strobes (flash)
- Black and white portraitures can be elegant
- don't afarid to experiment.
- Try other monochromatic techniques, such as cyanotype or sepiatone as pictured above.


