

Introduction: The Basics of JavaScript: Drawing


JavaScript is a common computing language, and it is so large and vague, that it is hard to learn everything at once. So, we will start with some fun stuff, Drawing and Animation. This will be the first instructable in the JavaScript series. Keep learning and expanding your computing skills, and practice on codeacademy.com or khanacademy.org to practice!
Step 1: Intro to Drawing: Learn the Basics


I don't want to waste any time on small talk, so let's get started! But, first, you need to know the basics of drawing and how to make simple shapes before you begin making elaborate shapes. Starting is very simple; you just need to know the commands. Here are the top commands that are used in almost every "drawing" or "animation" by using JavaScript.
- rectangle
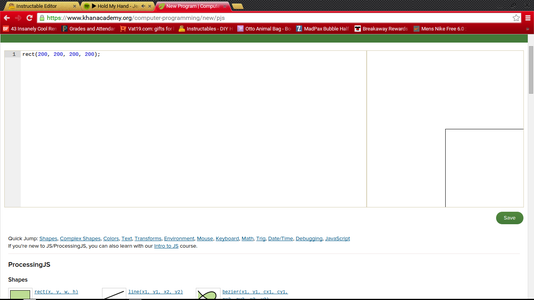
To draw a rectangle, do the following. (I will explain what the numbers mean in a second!!!)
rect (200, 200, 200, 200);
Now, this is the command for drawing it, but what do those numbers mean? Here's what they mean:
- The first number is to locate where the rectangle will be located. Look at the first image. There are three red dots across the top, one labeled 0, one labeled 200, and one labeled 400. So, the left corner is 0, the right corner is 400, and the middle is 200. So your first number locates where the top left corner of your rectangle will be located. So, in the example, my rectangle is located at 200, in the exact middle of the X-axis. The first number controls where in the X-axis the left corner (top) will be located, to be simple.
- The second number is to locate where on the Y-axis the top left corner will be. Look at the second picture. You will see that there are three dots again. This is the same as the first number, except it deciphers where the top corner of the rectangle will be located, up or down. So, now our rectangle will be located in the center of the page, or at least the top left corner will.
- The third number is the first number that tells how big to make the rectangle. This number tells how long the rectangle will be. So we already know that the rectangle will be located at 200, 200, or, the middle of the page. Now, our rectangle will be 200 wide, or 200 long.
- The fourth number tells how tall to make the rectangle. So, in our case, it is 200 tall. So we now have 200, 200, 200, 200. So, instead of a rectangle, we actually have a square! But I don't mean to confuse you, now! You can change the numbers to change the size or location of your rectangle. Check out the third picture to see the square we made. The fourth picture shows another rectangle with the coordinates of: 20, 10, 40, 75.
NOTE!!**In the third picture, the reason you don't see the other two lines is because they are exactly on the end lines of the canvas (Your "drawing" board).
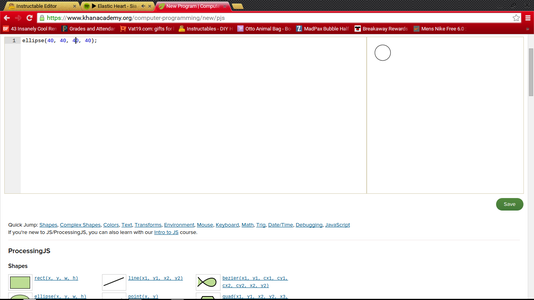
- ellipse (circle or oval)
Step 2: *Challenge!

Since you just learned how to make rectangles and circles, let's have a fun little quiz! Go to https://www.khanacademy.org/computer-programming/n.. for a blank JavaScript template. Now, using only ellipses and rectangles, create a funny face! In the image above, you can see my face that I made, and you can see the code I used: the BASICS!! If you like, screenshot your creation and post it in the comments below. The coding I used was:
ellipse(200,200,300,300);
ellipse(132,70,50,50);
ellipse(266,70,50,50);
ellipse(200,240,200,50);
rect(151,145,100,50);
And that's all I did to get my face! I'd love to see yours!
Step 3: Lines


Lines are very simple, yet very intricate to code. However, with practice, you will be a master! Here is the code, and I'll explain the numbers in a second.
line(20, 20, 20, 20);
Now, this is very different from rectangles and ellipses, because you can't make it wider. It is one set width, which is basically 1. Here is what those wacky numbers mean:
- The first number is x1. So, this is the coding for the x coordinate of the first end. So, this end is the top end. I know I'm making no sense probably, but, pictures are worth 1000 words, so follow the first picture. It will make more sense.
- The second number is y1. So, this is the coding for the coordinate of the first end, or the beginning of the line. So, y1 is where the beginning of the line will be on the y-axis.
- The third number is x2. So, this is the coding for the x coordinate of the second end, or the end of the line.
- The fourth number is y2. So, this is the coding for the y coordinate of the second end, or the end of the line.
If anything is unclear through text form, check out the pictures above!
Step 4: Coloring!

Coloring brings life to pictures! You know that! Let's bring life to our computer-created pictures by learning these codes. They are the simplest of the many, yet they can take some time to completely master. We'll learn how to color the following: the background, the stroke (the lines), and the fill.
- Background
For the background, use the coding:
background(173, 236, 255);
Now, all the numbers mean are what amount of each color to put into the mix. So, they use the RGB scale, or the Red, Green, Blue scale. So the first number is how much of red, then how much of green, and then finally, blue! It's that simple. However, even I, who am a Coding Master, hasn't mastered the art of knowing what color will show up, so I use khan academy, which as a color wheel, which makes life so much easier.
- Stroke
For the stroke color, use the coding:
stroke(173, 236, 255);
Same thing goes with the numbers. The RGB scale can be simplified on khan academy.
- Fill
For the Fill color, use the coding:
fill(172, 287, 189);
Same thing with the RGB scale.
IMPORTANT NOTE!!! Always put the background at the TOP of the page, as you will find out for all of these codes, it will influence all of the lines, fills, etc. after it, until interrupted by another code.
Just so you know: We'll learn text next, okay?
Step 5: Text

You want to add captions, titles, and bios to your drawing. Well, duh! Well guess what! You'll learn that, too! It just keeps getting simpler and Simpler!
Use the following code to create custom text, just for you!
text("Hello, World!", 200,100,400,50);
I'll explain this simply for you:
The first thing is your message. Type anything you want between the " and ". I chose to type: "Hello, World!" but your message goes in there.
Next, you need to choose the x location of your text. NOTE!!**This is where the top left corner will go, just like rectangles.
Then, you choose your y location.
And, the next two are your x size and y size.
Step 6: Variables

Variables can come in handle--like, all the time. First, let me explain what a variable is. So, let's say that you are making a drawing with a ton of the same sized dots everywhere around the page. Without a variable, you would need to write the same exact width and height every. singe. time. But, luckily, you don't need to. Introducing.....variables!!
Alright, so, variables are very simple to learn, and easy to master. So, say you are making a picture, as I mentioned above in the example, with same sized circles everywhere on the page. I don't want to write 33 over and over again for the width and height of my circles, so I create a variable.
How To Do It!!!
At the top of the page, write var (name of variable here)=(whatever number you choose. In my case, 33.);
So my variable will be:
var circleSize = 33;
You can choose to name the variable anything you want, but I like to stick with something that distinctly clarifies what the variable is for.
So, basically, the variable takes that number you choose, puts it into a little file folder in the little computer brain, writes the name of the variable (circleSize) in black sharpie all over your file folder, so whenever circleSize is typed, the computer automatically reads 33 instead of circleSize.
Check the images above for that "Circle Picture" I was talking about. You'll see the variable in action.
NOTE!!**The variables must must must must must be in front (on top) of the coding with the variable. So var circleSize = 33 must be above ellipse(200,200,33,33); or else the code won't run, since the computer reads the code from top to bottom.
Step 7: Continue on to Animation Basics!
Congrats! You've finished the tutorial for JavaScript Drawing basics. If you would like to learn more on JavaScript Drawing and Animation, visit my next instructable, JavaScript Animation Basics, at: (NOTE!!**If no link is provided, I haven't completed it yet! I hope everything was crystal clear and educated you a little bit more! Ciao!

Participated in the
Epilog Contest VII


