

Introduction: The Death Star


This instructable was created in fulfillment of the project requirement of the Makecourse at the University of South Florida (www.makecourse.com)
About this project: If you're a big fan of Star Wars then this portable Death Star will be an awesome make for you! It is capable of rotating clockwise and counter clockwise, increasing or decreasing speeds, and completely stopping the stepper motor.
The design of this is based entirely around 3D printing and an arduino microcontroller.
Supplies Needed:
-Arduino Uno R3
-Breadboard
-Jumper Wires
-IR Controller
-IR Receiver
-2x 3V 2025 Batteries
-1x LED
-1x 9V Battery
-Stepper Motor
-Stepper Motor Shield
All of these supplies were purchased here.
Additional Supplies Include:
-3M Double Sided Tape
-Regular Scotch Tape
Step 1: Developing the 3D Model

Autodesk Inventor Professional 2015 was the software used to model the parts in this project. If you are not familiar with this software they provide tutorials on their website here.
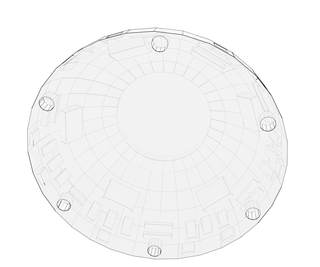
I have provided the stl files for the Death Star, which I split into two separate parts to meet the size constraints of most 3D printers, as well as the stl file for the modified lid. I had to modify the lid in order to have the stepper motor pin come through the top and also to allow the IR sensor to receive signals.
My Arduino and breadboard were encased in the DC-47P DC Series black box found here.


Step 2: Assemble Parts


The first things you will need are the double sided tape, scotch tape, LED, 2025 battery, and some scissors.
Cut about a 3inch piece of double sided tape and stick it inside the top half of the Death Star near the small hole in the front. This will be used to hold the LED in place. Make sure when you tape the LED to the battery that the longer, positive side is on the top of the battery with the '+' symbol and that the shorter, negative end of the battery is touching the bottom of the battery. Now using the velcro side of the tape hold the LED in place.
Cut 4x 1inch size pieces of double sided tape. Two pieces will be used for the bottom half of the Death Star as shown in the picture. The other two pieces will be used for the modified lid to hold the stepper motor, as shown.
The last thing you'll need to do is drill a hole about .5cm in diameter in the bottom half of the Death Star. I started with a smaller drill bit and kept increasing the size until I found one that made the hole snug for the pin on the stepper motor.
Step 3: Assemble Arduino


Starting with the Arduino, take two jumperwires and connect ground on the Arduino to '-' on the breadboard and 5v from the Arduino to '+' on the breadboard.
Then take the stepper motor shield and directly connect it to pins 8, 9, 10, and 11. You should use the same pin numbers I use for everything unless you want to change the pin numbers later in the code, which I will provide. Dircetly connect the wires from the stepper motor into the shield. Also take two more jumper wires and directly connect the '+' wire to the '+' on the breadboard and the '-' wire to '-' on the breadboard. Now your stepper motor is all set up.
Last is the IR sensor. Take a jumper wire and connect it to pin 4 on the Arduino. Connect the other side of the jumper wire to the leftmost pin in the sensor on the breadboard. The middle pin on the sensor is ground so take a jumper wire and connect it to the middle pin and to '-' on the breadboard. The last pin is your vcc pin so connect a jumper wire from '+' on the breadboard to this pin.
I have provided a Fritzing schematic as well as some pictures of my design, which will help in case you get stuck. I also uploaded my Deliverable 5 video which goes into detail on my breadboard setup.


Step 4: The Code
The first sketch you'll need to use is the Get IR button numbers. This sketch requires the IR remote library which I have uploaded in case you don't have.
The code is fairly simple:
The irrecv.decode(&results) function receives input from the IR remote and converts the signal to a number which will be printed by the Serial.println(results.value, DEC); function. irrecv.resume(); receives the next signal.
Now open the Death Star Sketch. This sketch requires the IR remote and Stepper motor libraries: #include "Stepper.h" & #include "IRremote.h" so make sure you download the libraries I have provided and place them in the libraries folder on your Desktop.
Important functions to note are:
small_stepper.setSpeed(avgSpeed); This sets the speed of your stepper motor.
Steps2Take = 2048; Defines a full rotation in the clockwise direction.
Steps2Take = -2048; Defines a full rotation in the counter clockwise direction.
small_stepper.step(Steps2Take); Moves the stepper motor in the direction specified by Steps2Take.
case 16712445: Replace the case numbers with your numbers you receive from the Get IR button numbers sketch.
if(irrecv.decode(&results))
{
irrecv.resume();
}
This last section of code is used in the while loop which will stop the roation once the power button is pressed.
Step 5: Congratulations!

Your Death Star is now ready to go. Because it is powered by a 9 volt battery it is fully portable too, although if you wanted you could also connect it via USB.
If you decide to build my Death Star let me know how it goes or if you need any help!


