

Introduction: The G1 Lego Under-Barrel Grenade Launcher


MY WEBSITE: http://sites.google.com/site/bblegobrickworks/Home
For the G2, I intend to add many different new features, such as: the firing system will be semi-automatic, and will be able to hold up to 2-3 shots' worth of rubberbands, it will be shorter, and there will be a true trigger placed on it.
Step 1: Bottom of the Launcher


This step just builds up the bottom of the launcher.
Step 2: Runway


This step builds the runway which the ammo goes on.
Step 3: Firing Gear + Back of Launcher


This step builds the firing gear, and builds me of the back.
Step 4: Side of Launcher


This step finishes one side of the launcher.
Step 5: Half of the Trigger + Counterweight RB Holder


This step builds half of the trigger, and the area which holds the counterweight rubberbands.
Step 6: The Counterweight Rubberbands + Finishing the Trigger


This step will need 4 small rubberbands to act as a counterweight. The rest of the step will finish off the other side of the trigger and firing system,
Step 7: Finishing the Side + Top


This step will finish the side of the gun, and the top piece.
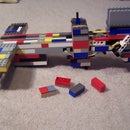
Step 8: Ammo (The X3 Mini Rocket)


This is the ammo for the G1, the X3 Mini Rocket, which is a much smaller rocket than the X2 and X1.
Step 9: Loading


This step shows how to load the firing rubberbands (you need 3 small-medium sized rubberbands), and how to put in the ammo.
Step 10: 2 Different Ways to Mount on a Gun


Basically, it has 2 ways to mount it- with it completely on the gun, or with some of it hanging off it.


