

Introduction: The NanoStillery™ - Automated Whiskey Distillery


Historically, in Europe at least, it used to be very common for enterprising folk to travel around the land with their distillation equipment strapped to the sides of their donkeys providing a valuable service for owners of orchards and fruit bushes who wanted the produce turned into alcohol rather than having it wasted or eaten by birds and rats. In modern times, due to the advances of science, the equipment necessary for the process is much more sophisticated, but could, in theory, still be strapped to the back of a donkey.
It's not an old wives tale - The process of distillation used to be rather dangerous, often involving the lethal combination of naked flames, self intoxication and explosive alcohol vapours. Now, thankfully, there is much more awareness of sensible drinking and the potential dangers of industrial processes.
For me, the challenges are to automate the machine and make it as safe as reasonably possible, giving us lots of scope for using all kinds of weird and wonderful gadgets and sensors to monitor the process and minimise the risk of explosion.
Disclaimers:
- Distilling alcohol is illegal in many parts of the world so check out your local laws. Often, there is also a tax to pay on the product.
- Alcohol vapour is potentially explosive. Explosions can be triggered by naked flames, relay switch contacts, hot surfaces, cigarette smoking, mobile phones etc.
- This design uses 240 v power and should be wired up by a qualified electrician.
- Most beer and wine contains small quantities of methanol which need to be removed during the distilling process. Methanol is a neuro poison that causes permanent nerve damage with symptoms such as blindness.
- Always drink in a responsible manner. Don't make your own spirits if you're prone to alcohol addiction.
Step 1: Features

- Alcohol vapour detection and automatic machine shut down.
- Safe heating with 'under floor' heating coil.
- Fully automatic - just press the start button - includes all pumps and valves.
- Inline hydrometer to automatically remove methanol.
- M2M and IoT (Machine to machine and Internet of Things) technology.
- Real-time custom made webpage graphical display for quality control.
- GPRS cellular network data transmission to online database - no wifi required.
- Audio messages for machine status and error warnings.
- Stainless steel and copper fabrication.
- Easy boiler cleaning.
- 4 different temperature sensors.
- Small, lightweight and compact for transport by donkey.
Step 2: How It Works


Home made beer or cider is pumped into the boiler and then rapidly heated to about 85 degrees C after which the power is reduced and the alcohol starts to boil off. Vapour travels into an air cooled condenser and then trickles out the other end into an inline hydrometer.
The hydrometer is connected to a pressure sensor which detects the level of fluid at any given time and a solenoid 'dump valve' at the bottom of the device allows the product to be dumped into a separate container to separate out the methanol.
The rest of the product goes into the conical flask and the process finishes when the boiler temperature hits a preset level controlled by a potentiometer on the control panel.
To learn how to distill home brew into alcohol, check out my purpose made instructable HERE.
Step 3: The Boiler

A great deal of the work involved was in making the boiler. The 3D image above hopefully should show how it is put together.
Step 4: The Boiler - Parts
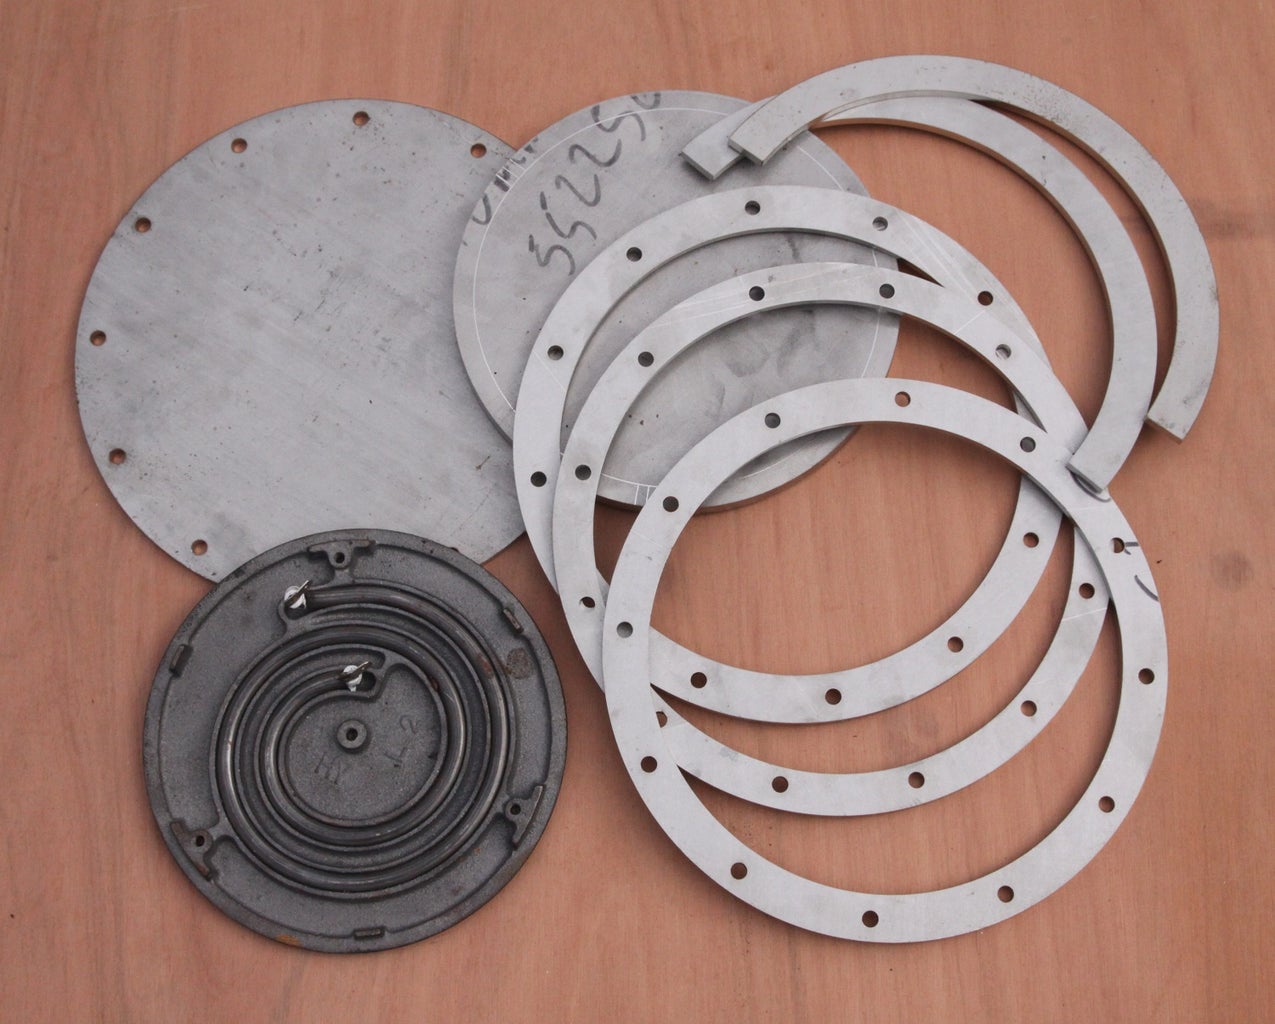

- 10 litre Cornelius type keg
- 1500 watt counter top electric hotplate element
- Flanges and discs - see files attached.
- 2" stainless steel half socket
I did consider making my own heating element or even using an inductor coil, but the desire for a simpler life got the better of me. The same is true of using the smart looking stainless keg. The boiler needs to have an access lid large enough to get your hand in for cleaning the inside and the heating elements must not protrude into the keg so need to be underneath or around the sides or both. Protruding elements would be far easier but they are dangerous as if they are not fully submerged in liquid they can glow red hot and ignite the alcohol fumes - AVOID!

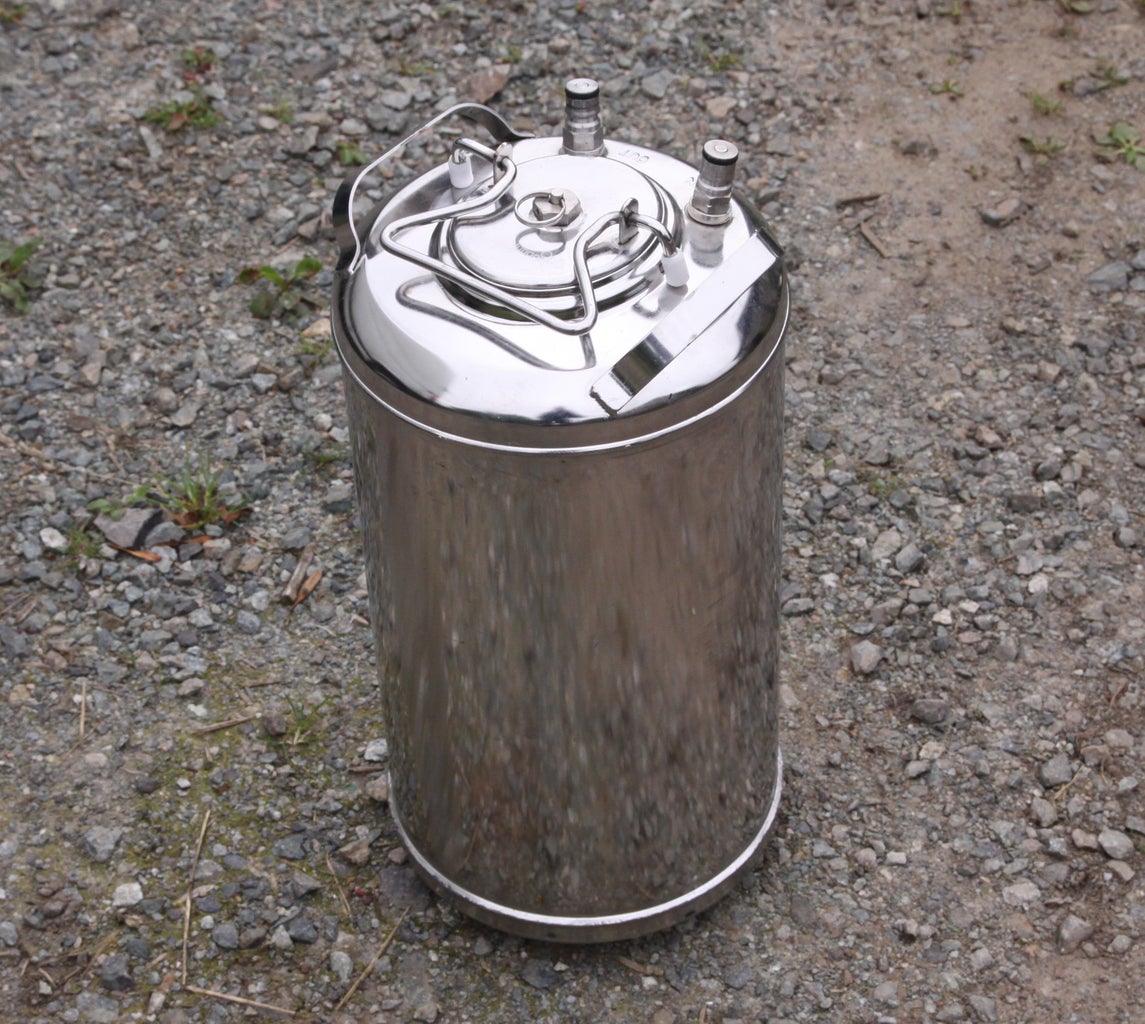
Step 5: Boiler Fabrication - Keg and Outer Skin


The boiler is double skinned to provide some degree of insulation. The bottom of the keg is removed, the outer cylinder has a flange welded onto it to connect to the top of the keg and the keg has a hole cut in it at 45 degrees to accept the 2" socket.
The 10 litre keg, though of very high quality manufacture, is made of very thin stainless steel which makes it very difficult to weld without over heating it and forming a large hole. I used a combination of MIG and TIG techniques and it probably took me about 2 days until I got it leak proof.
The boiler was tested for leaks after the reflux pipe was finished and attached. This made it easy to attach a compressed air supply and pressurise the whole thing to about 30 psi. A bit of soapy water sprayed on the outside revealed the leaks when it formed bubbles.
Step 6: Boiler Fabrication - Weld in the 2" Socket
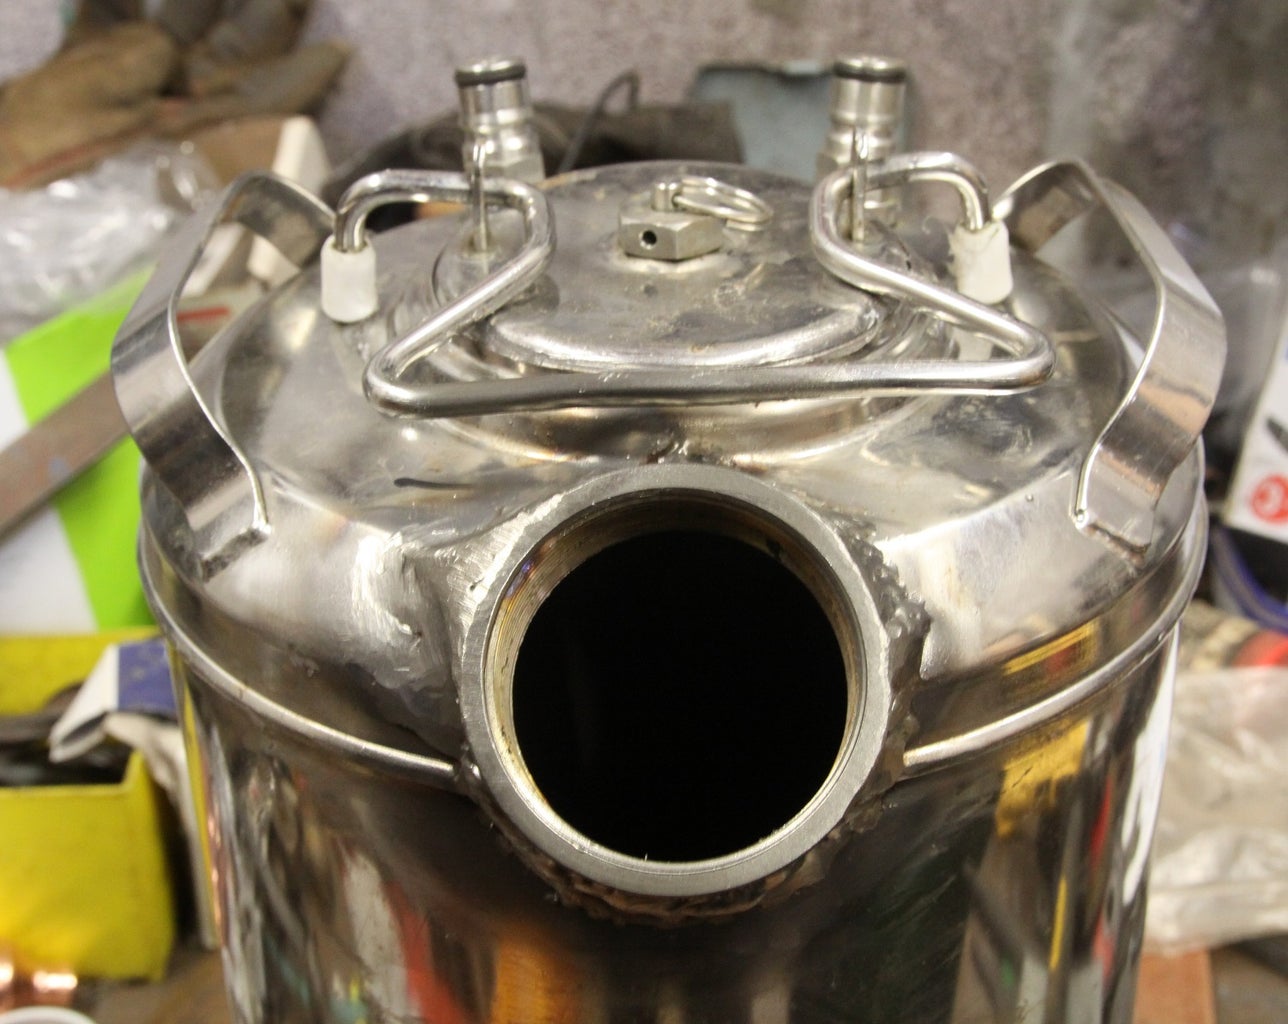

The brass connector is screwed into the 2" socket to prevent distortion and splatter on the threads during welding.
Step 7: Boiler Fabrication - Heating Element


The thick stainless disc (see attached dwg files) is welded onto the bottom of the keg and the 1500 watt heating element assembly is bolted onto it with some thermal grease in between. It is then slotted into the keg and wired up for 240 volts. The heating element was extracted from an electric hotplate found on ebay.
Fortunately, the heating element worked really well and the thick stainless disc helped even out the heat when the electricity supply was pulsed on and off at 10 second intervals to reduce the overall power.
Step 8: Reflux Pipe


Parts:
6620 3/8" x 1/4" BSP HEX REDUCING BUSH, BRASS
6620 3/8" x 1/4" BSP HEX REDUCING BUSH, BRASS 4 £0.20 £0.80
6621 1/2" x 1/4" BSP HEX REDUCING BUSH, BRASS 4 £0.49 £1.96
6675 6 mm COMP x 1/4" BSP TM, ADAPTOR, UK 4 £1.36 £5.44
6705 15 mm COMP COUPLER, UK 2 £0.90 £1.80 6768 15 mm COUPLING, EF 4 £0.08 £0.32
6787 15 mm x 10 mm FITTING REDUCER, EF 2 £0.25 £0.50
6798 15 mm EF, 90° ELBOW 4 £0.13 £0.52
6809 15 mm EQUAL TEE, EF 4 £0.26 £1.04
7160 54 mm EF x 2" BSP TM STRAIGHT ADAPTOR 1 £13.81 £13.81
7958 35 mm x 15 mm FITTING REDUCER, EF 1 £1.30 £1.30
7984 15 mm OBTUSE BEND 45°, EF 4 £0.35 £1.40
8280 2" BSP PLAIN HOLLOW PLUG, BLACK 1 £2.12 £2.12
9175 42 mm x 35 mm FITTING REDUCER, EF 1 £2.15 £2.15
9177 54 mm x 42 mm FITTING REDUCER, EF 1 £4.07 £4.07
14360 1/4" BSP HALF SOCKET, 316 S/S 3 £0.48 £1.44
14367 2" BSP HALF SOCKET, 316 S/S 1 £4.33 £4.33
14479 2" BSP TM, WELDING NIPPLE, 316, S/S 1 £4.16 £4.16
The reflux pipe is made of a series of brass and copper reducers which go from 2" to 15mm in size. The parts are soldered up using lead free solder to help prevent heavy metal poisoning. Paradoxically, copper is thought to be beneficial as the copper will react with the acid sulphurous fumes and remove sulphur by falling back into the boiler. Unfortunately, some of it will carry on into the condenser which will contaminate the product with copper ions. These can be detected by using a conductivity meter and removed with ion exchange resins at a later stage if necessary.
During the heating process, the fluid vapours will react with the copper in the reflux tube and also the fluid itself will react with pieces of copper tube cut up and dropped into the boiler.
Step 9: The Condensor


Parts:
5912-QG030-353/12, MFG Part No:QG030-353/12, ebm-papst Blowers, TARIC:8414592090 ECCN:EAR99 COO:HU
- 3/8 radiator tube with 15/16" discs.
Normally, the condenser would be made with water cooling, but I did not want the hassle of having running water in this system so I opted for air cooled instead.
A 3/8" pipe was fitted with special cooling discs (Anybody know what they're called?) and a condenser assembly was fabricated. The actual power of the system is estimated to be about 500 watts.
During operation, the boiler is programmed to reduce it's effective power after it passes the 85 degrees C mark. Looking at the graph on the features step, the heating curve shows where the power was reduced and how the increase in temperature slopes off to an almost flat line. At this point, the temperature increases very slowly as the boiler itself is 'cooled' by the vapours being emitted. It's very important not to 'over cook' the condenser or else vapour will be emitted from the breather pipes.
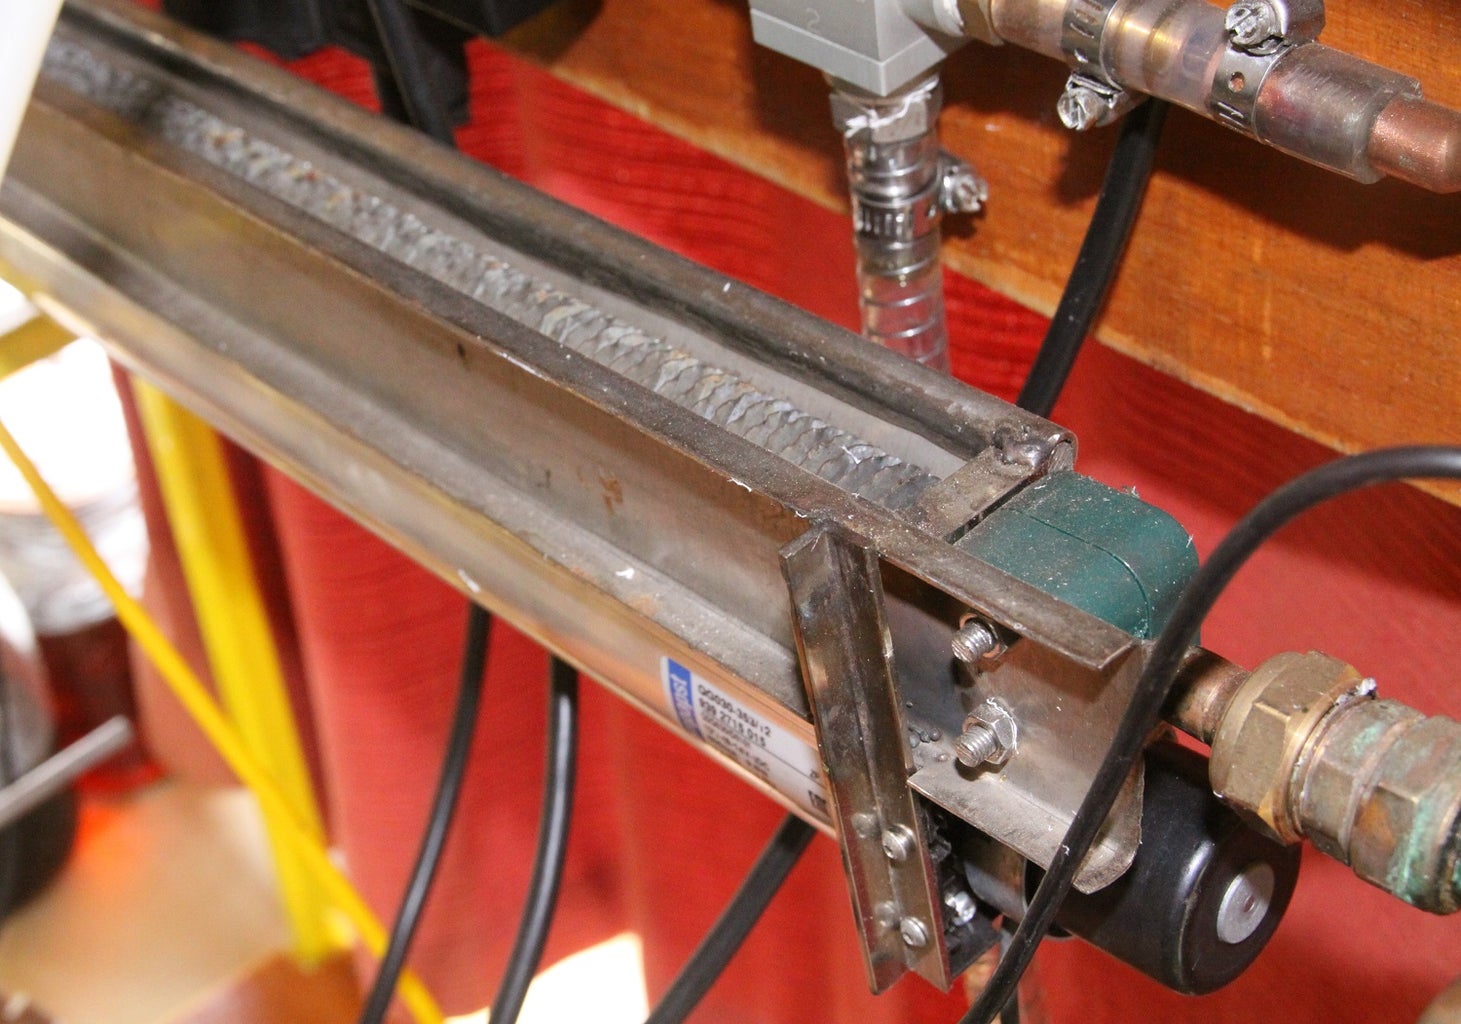
Step 10: Frame


Parts:
- 20 x 20 x 3 mm steel box section x 12m
The frame allows all the components to be mounted securely which is important for reliability and safety. Remember we have potentially explosive vapours and 240 volt electricity.
Step 11: Hydrometer

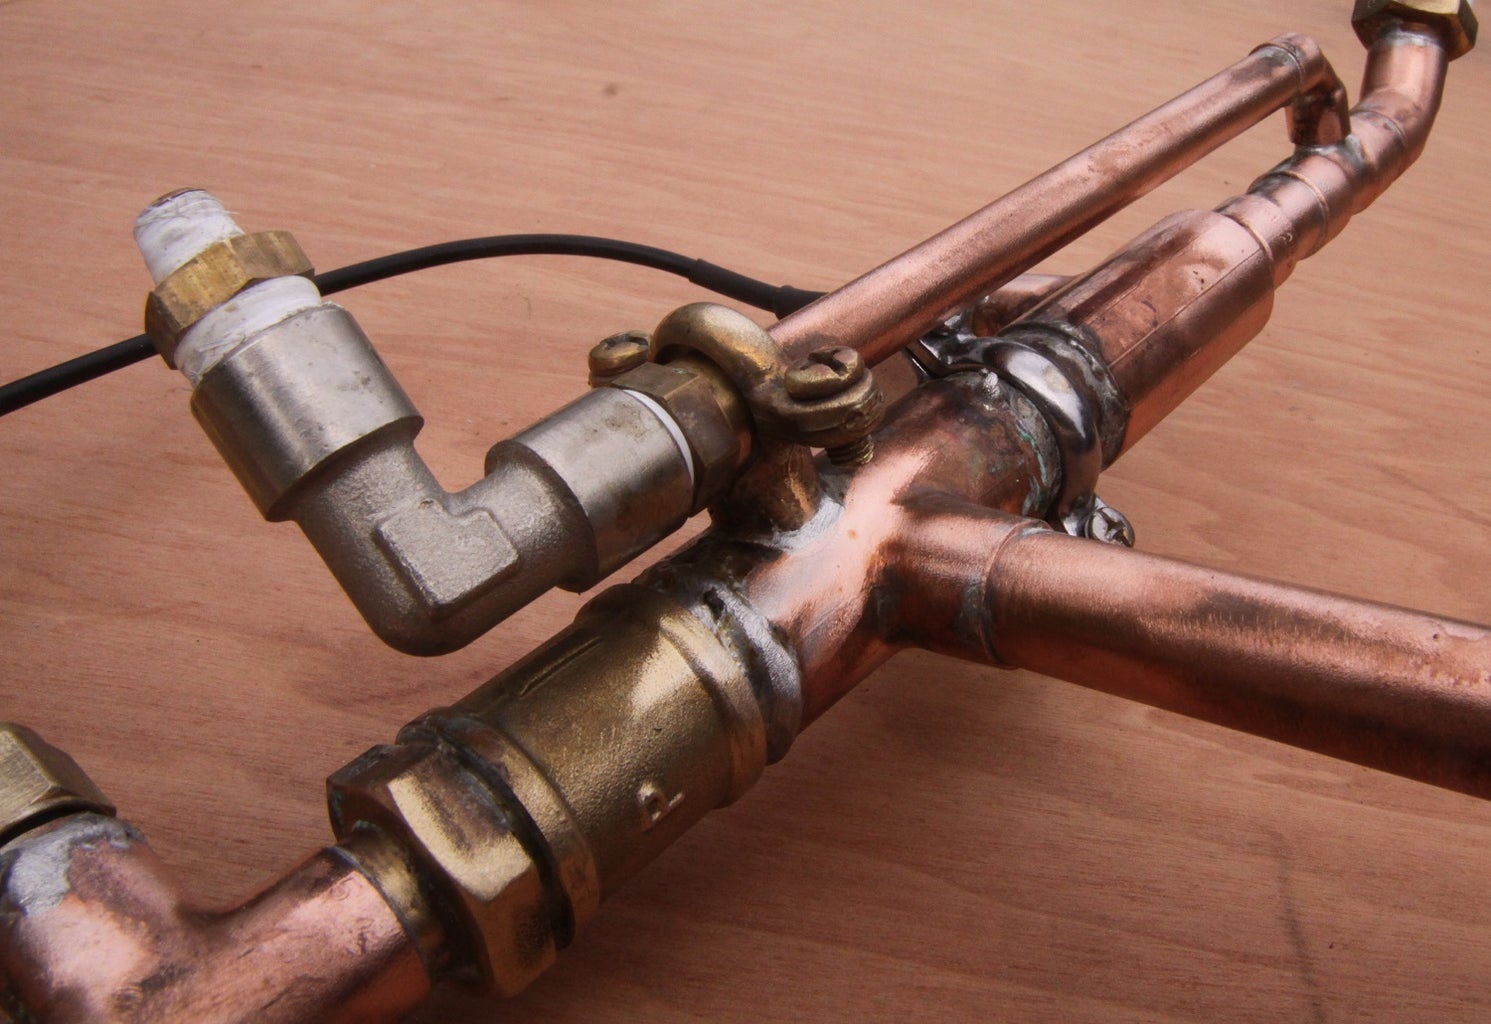

This elaborate pipe fabrication allows the alcohol product to be split off at different parts of the process and has a very sensitive pressure sensor chip in the control panel that senses the level of fluid in the main tube. More is explained in a separate instructable HERE.
The hydrometer allows the 'foreshots' to be automatically separated from the distillate produced by detecting the level of fluid in it's pipework. After this, during the rest of the process, it can indicate the concentration of alcohol being produced although at present it's not really accurate enough to give very meaningful results. I might upgrade this to a capacitance probe if I can bench test one successfully.
Step 12: Breather Pipes


Many parts of the system require a breather pipe to the outside eg the receiver tank for the product and the cold end of the condenser. The exception is the boiler itself as it vents directly through the condenser.
All the breather pipes are yellow and are quite small as during normal operation they only vent a very small amount of vapour/air. If there is a major malfunction in the machine, which would necessitate multiple safety failures, then the tubes will vent excess pressure.
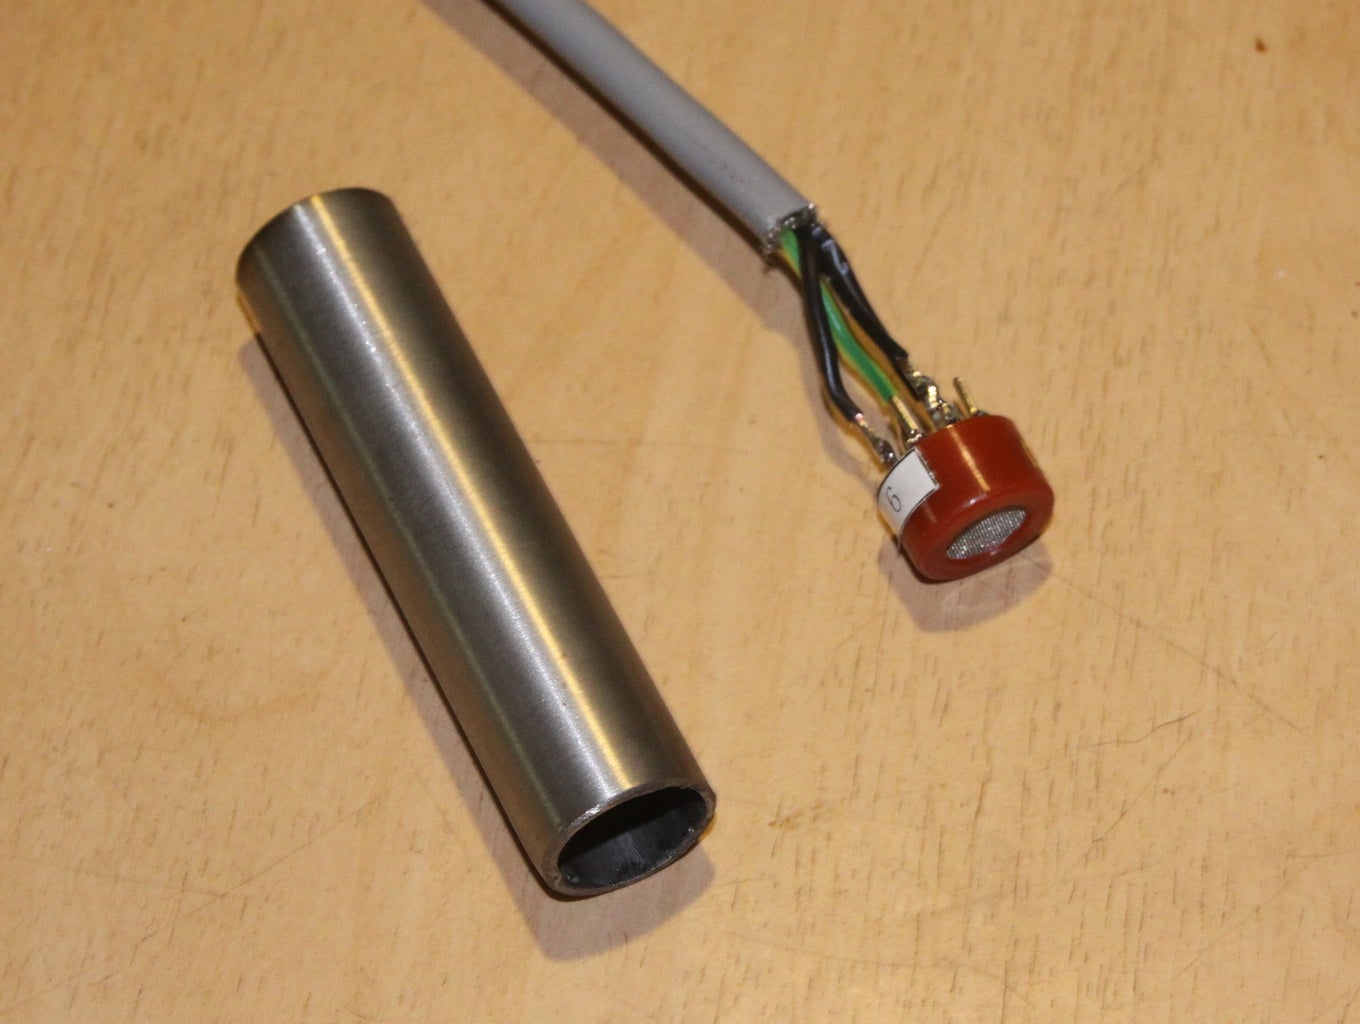
Step 13: Alcohol Vapour Detector Probe


Parts:
- Epoxy resin and hardener
- MQ3 alcohol detector
The orange MQ-3 module is wired up, tested, and slotted into a 20mm tube and permanently embedded in epoxy resin. This is the best way of protecting the connections against shorting and giving strain relief for the cable itself.
The sensor is easy to use but does use quite a lot of power - it has a very small heating element inside it. For this reason, the machine must never be powered from the USB cable going to the Arduino Mega or the Mega's onboard power supply will be destroyed. The sensor needs to be wired directly to the main power supply and can be isolated with a Schottky diode.
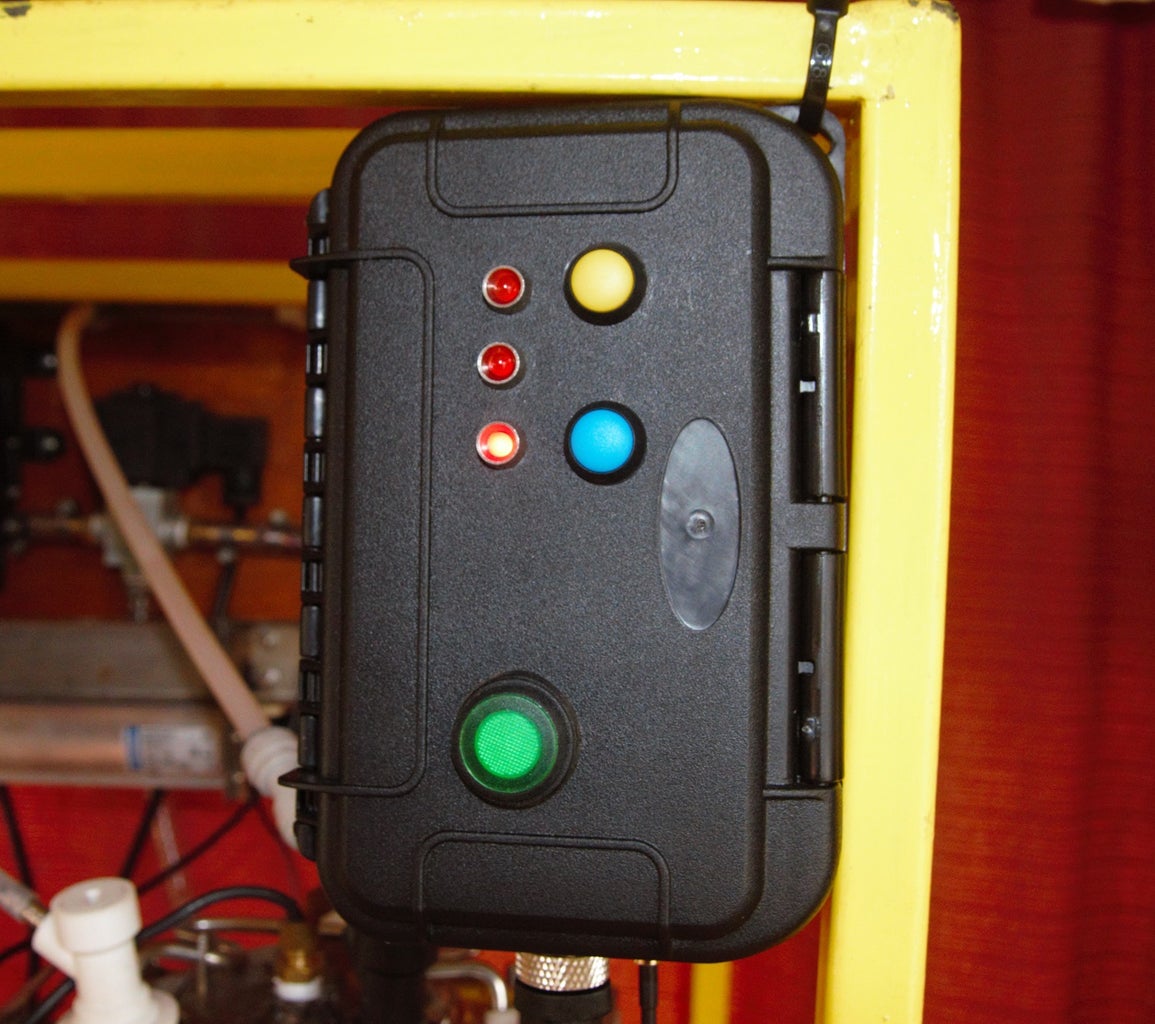
Step 14: Control Panels


Parts:
- MAX004 IP67 Hard Case – 350 x 230 x 86H mm MAX004S 2 of
- MAX001 IP67 Hard Case – 175 x 115 x 47H mm MAX001S 1 of
- Arduino Mega 2560
- Adafruit Feather 32u4 FONA
- Adafruit Audio FX Sound Board - WAV/OGG Trigger
- 20 x 4 LCD display
- Hackable Prototyping Board
There are 3 panel boxes in the NanoStillery™, the main panel is driven by an Arduino Mega and the secondary one houses an Adafruit Feather GPRS board for transmitting data to the interweb. The third box has a large 12 volt power supply and a bank of relays in it.
More details of how the system talks to itself and the outside world is detailed in a separate instructable here: Machine ⇒ I2C ⇒ GPRS Cellular Network ⇒ DIY Webpage
The main control panel receives information from the various sensors in the system - temperatures, pressure and alcohol vapour levels and controls various valves, pump and the boiler heater via the relays. It then communicates with the Adafruit Feather via the I2C bus which then sends the data to a database where it is accessed from this webpage: NanoStillery
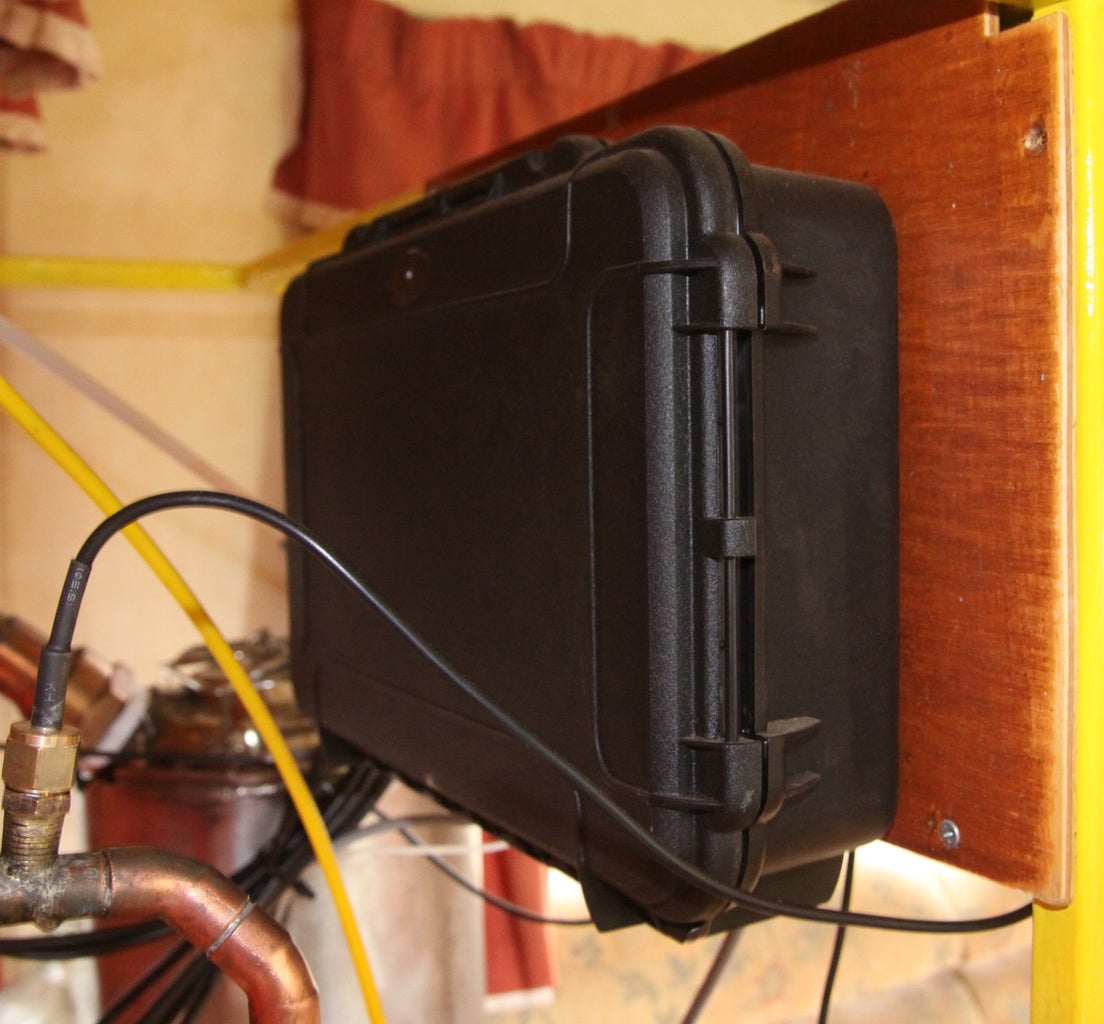
The GPRS module could very well have been bolted into the main control panel, but, for one, I had run out of room and secondly, I wanted the module to be removable so that it could be used for other projects in the future. Getting the two 'machines' to communicate with each other effectively was quite challenging. It was ok if the numbers were just simple small integers, but as soon as more complex 'floats' were involved, some serious number crunching code had to be developed. This can be seen in the 'Code' step.
Step 15: Electrical Schematics and Parts


Electrical parts:
- DS2 DS18B20 1-Wire Temperature Sensor Probe Cable
- DS3 DS18B20 1-Wire Temperature Sensor Probe Cable
- DS4 DS18B20 1-Wire Temperature Sensor Probe Cable
- DS5 DS18B20 1-Wire Temperature Sensor Probe Cable
- IC1 Voltage Regulator chip 78005; variant sink; voltage 5V; package to220-igo
- J1 Piezo Speaker LCD1 LCD screen type Character; pins 16 LED1 Red (633nm)
- LED color Red (633nm); leg yes; package 5 mm [THT]; part # GPRS CONNECTED
- LED2 Red (633nm) LED color Red (633nm); leg yes; package 5 mm [THT]; part # DATA RECIEVED
- Part1 Adafruit Feather 32u4 FONA variant variant 1; part # Adafruit #3027
- Part2 Arduino Mega 2560 (Rev3) type Arduino MEGA 2560 (Rev3)
- Q1 NPN-Transistor type NPN (EBC); package TO92 [THT]
- Q2 NPN-Transistor type NPN (EBC); package TO92 [THT]
- Q3 NPN-Transistor type NPN (EBC); package TO92 [THT]
- Q4 NPN-Transistor type NPN (EBC); package TO92 [THT]
- Q5 NPN-Transistor type NPN (EBC); package TO92 [THT]
- R1 Rotary Potentiometer (Small) type Rotary Shaft Potentiometer; size Rotary - 9mm; maximum resistance 100kΩ; track Linear; package THT
- R4 4.7kΩ Resistor tolerance ±5%; pin spacing 400 mil; bands 4; package THT; resistance 4.7kΩ
- R5 100Ω Resistor tolerance ±5%; pin spacing 400 mil; bands 4; package THT; resistance 100Ω
- R6 1kΩ Resistor tolerance ±5%; pin spacing 400 mil; bands 4; package THT; resistance 1kΩ
- R7 1kΩ Resistor tolerance ±5%; pin spacing 400 mil; bands 4; package THT; resistance 1kΩ
- R8 1kΩ Resistor tolerance ±5%; pin spacing 400 mil; bands 4; package THT; resistance 1kΩ
- R9 1kΩ Resistor tolerance ±5%; pin spacing 400 mil; bands 4; package THT; resistance 1kΩ
- R10 1kΩ Resistor tolerance ±5%; pin spacing 400 mil; bands 4; package THT; resistance 1kΩ
- R11 Rotary Potentiometer (Small) type Rotary Shaft Potentiometer; size Rotary - 9mm; maximum resistance 100kΩ; track Linear; package THT; part # HEATER
- R12 Rotary Potentiometer (Small) type Rotary Shaft Potentiometer; size Rotary - 9mm; maximum resistance 100kΩ; track Linear; package THT; part # PUMP TIMER
- R13 Rotary Potentiometer (Small) type Rotary Shaft Potentiometer; size Rotary - 9mm; maximum resistance 100kΩ; track Linear; package THT; part # END TEMPERATURE
- R14 10kΩ Resistor tolerance ±5%; package 2512 [SMD]; resistance 10kΩ
- R15 10kΩ Resistor tolerance ±5%; package 2512 [SMD]; resistance 10kΩ
- R16 1kΩ Resistor tolerance ±5%; package 2512 [SMD]; resistance 1kΩ
- R17 1kΩ Resistor tolerance ±5%; package 2512 [SMD]; resistance 1kΩ
- S1 SWITCH-MOMENTARY-2 variant 12mm; package tactile-pth-12mm
- S2 SWITCH-MOMENTARY-2 variant 12mm; package tactile-pth-12mm
- U1 RELAY-2 variant g5q; package relay-g5v; part # HYDROMETER DUMP
- U2 RELAY-2 variant g5q; package relay-g5v; part # PUMP LH
- U3 RELAY-2 variant g5q; package relay-g5v; part # PUMP RH
- U4 RELAY-2 variant g5q; package relay-g5v; part # HEATER
- U5 RELAY-2 variant g5q; package relay-g5v; part # PUMP
- U6 GAS_SENSOR package mq-3 VALVE1 Plastic Solenoid Valve part # HYDROMETER DUMP
- VALVE2 Plastic Solenoid Valve part # PUMP LH VALVE3 Plastic Solenoid Valve part # PUMP RH
- VCC1 Battery block 9V voltage 9V; part # 12V (NOT 9V)
- VCC2 4 x AAA Battery Mount voltage 4.8V

Step 16: Pump and 3 Way Valves

Parts:
- Pevekoil 12V-3/2-way solenoid valve
- 12V DC 4L/min 100PSI Water Pump High Pressure Diaphragm For Boot RV Caravan UK
This system allows the same pump to be used for filling and emptying the boiler, depending on how the 3 way valves are set. The pump itself is a diaphragm type that is self priming so can be positioned anywhere in the frame.
The pump and valves are controlled via small 'sugar cube' 12v relays. Some of the relays or perhaps the solenoids, I'm not sure, interfered with the LCD screen for a while but this was cured by using large 470uF capacitors wired in parallel with the offending device. The capacitors must not be too large or else the solenoids would not open quick enough.
Step 17: Arduino Mega Code

The code in the main control panel is fairly standard except for the part which sends data down the I2C bus to the Adafruit Feather slave. This code can be found in 'void sendData()' below and involves disassembling complex float numbers eg 89.29 and turning them into a string and then using character manipulation to turn them into a seires of individual integer digits, ie 8 ...9 ...2 ...9. To make it even more complicated, each series of integers had to have an identification marker so that the slave could recognise that a particular stream of digits had been initiated and it had to also have a number representing the number of digits being sent (string length) AND, just to completely fry my already half cooked brain, the digits themselves had to be sent back to front!
#include <Adafruit_ADS1015.h>
#include <OneWire.h>
#include <DallasTemperature.h>
#include <Wire.h>
#include <LiquidCrystal.h>
#define ONE_WIRE_BUS 10
#define TEMPERATURE_PRECISION 12
OneWire oneWire(ONE_WIRE_BUS);
DallasTemperature sensors(&oneWire);
DeviceAddress sensor0,sensor1,sensor2,sensor3;

char digitCharAAAA[10];
char digitCharBBBB[10];
String testAA;
String nothing;            // This is important - the string precursor.
String testAAAA;          // File names need to be of sufficient complexity!
String testBBBB;
int stringLengthAA;
int numberId =101;
int dataPrecursor = 198;  // A randomish number below 254. Be careful it does not conflict with numberIds.
int digitAAAA;
float tempZ=20.01;
int n = 0;

unsigned long currentTime=0;
unsigned long previousTime=0;
unsigned long intervalTime=0;
float tempC;
int deviceCount =0;
float boilerTemp;
float refluxTemp;
float hydroTemp;
float condensorTemp;
float previousTempC =0;
float totalTempC=0;
float deltaTempC =0;
float previousDeltaTempC =0;
float doubleDeltaTempC =0;
Adafruit_ADS1115 ads;  /* Use this for the 16-bit version */
// Adafruit_ADS1015 ads;     /* Use thi for the 12-bit version */

LiquidCrystal lcd(12, 11, 5, 4, 3, 2);
byte delta[8] =
{
  B00000,
  B00100,
  B00100,
  B01010,
  B01010,
  B10001,
  B11111,
  B00000
};
byte percent[8] =
{
  B11001,
  B11010,
  B00010,
  B00100,
  B00100,
  B01000,
  B01011,
  B10011
};
const int analogInPin = A0;  // Analog input pin that the potentiometer is attached to
const int densityEthanol = 789;
long sensorValue = 0;        // value read from the pot
int outputValue = 0;        // value output to the PWM (analog out)
int outputValueMin = 1000;
int outputValueMax = -1000;
int loopToStart =0;
int a=0;
int i=0;
int k=0;
int c=0;
int x=0;
int z=0;
int y=5;
int h=0;
int f=0;
int T00=0;
int T01=0;
int T02=0;
int T03=0;
int T04=0;
int T05=0;
float endTemp =0;
int alcoholCount=0;
float alcoholX=10.00;
int alcoholLimit=550;
double potReading01=0;
double pumpTimer1=0;
double pumpTimer2=0;
int pumpTimer3=1;
int pumpTimer4=0;
int adjustmentTimer=200;
int mappedPotReading01=0;
int potReading02=0;
int mappedPotReading02=0;
int potReading03=0;
double powerFactor=0;
int levelSwitch =HIGH;
int foreshotsDumpValue =0;
int startAndEndDumpValue =0;
int tempCount=0;
int momentarySwitchStatus =0;
int mins=0;
double ethanol =0;
float av=0;
long totalAdjustedOutputValue=0;
int adjustedOutputValue = 0;
float hrs=1;
double pressure =0;
double avPressure =0;
//Digital pins:
//D13:
//D12:LCD
//D11:LCD
//D10:TEMP01
//D09:Relay
//D08:Dump relay
//D07:Relay for equalising hydrometer pressure
//D06:Heater relay
//D05:LCD
//D04:LCD
//D03:LCD
//D02:LCD
//Analogue pins:
//A0:Tone
//A1:Pot
//A2:Pot
//A3:Pot
//A7:Alcohol

void setup()
{
  pinMode(A8, INPUT_PULLUP); // Boiler level switch

  pinMode(6, OUTPUT); // Relay for heater
  digitalWrite(6, LOW);
  pinMode(8, OUTPUT); // Relay for dump valve.
  digitalWrite(8, LOW);
  pinMode (13, OUTPUT); // Relay
  digitalWrite(13, LOW);
  pinMode (7, OUTPUT); // Relay
  digitalWrite(7, LOW);
  pinMode (9, OUTPUT); // Relay
  digitalWrite(9, LOW);

// External relays: 47,49,51,53
  pinMode(47, OUTPUT); // Relay for NOT USED
  digitalWrite(47, HIGH);
  pinMode(49, OUTPUT); // Relay for PUMP
  digitalWrite(49, HIGH);
  pinMode(51, OUTPUT); // Relay for RH valve
  digitalWrite(51, HIGH);
  pinMode(53, OUTPUT); // Relay for LH valve
  digitalWrite(53, HIGH);

 // pinMode (A1, OUTPUT);  //SFX T02 alcohol levels exceeded
 // pinMode (A2, OUTPUT);  //SFX T03 seventy degrees
//  pinMode (A3, OUTPUT);  //SFX T04 ninety five degrees

  pinMode (23, OUTPUT);  //SFX ..............
  pinMode (25, OUTPUT);  //SFX ..............Finished
  pinMode (27, OUTPUT);  //SFX ..............Alcohol too high
  pinMode (29, OUTPUT);  //SFX ..............70 degrees
  pinMode (31, OUTPUT);  //SFX ..............95 degrees
  pinMode (33, OUTPUT);  //SFX ..............Heater turned on
  pinMode (35, OUTPUT);  //SFX ..............Process initiated
  pinMode (37, OUTPUT);  //SFX ..............Dump valve opened
  pinMode (39, OUTPUT);  //SFX ..............Temperature is rising
  pinMode (41, OUTPUT);  //SFX ..............Now producing alcohol
  pinMode (43, OUTPUT);  //SFX ..............

                         //SFX T06
                         //SFX T07


//  digitalWrite(A1, HIGH);
//  digitalWrite(A2, HIGH);
//  digitalWrite(A3, HIGH);

  digitalWrite(23, HIGH);
  digitalWrite(25, HIGH);
  digitalWrite(27, HIGH);
  digitalWrite(29, HIGH);
  digitalWrite(31, HIGH);
  digitalWrite(33, HIGH);
  digitalWrite(35, HIGH);
  digitalWrite(37, HIGH);
  digitalWrite(39, HIGH);
  digitalWrite(41, HIGH);
  digitalWrite(43, HIGH);

  digitalWrite(35, LOW);
  delay(500);
  digitalWrite(35, HIGH);

//  digitalWrite(11, HIGH);

  Serial.begin(115200);
  lcd.createChar(1, delta);
  lcd.createChar(2, percent);
  lcd.begin(20, 4);
  lcd.setCursor(0,0);
  lcd.print("    DISTILLATION    ");
  lcd.setCursor(0,1);
  lcd.print("     INITIATED      ");

////////////////////////////////Wait for MQ3 to warm up //////////////////////////////////////////
  delay(3000);
  alcoholX = analogRead(A7);
  while (alcoholX>alcoholLimit)
  {
    alcoholX = analogRead(A7);
    tone (A0,alcoholX*2,200);
    delay(500);
    lcd.setCursor(0,0);
    lcd.print("Wait for MQ3 Heater ");
    lcd.setCursor(0,1);
    lcd.print("                    ");
    lcd.setCursor(0,2);
    lcd.print("Alcohol:");
    lcd.setCursor(9,2);
    lcd.print(alcoholX);
  }
//////////////////////////////////////////////////////////////////////////////////////////////////
//Temperature stuff
  sensors.begin();
  // locate devices on the bus
  Serial.print("Locating devices...");
  Serial.print("Found ");
  deviceCount = sensors.getDeviceCount(), DEC;
  Serial.print(deviceCount);
  Serial.println(" devices.");

  if (!sensors.getAddress(sensor0, 0)) Serial.println("Unable to find address for Device 0");
  if (!sensors.getAddress(sensor1, 1)) Serial.println("Unable to find address for Device 1");
  if (!sensors.getAddress(sensor2, 2)) Serial.println("Unable to find address for Device 2");
  if (!sensors.getAddress(sensor3, 3)) Serial.println("Unable to find address for Device 3");

  sensors.setResolution(sensor0, TEMPERATURE_PRECISION);
  sensors.setResolution(sensor1, TEMPERATURE_PRECISION);
  sensors.setResolution(sensor2, TEMPERATURE_PRECISION);
  sensors.setResolution(sensor3, TEMPERATURE_PRECISION);

  Serial.print("Device 0 Address: ");
  printAddress(sensor0);
  Serial.println();

  Serial.print("Device 1 Address: ");
  printAddress(sensor1);
  Serial.println();

  Serial.print("Device 2 Address: ");
  printAddress(sensor2);
  Serial.println();

  Serial.print("Device 3 Address: ");
  printAddress(sensor3);
  Serial.println();

  Serial.println("");

  printTemperature();
  lcdTemperatures();
  delay (4000);
//////////////////////////////////////////////////////////////////////////////////////////////////
    pinMode(28, INPUT_PULLUP);   // Momentary switch
    ads.begin();


  previousTempC = tempC;
  totalTempC = -1*tempC;
  delay (4000);
  digitalWrite(8, LOW);
  lcd.clear();
}
///////////////////////////////////////////////////////////////////////////////////////////
void loop()
{
///////////////////////////////////////////////////////////////////////////////////////////////
// Send data to the Feather Nestbox every 2 minutes:
currentTime = millis();
intervalTime = currentTime - previousTime;
Serial.print("Current time: "); Serial.print(currentTime/1000);Serial.print(" Secs ");Serial.print(currentTime/60000);Serial.println(" Minutes");
if (intervalTime > 120000)
  {
// Send data to the feather HERE.
//////////////////////////////////////////////////////////////////////////////////////////////////////////////////////////
   Serial.println("Now we are doing a transmission ....... ");
   Serial.println("");
   lcd.setCursor(0,3);
   lcd.print("Transmitting data...");

   delay(3000);
   Wire.beginTransmission(9); // transmit to device #9     // Make sure the order is the same in master and slave.
   delay(20);
  // We're going to send two chunks of data, tempA and tempB. Each of them is less than 1,000 and has two digits after the
  //decimal place.
   tempZ=boilerTemp;
   numberId= 101;
   sendData();
   Serial.print(numberId);Serial.print(":  ");Serial.println(tempZ);
   delay(50);
   tempZ=refluxTemp;
   numberId= 102;
   sendData();
   Serial.print(numberId);Serial.print(":  ");Serial.println(tempZ);
   delay(50);
   tempZ=condensorTemp;
   numberId= 103;
   sendData();
   Serial.print(numberId);Serial.print(":  ");Serial.println(tempZ);
   delay(50);
   tempZ=hydroTemp;
   numberId= 104;
   sendData();
   Serial.print(numberId);Serial.print(":  ");Serial.println(tempZ);
   delay(50);
   Wire.endTransmission();

   Wire.beginTransmission(9); // transmit to device #9     // Make sure the order is the same in master and slave.
   delay(20);
   tempZ=mins;
   numberId= 107;
   sendData();
   delay(20);
   tempZ=alcoholX/10;
   numberId= 105;
   sendData();
   Serial.print(numberId);Serial.print(":  ");Serial.println(tempZ);
   tempZ=pressure/10;
   numberId= 106;
   sendData();
      while (k<20)
      {
      tone (A0,700,50);
      delay(100);
      k++;
      }
      k=0;
   Serial.print(numberId);Serial.print(":  ");Serial.println(tempZ);
   delay(50);
   Wire.endTransmission();

   Serial.println("");
   Serial.println("Transmission ended ....... ");
   Serial.println("");
   previousTime=currentTime;
  }
///////////////////////////////////////////////////////////////////////////////////////////////
  int momentarySwitch = digitalRead(28);
  if ((momentarySwitch == LOW)&&(momentarySwitchStatus == 0))
  {
    momentarySwitchStatus=1;
  }
  else
  {
    if ((momentarySwitch == LOW)&&(momentarySwitchStatus == 1))
    {
     momentarySwitchStatus=0;
    }
  }
///////////////////////////////////////////////////////////////////////////////////////////
///////////////////////////// if command encompases all the next code /////////////////////
if (momentarySwitchStatus==0)
{
////////////////////////////////////////////////////////////////////////////////////////////
// Test external relays ////////////////////////////////////////////////////////////////////
//  digitalWrite(53, LOW);
//  delay(5000);
//  digitalWrite(53, HIGH);
/////////////////////////////////////////////////////////////////////////////////////////////////////////////////////////////
//////// A place to allow settings to be adjusted ///////////////////////////////////////////////////////////////////////////
while (adjustmentTimer>0)
  {
    tone(A0,(adjustmentTimer*2)+600,50);

    potReading01 = analogRead(A1);
    pumpTimer4 = potReading01;
    lcd.setCursor(0,0);
    lcd.print("Pump timer:");
    lcd.setCursor(12,0);
    lcd.print("        ");
    lcd.setCursor(12,0);
    lcd.print(pumpTimer4);
    lcd.setCursor(15,0);
    lcd.print("secs");

    lcd.setCursor(0,1);
    lcd.print("Alcohol limit:");
    lcd.setCursor(15,1);
    lcd.print(alcoholLimit);

    potReading03 = analogRead(A3);
    powerFactor = map(potReading03, 14, 1023, 0,  100);
    lcd.setCursor(0,2);
    lcd.print("Power factor:");
    lcd.setCursor(14,2);
    lcd.print(powerFactor);
    lcd.setCursor(18,2);
    lcd.write(2);

    potReading02 = analogRead(A2);
    mappedPotReading02 = map(potReading02, 13, 1023, 0,  1000);
    endTemp = (mappedPotReading02 / 200.00) + 98.00;
    lcd.setCursor(0,3);
    lcd.print("End Temp:           ");
    lcd.setCursor(10,3);
    lcd.print(endTemp,2);
    lcd.setCursor(16,3);
    lcd.print("\337C");

    adjustmentTimer=adjustmentTimer-1;
    delay(100);
  }
///////////////////////////////// Reading potentiometer on A1: Unused ///////////////////////////////////////////////////////
if (loopToStart ==0)
  {
    lcd.clear();
    potReading01 = analogRead(A1);
    lcd.setCursor(0,2);
    lcd.print("Pump in timer:");
    lcd.setCursor(5,3);
    pumpTimer4 = potReading01;
    lcd.print(pumpTimer4);
    lcd.print(" seconds  ");
  }
////////////////////////////////////////////////////////////////////////////////////////////
///// Empty the boiler. Fluid exits from LH valve port 3 /////////////////////////////////////////////////////////////////////
pumpTimer1 = 1000*potReading01;
pumpTimer2 = 1000*potReading01;
if (loopToStart ==0)
{
  //Pump and valves:
  //Valve default state is port 1 to 3 open.
  while (pumpTimer1>0)
  {
  levelSwitch = digitalRead(A8);
  if (levelSwitch == HIGH)
    {
    tone(A0,800,500);
    Serial.print("Level switch:  ");
    Serial.println(levelSwitch);
    }
  pumpTimer1=pumpTimer1-1000;
  lcd.setCursor(0,0);
  lcd.print("    PUMPING OUT     ");
  lcd.setCursor(0,1);
  lcd.print("                    ");
  lcd.setCursor(5,1);
  pumpTimer3 = pumpTimer1/1000;
  lcd.print(pumpTimer3);
  digitalWrite(49, LOW); // Pump
  delay(1000); //Effectively mappedPotReading01 is in seconds.
  }
  lcd.setCursor(0,1);
  lcd.print("     COMPLETED      ");
  digitalWrite(49, HIGH);
}
  delay(5000);
////////////////////////////////////////////////////////////////////////////////////////////
///// Fill the boiler. Fluid enters from RH valve port 2 /////////////////////////////////////////////////////////////////////
pumpTimer3 =1;
if ((loopToStart ==0)&&(pumpTimer3>0)) // &&(levelSwitch==LOW)
{
//  digitalWrite(49, LOW);  // Pump
//  digitalWrite(51, LOW);  // LH valve
    digitalWrite(53, LOW);  // RH valve must be opened before the pump starts.
//  delay(5000);
//  digitalWrite(49, HIGH);
//  digitalWrite(51, HIGH);
//  digitalWrite(53, HIGH);
  delay(2000);
  while ((pumpTimer3>0) && (levelSwitch==LOW))
  {
  levelSwitch = digitalRead(A8);
  tone(A0,800,500);
  pumpTimer2=pumpTimer2-1000;
  lcd.setCursor(0,2);
  lcd.print("    PUMPING IN      ");
  lcd.setCursor(0,3);
  lcd.print("                    ");
  lcd.setCursor(5,3);
  pumpTimer3 =pumpTimer2/1000;
  lcd.print(pumpTimer3);
  lcd.setCursor(9,3);
  lcd.print(" Seconds  ");
  digitalWrite(49, LOW); // Pump
  digitalWrite(51, LOW);  //LH valve
  digitalWrite(53, LOW);
  delay(1000);
  }
}
if (loopToStart ==0)
  {
  lcd.setCursor(0,3);
  lcd.print("     COMPLETED      ");
  digitalWrite(49, HIGH);
  digitalWrite(51, HIGH);
  digitalWrite(53, HIGH);
  delay(5000);
  lcd.clear();
  }
loopToStart=1;  // This stops the pumping processes repeating in every loop.

///////////////////////////////////////////////////////////////////////////////////////////////////
///// Dump the contents of the hydrometer at the start ////////////////////////////////////////////
  startAndEndDump();
////////////////////////////////////////////////////////////////////////////////////////////
////////////////// Changes the Beep when alcohol starts to be produced /////////////////////
  if (pressure < 400)
  {
    tone (A0,tempC*40,500);
  }
  else
  {
    k=10;
    while (k<20)
      {
      tone (A0,tempC*k,50);
      delay(50);
      k++;
      }
   if (a==0)                // One off Producing alcohol SFX.
    {
     digitalWrite(41, LOW);
     delay(500);
     digitalWrite(41, HIGH);
     a=1;
    }
  }
//////////////////////////////////////////////////////////////////////////////////////////////////////////////////
///////////////////////////////// Reading potentiometer on A2: End point temperature ///////////////////////////////////////////////////////
    potReading02 = analogRead(A2);
    mappedPotReading02 = map(potReading02, 13, 1023, 0,  1000);
    endTemp = (mappedPotReading02 / 200.00) + 98.00;
    delay(100);
    lcd.setCursor(0,0);
    lcd.print("End Temp:           ");
    lcd.setCursor(11,0);
    lcd.print(endTemp,2);
    lcd.setCursor(18,0);
    lcd.print("\337C");
 //   Serial.println(endTemp,2);
//////////////////////////////////////////////////////////////////////////////////////////////////////////////////
///////////////////////////////// Reading potentiometer on A3: Heater power factor % ///////////////////////////////////////////////////////
    potReading03 = analogRead(A3);
    powerFactor = map(potReading03, 14, 1023, 0,  100);
    lcd.setCursor(0,1);
    lcd.print("Power factor:           ");
    lcd.setCursor(14,1);
    lcd.print(powerFactor);
    lcd.setCursor(18,1);
    lcd.write(2);
///////////////////////////////////// Row 4 of LCD ////////////////////////////////////////////////////////////////
    lcd.setCursor(0,3);
    lcd.print("                    ");
/////////////////////////////////////////////////////////////////////////////////////////////
    delay (1000);
    lcdStuff();

///////////////////////////////// Now producing alcohol SFX ///////////////////////////////////////////////////////
if ((tempCount==30)&&(pressure>100))
{
  digitalWrite(41, LOW);
  delay(500);
  digitalWrite(41, HIGH);
}
  Serial.print("tempcount:   ");Serial.println(tempCount);
/////////////////////////////////////////////////////////////////////////////////////////////
//////////////////////////////// The process needs to finish ////////////////////////////////
  if (tempC > endTemp)
  {
   digitalWrite(6, LOW);
//   startAndEndDumpValue=0;
//   startAndEndDump();
   while (1)
   {
    lcd.setCursor(0,0);
    lcd.print("      FINISHED      ");
    digitalWrite(25,LOW);
    delay(1000);
    digitalWrite(25,HIGH);
    delay(10000);
   }
  }
  else
  {
  digitalWrite(A0,HIGH);
  }
/////////////////////////////////////////////////////////////////////////////////////////////
  alcoholX = analogRead(A7)*1.01;
  Serial.print("Alcohol:  ");Serial.println(alcoholX);
  if (alcoholX>alcoholLimit)
  {
    while (alcoholX>alcoholLimit)
    {
    digitalWrite(6, LOW);
    lcdStuff();
    alcoholX = analogRead(A7);
  digitalWrite(27, LOW);    // SFX
  delay(500);
  digitalWrite(27, HIGH);
    delay (10000);
    }
  }
  else
  {
  digitalWrite(A1, HIGH);
  }

  if (alcoholX<alcoholLimit)
  {
   alcoholCount++;
  }
  else
  {
   alcoholCount=0;
  }
/////////////////////////////////////////////////////////////////////////////////////////////
/////////// Heater control for full power:///////////////////////////////////////////////////
  if ((alcoholX<650)&&(alcoholCount>5)&&(tempC<85))
  {
  digitalWrite(6, HIGH);
     if (T05==0)                  // Make a one off audio sound
     {
      digitalWrite(33, LOW);
      delay(500);
      digitalWrite(33, HIGH);
      T05=1;
      lcd.clear();
     }
  }
//  else
//  {
//  digitalWrite(6, LOW);
//  T05=0;
//  }
/////////////////////////////////////////////////////////////////////////////////////////////
/////////// Heater control for 1/5 power://////////////////////////////////////////////////////////////////
  if ((alcoholX<650)&&(alcoholCount>10)&&(tempC>85)&&(condensorTemp<50))
  {
  digitalWrite(6, LOW);
  delay (1000);
  digitalWrite(6, HIGH);
  delay (powerFactor*250);
  digitalWrite(6, LOW);
  }
  Serial.print("Power Factor:   ");
  Serial.println(powerFactor,2);
 // else
 // {
 // digitalWrite(6, LOW);
 // }
////////////////////////////////////////////////////////////////////////////////////////////////
if (condensorTemp>50)
{
  digitalWrite(6, LOW);
  lcd.setCursor(0,3);
  lcd.print("Condensor too hot");
}
///////////////////////////////////////////////////////////////////////////////////////////////////
////////////////////////////////// One off SFX ////////////////////////////////////////////////////
if ((tempC>70)&&(T03==0))
{
  digitalWrite(29, LOW);
  delay(500);
  digitalWrite(29, HIGH);
    T03=1;
}
else
{
    digitalWrite(A2, HIGH);
}
///////////////////////////////////////////////////////////////////////////////////////////////////
////////////////////////////////// One off SFX ////////////////////////////////////////////////////
if ((tempC>95)&&(T04==0))
{
  digitalWrite(31, LOW);
  delay(500);
  digitalWrite(31, HIGH);
    T04=1;
}
else
{
    digitalWrite(A3, HIGH);
}
//////////////////////////////////////////////////////////////////////////////////////////////////
  foreshotsDump();


///////////////////////////////////////////////////////////////////////////////////////////////////
  if (f==5)
  {
  pressureZeroing();
  }
  sensors.requestTemperatures(); // Send the command to get temperatures
  printTemperature();
  totalTempC = totalTempC + tempC;

/////////////////////////////////////////////////////////////////////////////////////////////////////////////////////////
  int pushButton = digitalRead(10);
    if (pushButton == HIGH)
    {
 //     Serial.print("Switch Off");
     digitalWrite(8, LOW);
    } else
    {
 //     Serial.print("Switch On");
 //   pressureZeroing();
     digitalWrite(8, HIGH);
    }
//      Serial.println(" ");

/////////////////////////////////////////////////////////////////////////////////////////////////////////////////////////////
///////// Reading the hydrometer pressure sensor ////////////////////////////////////////////////////////////////////////////
  int16_t adc0, adc1, adc2, adc3;

 // adc0 = ads.readADC_SingleEnded(0);
 // Serial.print("AIN0: "); Serial.println(adc0);
 // Serial.println(" ");

 i=0;
 c++;
 sensorValue =0;
 while (i<15)
 {
  adc0 = analogRead(11);
  i++;
  sensorValue = sensorValue + adc0;
  delay (50);
 }
  sensorValue = sensorValue/i;
 // sensorValue = adc0;
  // Map it to the range of the analog out:
  //outputValue = map(sensorValue, 0, 1024, -2500,  2500);
  adjustedOutputValue =   (sensorValue-512)*2.2; // Needs to be active in the range 0 to 1,000.
  pressure = adjustedOutputValue;

  Serial.print("Pressure sensor = "); // The sensor usually reads about 512 ie 1024/2.
  Serial.print(sensorValue);
  Serial.print("\t Actual output = ");
  Serial.println(pressure);


if (adjustedOutputValue > outputValueMax)
{
  outputValueMax = adjustedOutputValue;
}
if (adjustedOutputValue < outputValueMin)
{
  outputValueMin = adjustedOutputValue;
}

  totalAdjustedOutputValue = adjustedOutputValue + totalAdjustedOutputValue;
  av = 1.000*totalAdjustedOutputValue/c;

  avPressure = av/1.607/1.284;
  ethanol = 100 - (avPressure - densityEthanol) / (1000 - densityEthanol) *100;
  mins = c/60;
///////////////////////////////////////////////////////////////////////////////////////////////////////////////////////
////////////// Calculating the temperature changes value (delta T) ////////////////////////////////////////////////////
if (tempCount ==10)
{
  deltaTempC = totalTempC/10 - previousTempC;
  previousTempC = totalTempC/10;
  doubleDeltaTempC = deltaTempC - previousDeltaTempC;
  previousDeltaTempC = deltaTempC;

  if (deltaTempC >0.2)
  {
    digitalWrite(39, LOW); // SFX (Temperature is rising .... Checking all systems are operational.)
    delay(500);
    digitalWrite(39, HIGH);
  }

//  Serial.print(k);
//  Serial.print(",");
//  Serial.print(totalTempC/60);
//  Serial.print(",");
//  Serial.print(deltaTempC);
//  Serial.print(",");
//  Serial.println(pressure,0);
//  Serial.print("Ethanol%: ");
//  Serial.println(ethanol,0);
  z=10;
  y=0;
  totalTempC=0;
///////////////////////////////////////////////////////////////////////////////////////////////////////////////////////
////////////////////////// Zeroing the hydrometer sensor at 70 degrees C //////////////////////////////////////////////
  if ((tempC>70)&&(h<1))
  {
    pressureZeroing();
    h=1;
  }
  tempCount=0;
  k++;
}
/////////////////////////////////////////////////////////////////////////////////////////////////////////
////////////////////////// Print to LCD /////////////////////////////////////////////////////////////////
  lcdTemperatures();
  delay(5000);

  lcdStuff();
  delay(5000);

  tempCount++;
  f++;

}
////// The curly bracket above is effectively the main loop except for small bit of code below /////////////
///////////////////////////////////////////////////////////////////////////////////////////////////////////
////////////////// Momentary switch stuff below here ///////////////////////////////////////////////////////

else
{
   paused();
   delay(1000);
}
}
///////////////////////////////////////////////////////////////////////////////////////////////////////////
void paused()
{
   digitalWrite(6, LOW); // Turn off heater.
   digitalWrite(8, LOW); // Close dump valve.
   alcoholX = analogRead(A7);
   sensors.requestTemperatures(); // Send the command to get temperatures
   printTemperature();
   lcd.setCursor(0,0);
   lcd.print("       PAUSED       ");
   lcd.setCursor(0,1);
   lcd.print("                    ");
   lcd.setCursor(0,2);
   lcd.print("                    ");
   lcd.setCursor(0,3);
   lcd.print("                    ");
   lcd.setCursor(0,0);
   lcd.print("P:");
   delay(10);
   lcd.setCursor(2,0);
   lcd.print(pressure,0);
   lcd.setCursor(0,1);
   lcd.print("Max:");
   lcd.setCursor(4,1);
   lcd.print(outputValueMax);
   lcd.setCursor(0,2);
   lcd.print("Alc:");
   delay(10);
   lcd.setCursor(4,2);
   lcd.print(alcoholX);
   lcd.setCursor(0,3);
   lcd.print("Secs:");
   lcd.setCursor(5,3);
   lcd.print(c);
   lcd.setCursor(11,3);
   delay(10);
   lcd.print("Mins:");
   lcd.setCursor(16,3);
   lcd.print(mins,1);
   lcd.setCursor(11,1);
   lcd.print("A:");
   delay(10);
   lcd.setCursor(11,2);
   lcd.print("T:");
   lcd.setCursor(13,2);
   lcd.print(tempC);
   lcd.setCursor(18,2);
   lcd.print("\337C");
}
void printTemperature()
{
  Serial.println("  ");

  sensors.requestTemperatures();
  Serial.print("Boiler Temp: ");
  boilerTemp =sensors.getTempCByIndex(1)-0.76; // Change the index value accordingly.
  Serial.println(boilerTemp);

  sensors.requestTemperatures();
  Serial.print("Reflux Temp: ");
  refluxTemp =sensors.getTempCByIndex(2)-0.76; // Change the index value accordingly.
  Serial.println(refluxTemp);

  sensors.requestTemperatures();
  Serial.print("Condensor Temp: ");
  condensorTemp =sensors.getTempCByIndex(0)-0.76; // Change the index value accordingly.
  Serial.println(condensorTemp);

  sensors.requestTemperatures();
  Serial.print("Hydrometer Temp: ");
  hydroTemp =sensors.getTempCByIndex(3)-0.76; // Change the index value accordingly.
  Serial.println(hydroTemp);

  Serial.println("  ");
  tempC=boilerTemp;

}
void pressureZeroing()
{
      x = outputValue;
      outputValueMin = 10000;
      outputValueMax = -10000;
      c = 0;
      totalAdjustedOutputValue =0;
      av=0;
      hrs=0;
}
void lcdTemperatures()
{
  lcd.setCursor(0,0);
  lcd.print("Boiler Temp:");
  lcd.setCursor(12,0);
  lcd.print("      ");
  lcd.setCursor(12,0);
  lcd.print(boilerTemp,2);
  lcd.setCursor(18,0);
  lcd.print("\337C");

  lcd.setCursor(0,1);
  lcd.print("Reflux Temp:");
  lcd.setCursor(12,1);
  lcd.print(refluxTemp,2);
  lcd.setCursor(18,1);
  lcd.print("\337C");

  lcd.setCursor(0,2);
  lcd.print("Conden Temp:");
  lcd.setCursor(12,2);
  lcd.print(condensorTemp,2);
  lcd.setCursor(18,2);
  lcd.print("\337C");

  lcd.setCursor(0,3);
  lcd.print("Hydrom Temp:");
  lcd.setCursor(12,3);
  lcd.print(hydroTemp,2);
  lcd.setCursor(18,3);
  lcd.print("\337C");
}
void lcdStuff()
{
  lcd.setCursor(0,0);
  lcd.print("                    ");
  lcd.setCursor(0,1);
  lcd.print("                    ");
  lcd.setCursor(0,2);
  lcd.print("                    ");
  lcd.setCursor(0,3);
  lcd.print("                    ");
  lcd.setCursor(0,0);
  lcd.print("P:");
  delay(10);
  lcd.setCursor(2,0);
  lcd.print(pressure,0);
  lcd.setCursor(11,0);
  lcd.write(1);
  lcd.print("T:");
  lcd.setCursor(14,0);
  lcd.print(deltaTempC);
  lcd.setCursor(0,1);
  lcd.print("Max:");
  lcd.setCursor(4,1);
  lcd.print(outputValueMax);
  lcd.setCursor(0,2);
  lcd.print("Alc:");
  delay(10);
  lcd.setCursor(4,2);
  lcd.print(alcoholX);
  lcd.setCursor(0,3);
  lcd.print("Secs:");
  lcd.setCursor(5,3);
  c=millis()/1000;
  lcd.print(c);
  lcd.setCursor(11,3);
  delay(10);
  lcd.print("Mins:");
  lcd.setCursor(16,3);
  mins=c/60;
  lcd.print(mins,1);
  lcd.setCursor(11,1);
  lcd.print("A:");
  delay(10);
  lcd.setCursor(11,2);
  lcd.print("T:");
  lcd.setCursor(13,2);
  lcd.print(tempC);
  lcd.setCursor(18,2);
  lcd.print("\337C");

  if (ethanol>100)
  {
    lcd.setCursor(13,1);
    lcd.print("VOID");
    totalAdjustedOutputValue =0;
    c=0;
  }
  else
  {
    lcd.setCursor(13,1);
    lcd.print(ethanol,0);
    lcd.setCursor(16,1);
    lcd.write(2);
  }
}
void foreshotsDump()
{
    z=15;
  if ((pressure > 500)&&(y<z)&&(foreshotsDumpValue==0))
  {
    digitalWrite(37, LOW); // SFX
    delay(500);
    digitalWrite(37, HIGH);
    digitalWrite(8, HIGH);  // dump valve relay.
    while (y<(z+1))
    {
    y++;
    delay(500);
    }
    foreshotsDumpValue++;
    lcd.clear();
  }
  else
  {
    digitalWrite(8, LOW);
  }
}
void startAndEndDump()
{
  z=15;
  if ((y<z)&&(startAndEndDumpValue==0))
  {
    digitalWrite(8, HIGH);  // dump valve relay.
    digitalWrite(37, LOW);
    delay(500);
    digitalWrite(37, HIGH);
    while (y<(z+1))
    {
    lcd.setCursor(0,0);
    lcd.print("       DUMPING      ");
    lcd.setCursor(0,1);
    lcd.print("                    ");
    lcd.setCursor(0,2);
    lcd.print("                    ");
    lcd.setCursor(0,3);
    lcd.print("                    ");

    y++;
    delay(500);
    }
    startAndEndDumpValue++;
    y=5;
    delay(1000);
    digitalWrite(7, HIGH); // Neutralise hydomter pressure sensor by 3 way solenoid in tube.
    tone(A0,600,600);
    delay(5000);
    tone(A0,600,600);
    delay(1000);
    digitalWrite(7, LOW);
    lcd.clear();
  }
  else
  {
    digitalWrite(8, LOW);
  }
}
void testRelays()
{
  digitalWrite(8, HIGH);
  delay(2000);
  digitalWrite(8, LOW);
  digitalWrite(6, HIGH);
  delay(2000);
  digitalWrite(6, LOW);
  digitalWrite(7, HIGH);
  delay(2000);
  digitalWrite(7, LOW);
  digitalWrite(13, HIGH);
  delay(2000);
  digitalWrite(13, LOW);
  digitalWrite(9, HIGH);
  delay(2000);
  digitalWrite(9, LOW);
}
void printAddress(DeviceAddress deviceAddress)
{
  for (uint8_t i = 0; i < 8; i++)
  {
    // zero pad the address if necessary
    if (deviceAddress[i] < 16) Serial.print("0");
    Serial.print(deviceAddress[i], HEX);
  }
}
void sendData()
{
  //  We're going to turn testAAAA and testBBBB into shorter numbers to transmit:
  //  assume the number is less than 1,000 and we want to preserve the first two decimal places
    testAAAA = nothing + tempZ*100;
    stringLengthAA = testAAAA.length();
    testAAAA.remove((stringLengthAA-3),3); // Remove decimal place etc.
 //   Serial.print("testAAAA: ");Serial.println(testAAAA);
    Wire.write(dataPrecursor);                          // Must send this junk data precursor first!
    Wire.write(numberId);
//    Serial.print("numberId is:   ");Serial.println(numberId);
    Wire.write(stringLengthAA-3);
    n=stringLengthAA-4;
      while (n>-1)                                       // Send the data back to front.
      {
      digitCharAAAA[n-1] = testAAAA.charAt(n);
      n--;
      digitAAAA = (digitCharAAAA[n]+nothing).toInt();
 //     Serial.print("Digit to send:  "); Serial.println(digitAAAA);
      delay(20);
      Wire.write(int (digitAAAA));                       // Values must not be greater than 255 (1 byte)?
      }
}
end.
Step 18: Adafruit GPRS Feather Code

The crux of this code is the 'unravelData()' function which receives the stream of data and turns it into a character arrays called 'rabbits'. These arrays are then pretty much ready to be passed over to the FONA module for transmission down the GPRS network via a PHP 'Get' command. No real animals are sent down the I2C bus!!
Whilst on the subject of rabbits, an analogy would be where two foxes are working together on different sides of a hedge. The first fox chops the rabbits up into legs, arms, head, ears etc and sends everything down the rabbit hole tail first, ears last. The fox on the other side of the hedge is feeling benevolent and puts the rabbits back together again, but needs to know which rabbit is which and how many parts each rabbit was chopped up into as some rabbits were bigger than others.
#include <Wire.h>
#include "Adafruit_FONA.h"

#define FONA_RX 9
#define FONA_TX 8
#define FONA_RST 4
#define FONA_RI  7

// this is a large buffer for replies
char replybuffer[255];
String initiator;
String dataString;
const char webAddress[100] = "http://www.goatindustries.co.uk/test/send.php?";
char url[120];

String nothing;
int numberId =0;
String resultForNumberId;
String numberA;
int stringLength =0;
String testad;
float result101=0.00;
float result102=0.00;
float result103=10.00;
float result104=20.00;
float result105=30.00;
float result106=40.00;
float result107=50.00;

int n=0;
int i=0;
String compileA;
char rabbits[10];
int a;
int k;
int z=0;


#include <SoftwareSerial.h>
SoftwareSerial fonaSS = SoftwareSerial(FONA_TX, FONA_RX);
SoftwareSerial *fonaSerial = &fonaSS;

//Connect Rx on Fona to Tx1 on mega or due:
//HardwareSerial *fonaSerial = &Serial1;

Adafruit_FONA fona = Adafruit_FONA(FONA_RST);
uint8_t readline(char *buff, uint8_t maxbuff, uint16_t timeout = 0);
uint8_t type;
/////////////////////////////////////////////////////////////////////////////////////////////////////////////////////////////////////
void setup() {
  Serial.begin(115200);
  pinMode(10,OUTPUT);
  digitalWrite(10, HIGH);
  delay(1000);
  digitalWrite(10, LOW);
  pinMode(13, OUTPUT);
  ledFastFlash();
  ledFastFlashB();
/////////////////////////////////////////////////////////////////////////////////////////////////////////////////////////////
  Wire.begin(9);                // join i2c bus with address #9
  Wire.onReceive(receiveEvent); // register event
///////////////////////////////////////////////////////////////////////////////////////////////////////////////////////////

 // while (!Serial);                           // Use this for initiating program by opening of serial monitor. Delete in normal operation.

  Serial.println(F("FONA basic test"));
  Serial.println(F("Initialiking....(May take 3 seconds)"));


  fonaSerial->begin(4800);
  if (! fona.begin(*fonaSerial)) {
    Serial.println(F("Couldn't find FONA"));
//   while (1);
  }
  type = fona.type();
  Serial.println(F("FONA is OK"));
  Serial.print(F("Found "));
  switch (type) {
    case FONA800H:
      Serial.println(F("FONA 800H")); break;
  }
  networkStatus();   // Check the network is available. Home is good.

        Serial.println("");
        Serial.println("Checking that GPRS is turned off to start with .........");
  fona.setGPRSNetworkSettings(F("pp.vodafone.co.uk"), F("wap"), F("wap"));   // Change these settings! (Network APN, username ,password)
delay (1000);
        // Turn off GPRS:
        if (!fona.enableGPRS(false))
        Serial.println(F("No - Failed to turn off"));
        Serial.println("If the line above says OK, then GPRS has just been turned off");
delay (1000);
////////////////////////////////////////////////////////////////////////////////////////////////////////////////////////////////
   Serial.println("Waiting for data from i2c  ...........");

}
////////////////////////////////////////////////////////////////////////////////////////////////////////////////////////////////
void loop()
  {
//////////////////////////////////////////////////////////////////////////////////////////////////////////////////////////////////////
      if (z>0)              // This loop is initiated if z is greater than 1. The value of z is given by the reciept of I2C data
  {
/////////////////////////////////////////////////////////////////////////////////////////////////////////////////////////////////////
  delay(5000);
  Serial.print(F("FONA> "));
    networkStatus();   // Check the network is available. Home is good.
    ledFastFlash();
    turnOnGPRS();
    turnOnGPRS();
    ledSlowFlash();
   Serial.println("");
   Serial.print("Result 101:   ");Serial.println(result101,2);
   Serial.print("Result 102:   ");Serial.println(result102,2);
   Serial.print("Result 103:   ");Serial.println(result103,2);
   Serial.print("Result 104:   ");Serial.println(result104,2);
   Serial.print("Result 105:   ");Serial.println(result105,2);
   Serial.print("Result 106:   ");Serial.println(result106,2);
   Serial.print("Result 107:   ");Serial.println(result107,2);

        // read website URL
        uint16_t statuscode;
        int16_t length;
        char url[180];
///////////////////////////////////////////////////////////////////////////////////////////////////////////////////////
// This is where the data is compiled into a character ....

  dataString =  initiator + webAddress + "tempA="+result101 + "&tempB="+result102 + "&tempC="+result103 + "&tempD="+result104 + "&alcohol="+result105 + "&pressure="+result106 + "&minutes="+result107;
  // To add another temperature reading we would need: +"&tempB="+tempB
  int n = dataString.length();

  Serial.print("Data string to send:     ");Serial.println(dataString);
  Serial.print("Size of string:  ");Serial.println(n);
  // Builds the url character:
      for (int aa=0;aa<=n;aa++)
      {
          url[aa] = dataString[aa];
      }
  Serial.print("Character data to send:  ");Serial.println(url);
  Serial.println("");
///////////////////////////////////////////////////////////////////////////////////////////////////////////////////////
//..... and sent out via HTTP to a PHP file called send.php ready to recieve it.

        Serial.print("Sending url .... ");
        Serial.print("Compiled url is: ");Serial.println(url);
        Serial.println(F("****"));
        if (!fona.HTTP_GET_start(url, &statuscode, (uint16_t *)&length)) {
          Serial.println("Failed!");
        }
        while (length > 0) {
          while (fona.available()) {
            char c = fona.read();

            // Serial.write is too slow, we'll write directly to Serial register!
#if defined(__AVR_ATmega328P__) || defined(__AVR_ATmega168__)
            loop_until_bit_is_set(UCSR0A, UDRE0); /* Wait until data register empty. */
            UDR0 = c;
#else
           // digitalWrite(5, HIGH);   // Call back to Master to say that tranmission was successful.
            Serial.write(c);
////////////////////////////////////////////////////////////////////////////////////////////////////////////////////////

////////////////////////////////////////////////////////////////////////////////////////////////////////////////////////
#endif
            length--;
            if (! length) break;
          }
        }
        Serial.println(F("\n****"));
        fona.HTTP_GET_end();
        Serial.println("Wait for 10 seconds ...........");

        delay (10000);

        // Turn off GPRS:
        if (!fona.enableGPRS(false))
        Serial.println(F("No - Failed to turn off"));
        Serial.println("GPRS turned off?");

  while (fona.available()) {
  Serial.write(fona.read());
  }
  z=0;
  Serial.println("Waiting for data from i2c  ...........");
  }
}
// End of main loop.
///////////////////////////////////////////////////////////////////////////////////////////////////////////////////////////////////


//////////////////////////////////////////////////////////////////////////////////////////////////////////////////////////

//////////////////////////////////////////////////////////////////////////////////////////////////////////////////////////////
void turnOnGPRS()
{
        delay (10000);
        Serial.println("Now attempting to turn on GPRS .........");
     //   if (!fona.enableGPRS(true))
     //   Serial.println(F("No - Failed to turn on"));
     //   Serial.println("GPRS is on if the line above shows 'OK'");
     //   Serial.println("Wait for 10 seconds to make sure GPRS is on ...........");
     //   delay (10000);
        if (fona.enableGPRS(true))
        ledFastFlashB();                          // Indicates a connect to GPRS.

        //Serial.println(("No - Failed to turn on"));
}
////////////////////////////////////////////////////////////////////////////////////////////////////////////////////////////////

void networkStatus()
      {
        //delay(10000);
        // read the network/cellular status
        uint8_t n = fona.getNetworkStatus();
        Serial.print(F("Network status "));
        Serial.print(n);
        Serial.print(F(": "));
        if (n == 0) Serial.println(F("Not registered"));
        if (n == 1) Serial.println(F("Registered (home)"));
        if (n == 2) Serial.println(F("Not registered (searching)"));
        if (n == 3) Serial.println(F("Denied"));
        if (n == 4) Serial.println(F("Unknown"));
        if (n == 5) Serial.println(F("Registered roaming"));

      }
void receiveEvent(int bytes)
{
  //delay(5000); // wait for data to be sent.
  a=20;
  while (a>0) // This looks for the correct numberId to iniate the next if command.
  {
  numberId = Wire.read();
//  Serial.print("Possible number Id:   ");Serial.println(numberId);

  n=-1;
  compileA = nothing;
  testad = nothing;
///////////////////////////////////////////////////////////////////////////////////////////////////////////////////////////////////////
 //   Serial.println("");
    if (numberId==101)
    {
    unravelData();
    result101 = (rabbits+nothing).toInt()/100.00;
    }
    if (numberId==102)
    {
    unravelData();
    result102 = (rabbits+nothing).toInt()/100.00;
    }
    if (numberId==103)
    {
    unravelData();
    result103 = (rabbits+nothing).toInt()/100.00;
    }
    if (numberId==104)
    {
    unravelData();
    result104 = (rabbits+nothing).toInt()/100.00;
    }
    if (numberId==105)
    {
    unravelData();
    result105 = (rabbits+nothing).toInt()/100.00;
    }
    if (numberId==106)
    {
    unravelData();
    result106 = (rabbits+nothing).toInt()/100.00;
    }
    if (numberId==107)
    {
    unravelData();
    result107 = (rabbits+nothing).toInt()/100.00;
    }
///////////////////////////////////////////////////////////////////////////////////////////////////////////////////////////////////////
  a--;
  delay(100);
  }
   delay(10);
   z=1;                 // recieveEvent is on an interrupt so when it's triggered it changes z to 1 and allows main loop.
}
////////////////////////////////////////////////////////////////////////////////////////////////////////
void unravelData()
{
     a=10;
    stringLength = Wire.read();
      while (n<stringLength)
      {
      compileA = testad + compileA;
      testad = nothing + Wire.read(); // This is a string.
      n++;

  //    Serial.print("Compile:  ");Serial.println(compileA);
      }

  numberA = compileA;
//  Serial.print("NumberA:  ");Serial.println(numberA);
//  Serial.print("String length:   ");Serial.println(stringLength);

 //Builds the rabbits character:
      i=stringLength;
      for (int aa=0;aa<=i;aa++)
      {
          rabbits[aa] = compileA[aa];
      }
 //Now create a string in which the last 3 characters represent the ID. The string can have the last four characters removed before being processed at the next stage.
      resultForNumberId = nothing + rabbits +" & " + numberId;

 //   Serial.print("rabbits:  ");Serial.println(rabbits);
 //   Serial.print("Result for number Id: ");Serial.print(numberId); Serial.print(" is: "); Serial.println(resultForNumberId );
    Serial.println("");
}
void ledSlowFlash()
{
  digitalWrite(13, HIGH);   // turn the LED on (HIGH is the voltage level)
  delay(1000);              // wait for a second
  digitalWrite(13, LOW);    // turn the LED off by making the voltage LOW
}
void ledFastFlash()
{
  k=0;
  while(k<20)
  {
    digitalWrite(13, HIGH);   // turn the LED on (HIGH is the voltage level)
    delay(100);              // wait for a second
    digitalWrite(13, LOW);    // turn the LED off by making the voltage LOW
    delay(100);
    k++;
  }
}
void ledFastFlashB()
{
  k=0;
  while(k<20)
  {
    digitalWrite(10, HIGH);   // turn the LED on (HIGH is the voltage level)
    delay(100);              // wait for a second
    digitalWrite(10, LOW);    // turn the LED off by making the voltage LOW
    delay(100);
    k++;
  }
}
Step 19: Video Tour
Every decent distillery should have a guided tour - no free samples on this one though! In the video you can see the machine automatically pumping in the homebrewed cider, dumping the foreshots, controlling the boiler heater, performing safety checks and sending out data to a real time webpage for graphical display.
Phew - this has taken me about 3 months to build and debug. Think it's time for a well deserved glass of delicious apple brandy?
| Please |

First Prize in the
Epilog Contest 8

Runner Up in the
Arduino Contest 2016

Participated in the
IoT Builders Contest


