

Introduction: Thumb Wrestling Ring.


Thumb wrestling. A fun thing to do... and now even FUNNER!!!
This instructable is going to show you how to make a thumb wrestling rink, Now lets get ready to RUMBLE!!!! (ding! ding!). Lol
This is an entrant in the Gorilla glue cardboard contest. Please rate and comment
Step 1: Step 2 What You Need

What you will need:
String
Skewers
Scissors (or craft knife)
A ruler
A marker
Other Stuff:
Cardboard (of course)
and a hot glue gun
Lets Get Started......
Step 2: Step 1: Making the Base


firstly measure out a square on your sheet of cardboard (10x10 works well) and cut it out with scissors or a craft knife. (Being careful not to cut yourself at the same time of course!)
Step 3: Step 2: Marking and Cutting Holes for the Corner Posts.


first mark a dot in each corner with the marker about 5mm from the corner and "dig out" with a craft knife.
Step 4: Step 3: Cutting the Corner Posts.


Now, on a skewer, place mark 4cm from the blunt end and cut at the 4cm mark. Also theres four corners so your going to have to do this FOUR TIMES! (my brother cut 6 out so i thought this may be necessary)
Step 5: Step 4: Gluing the Posts in Place.


Now for the posts. Place the posts in the holes you made so there is about 2mm sticking out the bottom of the card. Dab a big spot of glue around each of the posts on the top and a dab of glue over the piece of the post sticking out the bottom. leave to dry for 3-5 minutes.
Step 6: Step 5: Thumb Holes.


Now pick two opposing corners and mark two circles with about a 2cm radius (you pick how close together you make the holes). then you must cut out the circles with a craft knife(it might be hard to use scissors!)
Step 7: Step 6: Cutting the Ropes

Now you must measure and cut two lengths of string about 45cm's long. This will be hard if you only have a 30cm ruler like me.
Step 8: Step 7: Adding the Ropes


now place a dab of glue at the top of any post and place the end of one of the strings on the glue. Continue round the four posts and finish on the one you started. cut off any excess string. Do the same again for the second string just below the first one.
Step 9: Finished!


Now Your done!!
Colour it in any way you like with paints or pens.
Enjoy,
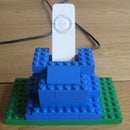
P.S.below is a picture of some sort of structure I put on the bottom to strengthen the wring floor
Participated in the
Gorilla Glue Cardboard Contest


