

Introduction: Track Your Car With an Arduino-based Lojack


Car theft is a real drag! Increase your chances of recovering your car by installing this simple Arduino-based tracker in your car.
This project is fairly simple, and would be a good project for a new Arduino programmer looking for something that goes a little beyond the basic Hello, world programs.
Before starting this project, there are some basic skills you should have under your belt:
- You should be familiar with installing programs on an Arduino and have basic familiarity with using the Arduino IDE
- You should have access to a web server on the internet where you can use PHP and MySQL
- You should have basic familiarity working with 12 volt wiring in your car
- You should be able to do some simple soldering and cut traces on a circuit board
Also, you should have a data-only cell phone service SIM you can install in the GPS. Some cell phone providers (such as T Mobile) offer a free data-only service for customers; otherwise, you can buy a SIM on the Internet for this purpose.
There are two main components to the project:
- The tracker that sits hidden in your car and uploads GPS information via the GPRS (cellular) network to the web, and
- A web application that receives GPS information from the tracker.
The tracker is built out of an Arduino Mega, a GPRS shield from Seeed Studios, and a GPS data logger shield from Adafruit. There are other shields available for GPRS and GPS for which you may be able to adapt the project. A small program samples data from the GPS, makes a connection to the web application, and uploads the data.
The web application is built using PHP and uses Mysql as a data store. As of this writing it is a minimally viable implementation, consisting of a RESTful service that receives GPS information via the web and a web page that displays the location on a map.
I built a box out of Lego to hold the tracker components, hid them inside my car and ran 12 volts to the box. I was able to use an auxiliary battery rather than the main battery to power the tracker, which helps reliability. However, I suspect I could run this off the main battery with the car parked and idle for weeks before it would cause an issues with draining the battery.
Step 1: Collecting the Components to Create the Tracker


First let's meet the components of the tracker!
The first two components, the Arduino Mega and the GPRS board need no modification.
The Arduino Mega is the brains of the operation. You'll need to make any updates to the code particular to your implementation (in particular, the internet address (FQDN) of the webserver) and flash this code onto the Mega before it will run.
I tried to use a basic Arduino for this project but I ran into memory constraints. Using a device with more memory will allow me to make more interesting updates in the future, so it's worth the small extra cost.
The Seeed Studio GPRS shield also needs no modification, and sits atop the Arduino Mega. Before installing, you will need to insert a provisioned SIM from your cellular provider.
On top of the GPRS shield sits the GPS shield from Adafruit. This shield does need some minor modifications, which will be explained in the next step.
Other components:
- I way to power your Arduino Mega. You can do this one of two ways:
- Use an AB USB cable and a car plugin adapter (I used one rated for 2.1 amps, just to make sure I had enough power) as well as a 12 volt plug hidden somewhere in your car.
- Use a 12 volt regulated power source somewhere in your car that you can plug directly into the power plug on your Arduino board.
- A few short lengths of wire.
- Solder
- A case for the project. I built one out of Lego, but there's lots of options for this.
Helpful tools:
- A computer with an Arduino development environment installed
- A soldering station
- "helping hands" to hold the GPS shield when doing the soldering
You'll also need to have a place in your car you can hide the tracker, that you can run 12 volts to.
Step 2: Minor Modifications to the GPS Shield

A few small modifications need to be done to the GPS shield. Unfortunately, both boards as sold use pins 7 & 8 for communication, so this conflict needs to be resolved via hardware. Follow these steps
- Break the traces between the TX and RX (transmit and receive) pins and pins 7 & 8. Using a sharp razor blade, cut the traces (embedded wires) on the top side of the shield that connect the TX and RX lines to pins 7 & 8
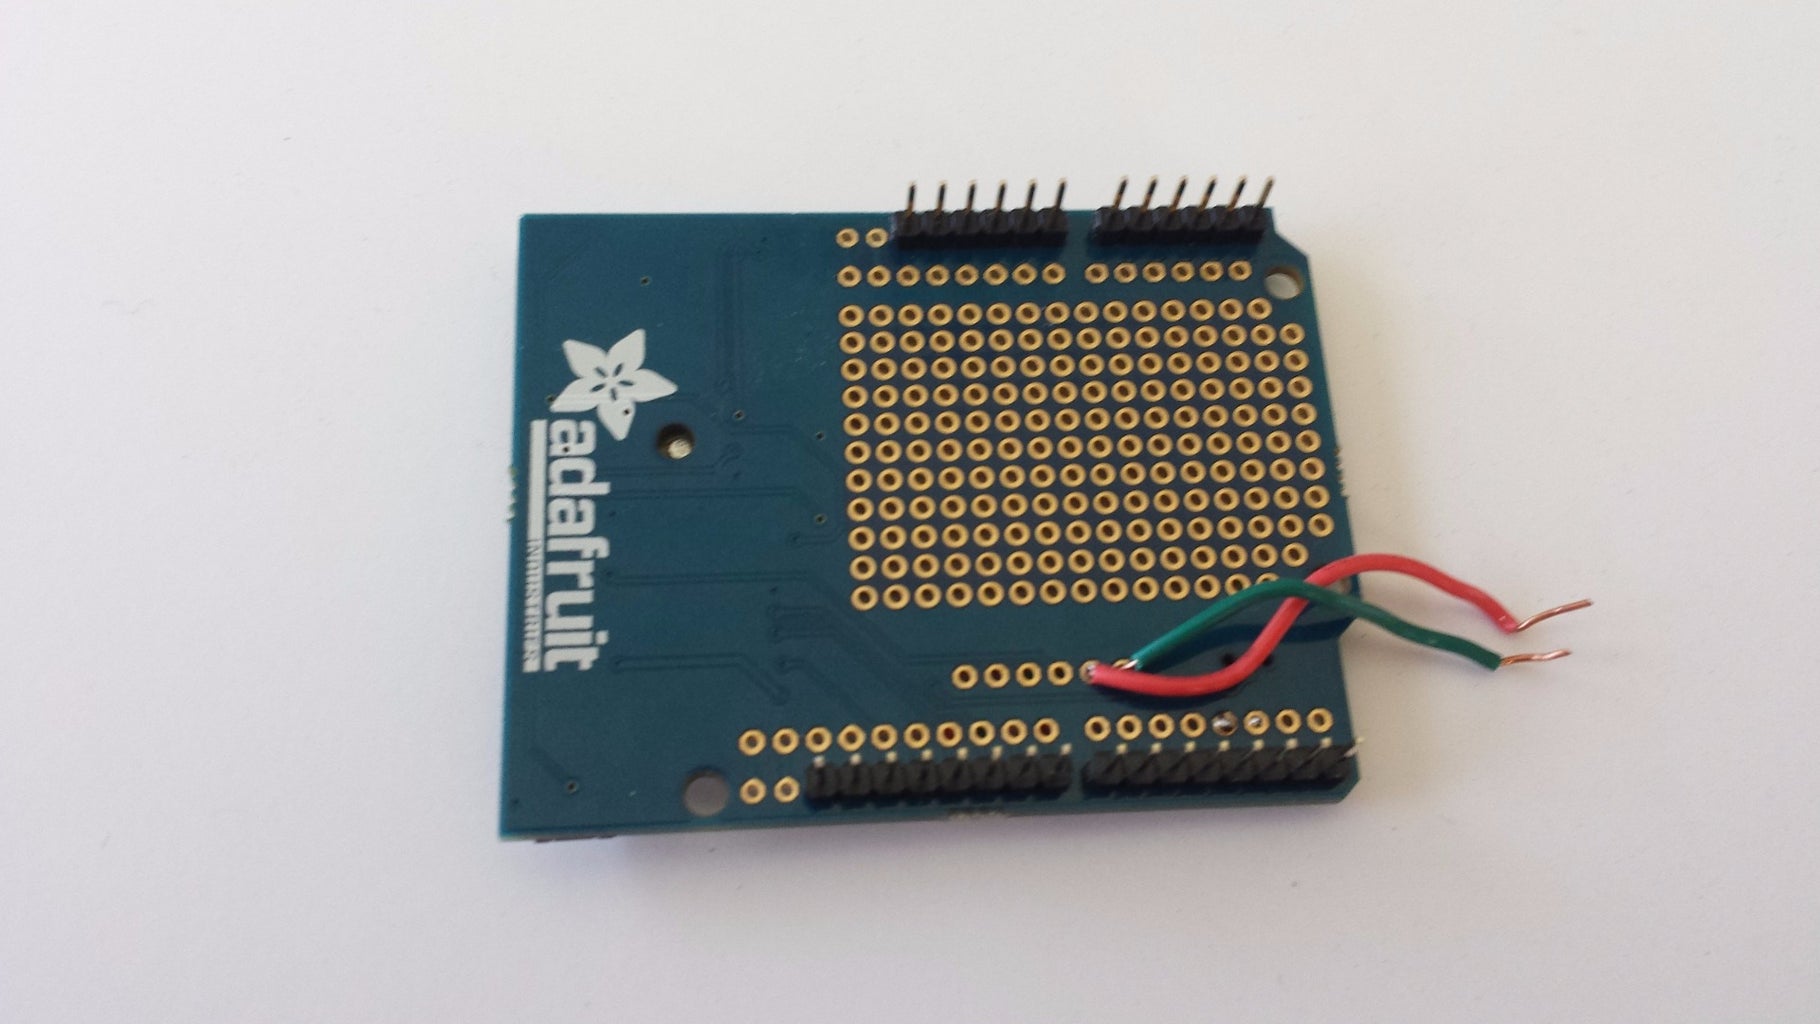
- On the underside of the board, solder a pair of small (about 7cm) wires from the holds next to TX and RX
- I also moved the GPRS serial lines to different pins. On the top side of the board, solder a small piece of wire between pin 7 and pin 10, and another between pin 8 and pin 11.
- Finally, set the switch setting to Soft Serial
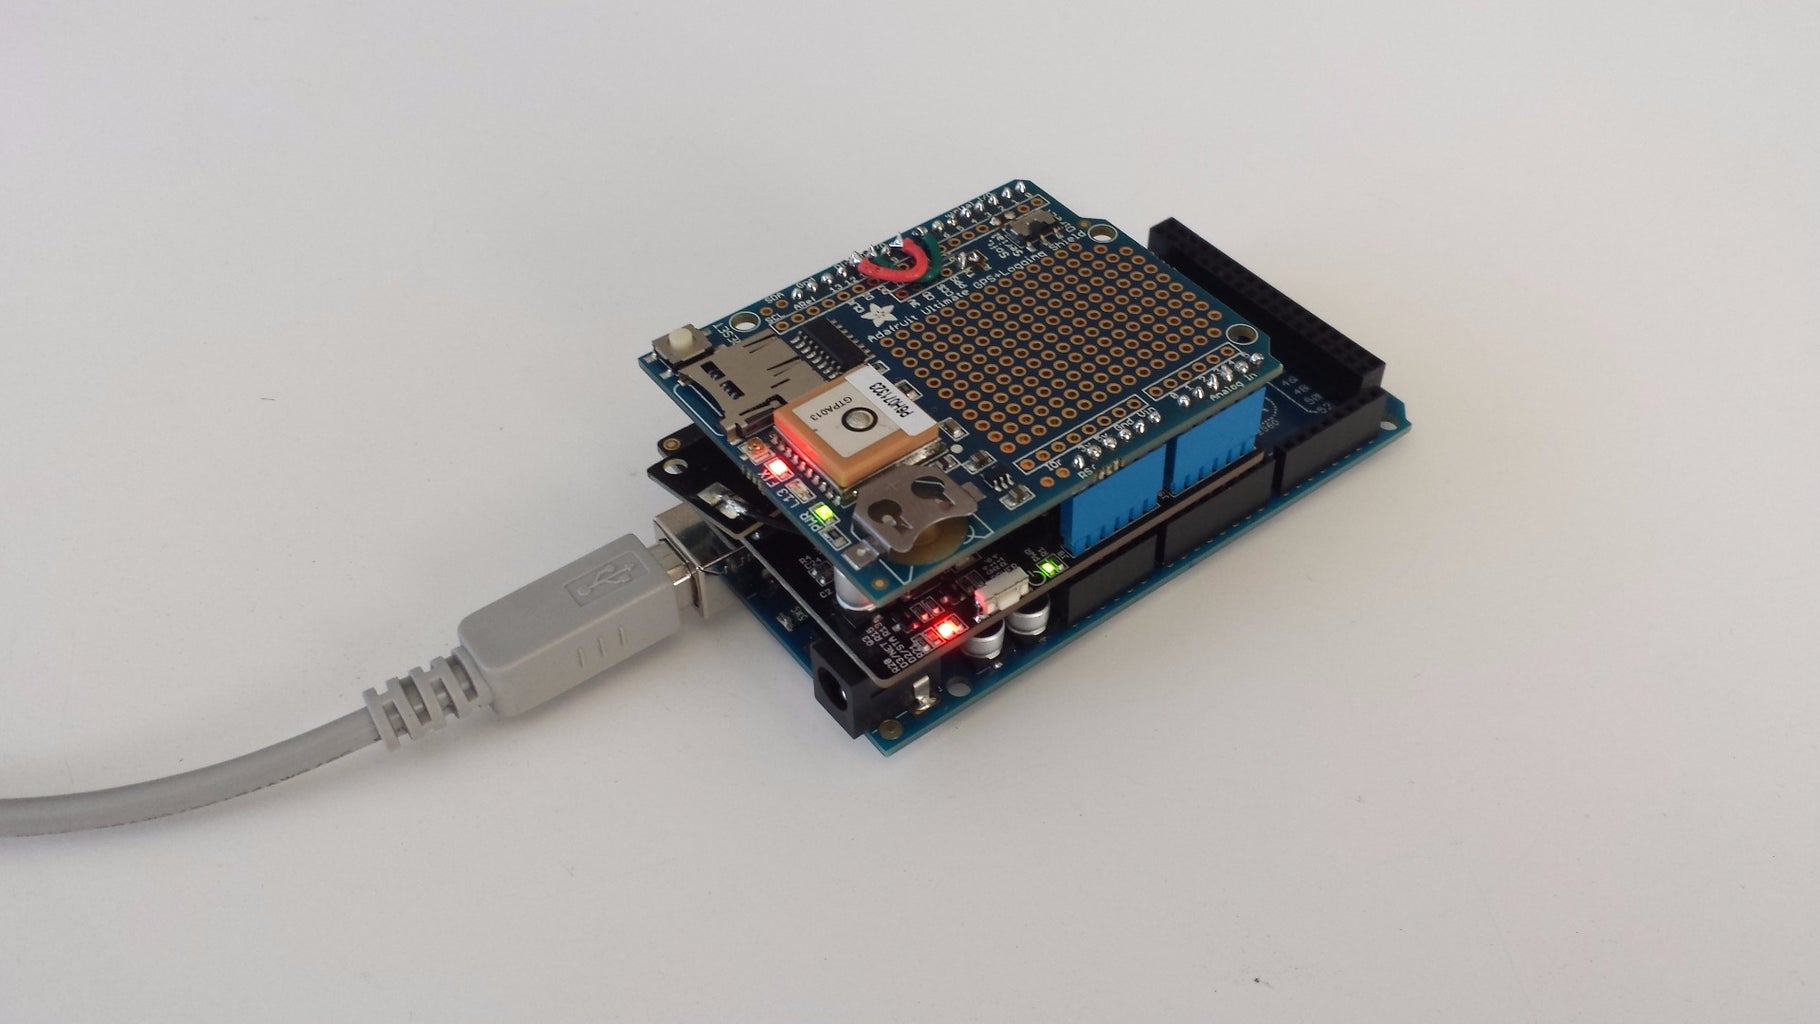
Finally, stack the GPS shield atop the GPRS shield. Insert the wire you soldered onto the TX pin of the GPS board into the header for RX on the Mega, and the wire soldered to the RX pin into the TX header of the mega, and the hardware should be ready to go.
Plug a USB AB cable into the Arduino debug/programming port, and the other into your development computer, and the assorted lights on the stack of hardware should light up appropriately.
Step 3: Programming the Mega
The current code for this project is stored on github, and can be found here:
https://github.com/mbegley/lojack
The code for the arduino mega can be found in the Arduino directory. You will need to modify the code by setting the value of remote_server to the address of your machine on the Internet that will host the web application.
If you are tracking multiple devices you will want to make sure deviceId is unique to each tracker.
You will want to make sure your IDE is set to compile for and deploy to a Mega.
After you deploy this, when you power up the mega two things should happen:
1) the FIX light atop the GPS board should, after several seconds to maybe a couple minutes, stop blinking and stay continuously on, indicating that it has a fix on GPS satellites. It helps to do this outside, or at least near windows.
2) The red power LED on the GPRS shield should light, and the green connect LED will blink about once per second. After the GPRS shield has connected to the cellular network, the green LED will blink about once every three seconds.
At this point, if all is going well, the tracker is determining its location and attempting to upload it to your remote server. We'll get to that part of the project in the next step.
Step 4: Deploying the Web Application
To complete this project, you will need access to a unix/linux machine on the internet where you can deploy PHP code and talk to a MySQL database. There are many different ways to solve this; my solution was to use a virtual machine with linode. Their smallest configuration will suffice. You will want to install apache (or webserver of your choice), PHP and MySQL (or database of your choice). The code on Github assumes apache and MySQL; you may need to modify the code to match your installation.
Create the database called 'lojack' with a user with both read and write access. Create a table called gpsUpdates with the following structure:
- id : int(11) : not null : primary key: default null : auto_increment
- latitude: (decimal(6,4): nullable: default null
- longitude: (decimal(7,4): nullable: default null
- deviceId: int(11) : nullable : default null
- timestamp: timestamp: not nullable: default: current_timestamp:on update CURRENT_TIMESTAMP
The following SQL will create the database in MySQL:
CREATE DATABASE lojack;
USE lojack;
CREATE TABLE lojack(
id INT( 11 ) NOT NULL AUTO_INCREMENT,
latitude decimal( 6,4 ) NULL DEFAULT NULL,
longitude decimal( 7,4 ) NULL DEFAULT NULL,
deviceId INT ( 11 ) NULL DEFAULT NULL,
timestamp TIMESTAMP NOT NULL DEFAULT CURRENT_TIMESTAMP ON UPDATE CURRENT_TIMESTAMP,
PRIMARY KEY ( id ) , UNIQUE (id)
);
Deploy the contents of the website directory to the web root of your web server. Modify Username and Password to the credentials for the user you created.
Step 5: Finishing Up!

At this point, you should be able to navigate to where.php on your webserver. You should see a map with a small icon of a car centered on the location of your tracker!
I finished mine up with a case built out of Lego and hidden in my car. Now, should someone make off with my car, I will be able to track the location and give it to police.
Important! Do not attempt to take your car back yourself. Always work with law enforcement. Tangling with criminals is never a good idea for amateurs - leave it to the professionals!
ALSO: Do not use this project to track someone without their knowledge. That's seriously not cool.
AND: keep the URLs to your car finder private. At some point in the future the app may grow to support some amount of privacy, but for the moment it exposes your car's location to anyone who happens to know the URL.
Step 6: Future Work
There are lots of possibilities for future work on this project:
- Install cameras to photograph and upload to the Internet the surroundings and interior (including occupants) of the car.
- Install a remote kill switch to shut off the car when it's been stolen
- Develop a mobile app so I can easily find my car when I can't remember where I parked it.
- Shrink the hardware to one of the smaller Arduino boards, and connect directly via serial ports to the GPS and GPRS devices. I believe I can get this whole device, including case, to something about the size of a deck of cards with not too much effort.


