

Introduction: Transfiguration Bustle: Color


A bit of Introduction
My daughter and I are "Transfiguration Bustle" one of the teams on Americas Greatest Makers. We have been eliminated from that show but had planned to share our work here anyway. You can watch our pitch to the judges if you are interested.
This is the first of three instructables for Color, Length, and Control of interactive clothing that is affordable. The forth component Power is no more that a well thought out battery pack, plenty of instructables available for that.
What you need to gather to make a color device for your Transfiguration Bustle
The recipe for creating awesome interactive clothing can be simple with the right tools. For the color piece of the Transfiguration Bustle we build on existing tools and resources.
We need the following components that can be purchased or acquired online, or locally
- An Arduino 101, this is the new Arduino type board that include BlueTooth Low Energy (BLE), Real TIme Clock(RTC), and 6 axis accelerometer. We eventually with Transfiguration Bustle take advantage of all these but we will start with the accelerometers for a simple demo. You will need to use the Tools->Board->Board manager to add the Curie Module based Arduino 101. If you don't have the Board Manager option on the screen where you see Arduino Uno, etc then you need a newer version of the Arduino software.
- NeoPixels or similar individually addressable LEDs.
- The NeoPixels or similar example code for your LEDs. For example, in the Arduino software choose File->Examples->Ada Fruit NeoPixel->Strand test.
- The example step counter code for the Arduino 101. For example, in the Arduino software choose File->Examples->Curie IMU->Step Count.
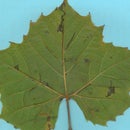
- A 5 left and 5 right leafs 3D Printed light diffusers. This is the piece we designed for this purpose it is available at http://www.thingiverse.com/thing:1337341
Really we are going to blend these two programs together. This seems complicated but really once you see how to do it you can create many interesting projects by blending examples.
Step 1: Test the LED


It is always a clever to start with what works. If you limit yourself to about 5 addressable LEDS you can run this demonstration from your USB port powering the Arduino 101. In the screenshot you can see that it expects the first LED to have its Din pin tied to pin 6 on the Arduino 101.
We are going to blend this code with the step counter code from the Cuire IMU Examples later.
For our limited 5 LED test we will need to change the "60" on line 15 to a "5". This tells the code that you only have 5 LEDS connected in your strip.
The other two wires on the LED are red (5V) and black (GND). This is your power for the LEDS. 5V goes to the 5V and GND goes to GND on the Arduino 101. That's it three wires and you will have control of 5 LEDS. You can hook up more LEDS but you need to provide 5V from another source, like a battery but AdaFruit has a great resource at https://learn.adafruit.com/downloads/pdf/adafruit-... to explain all the details.
If you have blinking colorful lights you are done with this step.
Step 2: Demonstrate the Curie IMU Step Count Example
You need an Arduino101 for this step, and you need to use the Serial Monitor to look at the step count output. Big picture we are going to have the step count change the color pattern on the LED.
Documentation for this example is at http://www.arduino.cc/en/Tutorial/Genuino101Curie...
Load the Curie IMU step count example and compile (checkmark) and upload (arrow) to the Arduino 101. The serial monitor is the spy glass icon in the arduino software, at the top right. Set the serial baud rate (bits per second) to 9600 baud to match the value on on line 42. You have to click on the line to get the number at the lower left of the screen.
The serial monitor should write out step counts for you. To "fake" a step usually a sweeping back and forth motion is needed.
Once you learn how to fake steps with the serial monitor and your Arduino 101 it time to cut and paste code together and make interactive clothing.
Because the Examples CurieIMU is slightly simpler we will use that code to paste together with the neopixel code.
Step 3: Code: All Together Now


This is the simple approach to make interactive clothing that changes color. You are going to copy the "global data", "setup", "loop" and the updateStepCount and eventCallback code from the Curie IMU StepCount to the Strand Test code of the NeoPixel. The text inside the {...} after the word setup or loop. The "global data" is that information that is not inside any function and is available globally, thus its name global data.
The results should look like the pictures, and while you think you might be done we have not really tied the two programs together. To do that we are going to add if statements around the different strand test options.
But for this step just make sure the compile just pasting the two into one. Again the global data, setup, loop and additional functions from the StepCount example into the NeoPixel Strand Test example. You should save your work to a new name at this point. Call it TransfigurationColor for instance.
Step 4: Making the Test Pattern Conditional on Step Count

We added a new variable called count which will store the Curies step count only up to 900 it will roll back to 0 and repeat the sequence.
We added to each line that triggered a sequence to check the value of count. If it is between 0 and 100 colorWipe //Red will be run.
One other important change is we commented out the delay(1000); That means we put the // at the beginning telling the compiler to ignore that line. We don't want our code delaying the test pattern so we just don't need that line anymore.
And there you have it. The pattern on your 5 LEDS should change as you step along with your Arduino 101. Now lets add some diffusion to the LEDS to make them look like something other than a spot of light.
This approach is great for a quick mock-up but when we get to Control you will see that we hide many of the details from the interactive clothing developer so they really only need to describe the different looks of the dress or scarf, and what might happen to make it change to a different look.
Also it is nice to not have abrupt changes. It seems more magical to have a slow transition from one color to the next.
Step 5: Last Step


Arguably this is our favorite step. You are going to need a 3D Printer or access to a 3D printer, but you can use whatever craft supplies you have to make diffusers for the LEDS. We like our Fract Leafs because you can easily design a new one with customizer. Or really add power by downloading the thing and OpenScad a free programming language for 3D shapes and look at how the code works. Arguably the code to make the leaf is far less complex than the code running the LEDS from the IMU.
When you print these we like to use many shells so the pattern of plastic in a single layer makes up concentric boundaries of the shape.
You can also have the 3D printer mirror in the Y axis and you can get the front and back of the diffuser.
We then use a hot glue gun, double stick tape, duct tape what ever we have around to hold the LED inside the two diffusers. Each LED has 4 wires, Din, Dout, 5V and Gnd. We tie all the 5v and GND together and connect them to the 5V and GND on the Arduino 101. We then connect the first Din to pin 6 of the Arduino 101. Next we chain togther connecting the Dout of the first LED to Din of the next. And so on until you have all 5 connected.
If you wanted to use 60 LEDS the process is not much different. Simply connect the power wires together to a battery (remember the Arduino 101 can only power about 5) and then chain Dout to Din with the first Din going to pin 6.
Step 6: Next Steps

While this is a great demonstration of how two examples can be tied together to make a amazing demonstration we wanted to go further. Not just changing the color but the shape or length of the clothing. This has been the most difficult part but it was worth it when we got it working.
Next post will be Length.
Then the Finale will be Control. A way of creating a new programming language inside the Arduino environment that is makes amazing demonstrations easy to create.
Post. Script.
We are not professional writers, and we do not mind at all critique or queries to help clarify. We want to engage with the readers of this post so feel free to reach out to us and ask for help, more details or increased clarity.


