

Introduction: Tuning Fork Clock


Some time ago I succeeded in making an oscillator with a (cheap) 440 Hz tuning fork. See https://www.instructables.com/id/Tuning-Fork-Osci...
I guess this can be seen as an inevitable follow up on that project. What else would one use a stable frequency for, than for a clock. So that's what I did.
EDIT: The code is now available on GitLab:
Step 1: Mounting the Tuning Fork


As I had another tuning fork available (more on that later) I didn't have to take it out of the oscillator. So filed off the metal lump at the end of the new tuning fork and cut thread on it, just as I had done for the first one. Then I made a mounting block out of some scrap metal so that I could mount it on a back plane.
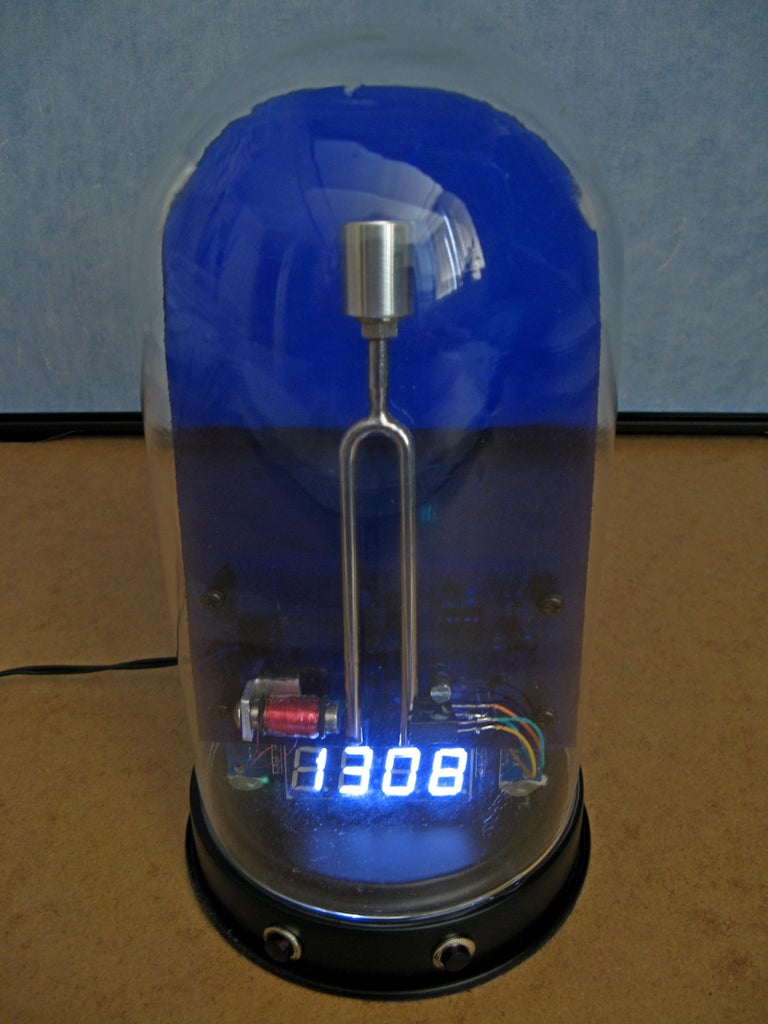
Step 2: The Dome


Now clocks are sometimes placed in a glass dome, probable to prevent dust from coming in, or just because it looks nice. I wanted to have that too. I found one with a lamp in it in a shop called "Action" (that is a kind of pound-shop or dollar-store) After removing the lamp-socket I had a perfect place for my clock. I wanted to have the fork clearly visible, that meant that the clock display itself had to be small but still visible from a distance. I settled for a TM1637 module with 1.4 cm large seven segment displays. The ones I had available were white. That meant that later I could give them any colour I liked by adding a piece of coloured plexiglass.
Step 3: Electronics


The electronics is for the most part the same as for the oscillator I made before. Added to it is a ATTINY13 that takes care of dividing the 440 Hz to one pulse per second, keeping track of time, checking the adjustment buttons and controlling the TM1637. The software is made with AVR Studio 7. I don't think it is possible to use the Arduino software for this micro controller as it have very little flash memory (1 kByte), you could use an ATTINY85, that one has plenty flash memory available (8 kByte).


Step 4: The Right Frequency


Just as I saw with the oscillator, the tuning fork does not produce 440 Hz exactly. I think that for "normal" use such as tuning a guitar it doesn't really matter but for a clock it does. Luckily both my forks were tuned too low. So I could file a little bit off the tines to raise the frequency.
While doing that I accidentally bumped against the handle and broke it off the fork. Now I had to disassemble my oscillator to continue the clock. Unfortunately it had a smaller thread cut on to it, so I also had to make another mounting block. Lesson learned, those cheap tuning forks are not very sturdy.
In the end I managed to get it to produce almost perfect 440 Hz, at 25 Celsius. With rising and falling temperatures the fork lowers en rises in frequency noticably, but not so much as to make the clock unusable.
Step 5: Noise

What does make this particular clock unusable though, is the noise it makes. I mounted the fork on a big piece of plexiglass, that works as a very efficient sound-board. Also the plexiglass is so big that is hard to prevent it from touching the glass dome, again producing more noise. I tried to reduce noise with pieces of cotton but that isn't very effective.
Step 6: Conclusion and Advice
So in the unlikely event that you want to make a tuning fork clock, use a small but sturdy place to mount the fork, make sure it doesn't touch anything and try to isolate vibrations from entering into and through the base. I might do those things to my clock later, but for now I'll leave it like it is and only switch it on when I want to show it to someone or when I just feel like looking at it.


