

Introduction: Turkey Bowl Trophy


This is a traveling trophy that I made for a city recreation department that runs an annual Thanksgiving flag football tournament, or "Turkey Bowl."
A traveling trophy is one that changes hands each time a new annual winner is determined. One of the most famous traveling trophies is hockey's Stanley Cup.
A Lombardi-style trophy with turkey-ball on top seemed like the most logical mix between football and Thanksgiving I could come up with. This a quick look at how I made it.
Step 1: Base


The base was made from three pieces of 1/2-inch medium density fiberboard. The pieces were 18 inches tall, 8 1/2 inches on the bottom, and 2 1/2 inches on the top. The sides were cut at a 30 degree bevel, and the inside bottom edge was cut at about a 5 degree bevel.
The sides were glued together, and a triangular piece of MDF was glued into the bottom of the base. Wood filler was used to clean up the seams. The base was then painted with primer.
A bright aluminum plate was added to the front panel of the base with double-sided tape. The words "VINCE LOMTURKI TROPHY" were etched onto it, along with my recreation department's logo (in the same location as the NFL logo on the Lombardi trophy). This was done by a local trophy shop.
Step 2: Football Construction


Creating a standard-sized football shape perched on (and wrapped around) the top of the base was a little tricky.
Cardboard football-shaped cross-sections were made and hot glued together, and glued onto the base. Some pieces had to be trimmed down and adjusted in various ways to make them fit.
Step 3: Cover Ball With Masking Tape


The entire football structure was covered with a layer of masking tape.
This worked well to create an initial covering, but left obvious ridges that needed to be hidden.
Step 4: Shaping


To create a smooth, rounded, realistic football, wads of newspaper were smooshed into shape and added with masking tape to fill in the valleys and recesses on the ball.
Many additional layers of tape were then added. Stretching the pieces of masking tape slightly as you put them on helps to smooth out and tighten up the shape.
Step 5: Grooves


Grooves were created by cutting into the football with a utility knife, and then re-covering the gaps with masking tape.
Step 6: Legs


Drumsticks were made out of two pieces of 5/8-inch doweling and wads of newspaper wrapped with masking tape.
More newspaper and tape were added and shaped until I was satisfied. The sides of the drumsticks were cut flat, along with a spot on the side of the football. The drumsticks were then glued in place and reinforced with more masking tape.
Thigh meat was added with more newspaper and tape.
I guess I can't call it a football anymore... so I'll call it a turkball. Or a footkey.
Step 7: Wings


Wings were made with wads of newspaper that were shaped and covered in masking tape.
These were glued in place on the turkball and reinforced with more masking tape.
Step 8: Cover the Turkball With PMF


Paper mache is cheap, non-toxic, and it creates a hard, smooth covering.
It's the poor man's fiberglass. PMF.
Step 9: Laces and Sealing


Laces were added by gluing down strips of cardboard. White glue was added around the edges to create a smooth look.
The wing tips were glued down so they wouldn't flare out so much.
The entire turkball was painted with many coats of brush-on craft gloss. It was sanded a couple of times with 220 between coats, which smoothed out the little bumps in the newspaper.
The gloss sealed the paper, preparing it for a good paint job.
Step 10: Priming


After the first coat of primer, the turkball was sanded again with 220, and wood filler was used to fill in some small holes and gaps. Then I resealed it with the brush-on gloss. This gave it a pretty smooth surface that I was quite pleased with.
Then the whole thing got two more coats of primer.
Step 11: Finish Painting

I initially painted it with silver paint (2nd photo). It looked okay.
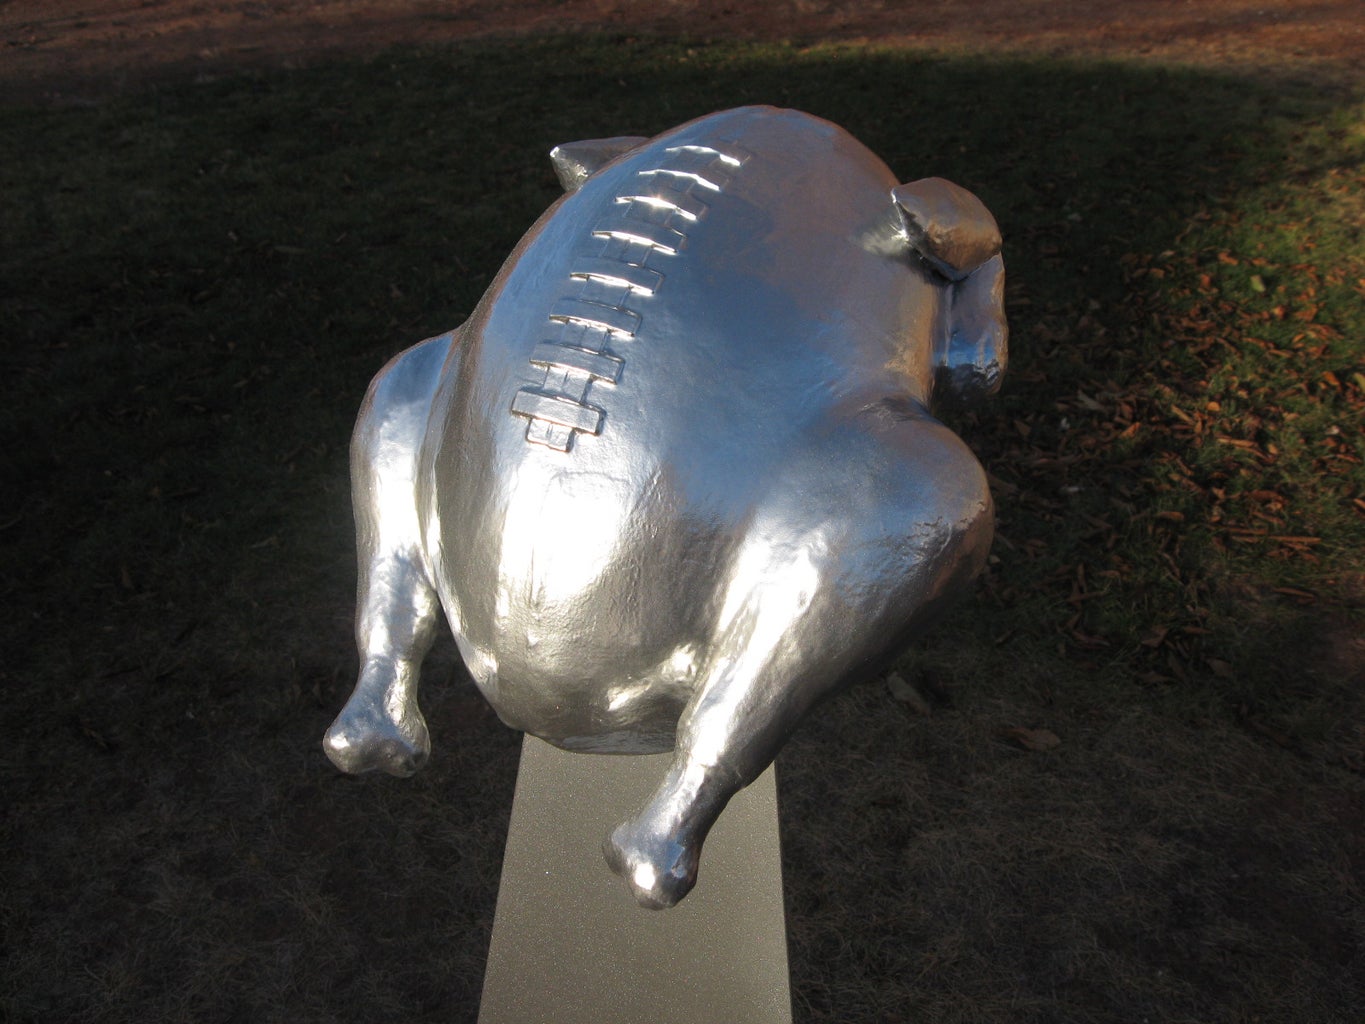
But then I got some chrome paint, which gave it a more reflective, shiny metallic look. You can actually see my reflection on the turkey (to the left of the right drumstick), along with the blue sky, some clouds and some tree branches.
I think the chrome made this look totally awesome. That's it!


