

Introduction: Turn Your 12V DC or 85-265V AC Fluorescent Light to LED - Part 2 (External Appearance)


This is Part 2 of my instructions for taking a fluorescent light fixture, converting it to LED, and making it more visually appealing. In Part 1 I went over the internal details of installing the LEDs and getting them hooked up. In this part, I will go over constructing a box out of bamboo to surround the LED fixture and making a piece of acrylic to cover the LEDs.
Step 1: Tools & Materials
Tools
Saw (circular, jig, etc)
Screw driver
Drill
Materials
Bamboo or other wood (I used left over 3/4" bamboo plywood)
L brackets
Acrylic (ACE Hardware will cut a sheet to your specs for width*height(in inches)*0.02 = $)
Screws (for L brackets and to hold on the acrylic)
Metal with holes in it for mounting (I used something similar to this but made of steel)
Rust-oleum Frosted Glass spray
Step 2: Measure & Cut Your Wood


I measured my light fixture and made everything my cuts just a little longer than necessary. I then sanded everything and laid them on a table in the way that they will go together.
Step 3: Place L Brackets, Pipe Hanger, and Switch Hole


I started by using the L brackets to secure each piece of wood to the next. I did this by placing the L bracket where I wanted it (see below), marking the position, drilling a pilot hole, and then screwing the bracket into place.
I then cut the pipe hanger into 2 pieces and placed it on the wood on the side that would be next to the ceiling once installed. I drilled and then screwed them into place.
Finally, I drilled out a hole for the switch I installed in Part 1. Unfortunately, I drilled out the hole a little bigger than necessary (as you will see on the following pages).
Step 4: Mount the Box

There are two ways that I could have mounted the box:
1.) With the lighting fixture completely disconnected and removed from the ceiling, screw the pipe hanger directly into the ceiling (I would use 4 screws, as close to the edges of the box as possible).
or
2.) Again, with the lighting fixture completely disconnected and removed, place the box against the ceiling. Next place the lighting fixture inside the box and hold both against the ceiling. Then screw the light fixture into the ceiling, using the original screws. This is the route I went.
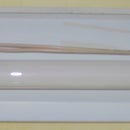
Step 5: Add the Acrylic


I took the acrylic sheet I got from ACE Hardware and drilled holes midway along each of the four sides for attaching it to the bamboo box. If you're not careful, you can easily crack your acrylic while drilling it. I used my drill on the fastest speed it was capable of and went VERY slowly.
Once drilled, I washed the acrylic thoroughly and sprayed it with Rust-oleum Frosted Glass spray. You can do as many coats as you like (depending on how much of a frost effect you want).
After the acrylic was completely dry, I drilled pilot holes in the bamboo box and screwed the acrylic to it.
Step 6: Done


Turn on the switch and enjoy!


