Introduction: Untouchable PAD
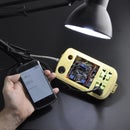
This tutorial explains how to set up and assemble the hardware to get started building your own tablet / pad. This amazing flawed by design but extremely unusable tablet was design mainly for academic purposes, but due to it's extreme upgradability I decided to post it here. However future tutorials will explain further other uses or upgrades for the flawed design and improved unnusability(comment plz). Main points cover the hardware parts, the assembly process and a brief explanation of the software, the possibilities and the alternatives found.
The hardware kept in mind quick assembly and ease. Considering other options on the market, I see it as best fit. Ask the local hackerspace for help if you don't own a printer, maybe they can help!. Otherwise, write a comment, I might have parts printed.
The GPIOs are left unused for now, since we are focused on hands on building a developing / playing platform, but in the latest case design the pins are left exposed under a removable lid. Adding a layer or connecting sensors to pins to expand it further is not a problem.
Step 1: The Parts
- 7 inch Display (it's quite big already!)
- Cubieboard 2 (fast, lots of pins and support)
- Printed parts ( Display case, electronics case Attached here)
- barrel jacks and wires
- DC to DC power regulator
- Battery
- M3 screws and nuts
For controller board, I would've gone with cubietruck. Including BT and wifi, but I was afraid of the big size and cost. A wifi dongle would fix this problem easily. Raspberry pi for me has several problems. No internal memory, you must need SD card!! No SATA (anyway this is out of scope). Performance is not good enough, not bad for some stuff, but just not enough for the display LCD project. A lot of sources are not accessible, I don't really know the details tho. Thanks to Linux sunxi amazing efforts and Cubian and other distros that make this a very fun product to play with. However, for all the new comers, get a linux book and do a lot of reading and be patient.
Alternatively, a touch screen is probably a great idea, but.. any suggestions? Is it useful? I mean, if really want tablet features, Dont try this! Just head to the mall and buy one.
Attached is the LCD case STL. Print and get enough screws.
Attachments
Step 2: LCD and Electronics Case
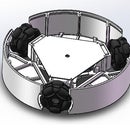
The case holds the idea to make it modular, each part protected and isolated. A base case for the LCD that can be used standalone, and a case for the main electronics. Since one of the objectives is to keep it modular and repurposable for other projects many other things that could be considered very important are not kept. The LCD wires and components are easy to fall apart or break, so the standalone case was a must. This way I can sit it on my main PC desk, or added to the second layer of the project, or simply attach it to one of my robots to display data.
The separated electronics layer basically consist on a main PC board, battery and power distribution. Since the LCD case needs the connectors to be external, the second layer, for Cubieboard has the connector external. It's a bit annoying to have the cable holding outside, but ultimately, the designs are up online and if anyone wants it internal just move the board inside and make a hole between layers, please share if you do! This case was meant for a quick printed run, and might need some work around the edges, again, share..
I decided to play a little with the amazing USB features of Arduino Leonardo. I am adding a “mouse gaming" controller for this project to be able to input easily and and build on top of it a software to use as a remote controller.
I found VGA woking much better for RPi and a windows machine. But with Cubieboard HDMI is good. The FCC wire is very fragile, so the case works like a charm. If you set it all up well, you don't want to open it up again. Careful with the FCC pins not to be shorted with the aluminum case, make sure is pushed all the way in. At first seems like about 1mm clicks in, but a slight push will let you get it about 3 or 4 mm inside. Clip it and glue it all up, to make it shake proof.
I printed it all with on Dream Maker
Step 3: Wires and Screws
- M3*6 20pcs
- M3*16 4pcs
- M3*30 6pcs
Local store should have them, I have a pack of them already, so just grabbed them out of the box. Same goes for the wires. However, you should be able to DIY a wire easily. I got a few DIY wires, and added them on the picture. The barrels I got a nice pack from here. Very convenient to have them at reach. The HDMI is very easy to come by as well.
Step 4: The Software (brief)
I am not going into details, since this could get easily to overkill and is very well documented. Android comes preinstalled and should work as well. You can probably play games out of the box with the DIY controller. To keep it as simple as possible, we are just coding an Arduino for controller on this tutorial.
I went for Cubian, it's great at the time of writing this. But you can keep the Android on it or use something else you like. Feel free to ask any questions, but don't expect full answers if you have trouble with OS. Probably better if you go to the right forum. If you are planning to attach modules and things to the pins, make sure to review the pin mappings and gpio usage on Linux.
Check out the tutorial page to get it started. It is quite straight forward.
For the purpose of this guide, we will add a joystick and a couple of buttons. To ease the controller issue and give it a sense of portability. If you need other simple method of input, try an IR sensor. Osin and I really wanted to do it with a gyro, but after considering the costs they joystick does the trick. If you want to control the mouse with the gyro it should be a few of lines edit to the original code. Back to the point, the code is almost as simple as fire up the Arduino IDE, open the joystick leonardo USB example and edit a couple of lines. Consider the warnings on the comments. The plug on the Cubieboard.
Step 5: The LCD Assembly
Screws and nuts for the LCD, the case and the lcd buttons.
Place the driver board and the buttons on the socket as in the picture, screw them into place. If you've printed the part, you will need to file the edges of the printed part as well. But bear in mind. The buttons are not easily accesible. Why? Because we need them just once. After you have selected the Input method, there is no need of using this buttons. It works like the LCD for a desktop computer. Do you use those buttons everyday? We wanted this kind of “portable” so these buttons pose more of a danger than anything else
Step 6: Top Layer
You will use 6 Screws, the mounting holes pretty much explain the hole thing. The board fits well on the mounting holes. Place the LCD first from the bottom side, where it has no aluminum tape, and then the top side will just sit on the socket.
Step 7: The LCD Lock
This part is used to lock the LCD so it does not fall over when you move it around. I thing is best to screw it, on top of the LCD and leave it like that since we don't need to connect anything else. Thus, protecting the wires.
Step 8: The Second Layer, Power
The power board and Cubieboard sit on well, but in order to snap on, you need to place first the power board then the Cubieboard starting from the USB connector. You might need to bend a little the Infrared receiver when you do so.
Step 9: The Second Layer, Cubieboard and Power
For now this is how it should look like. If you need the ethernet port, cut the wall next to the battery socket and plug it in before screwing the wires.
Step 10: Battery Lid
The battery lid goes to the bottom and should be screwed at the end. When you connect both top and bottom layers.
Step 11: The Arduino Code
This step is fairly straight forward, connect your Leonardo board and upload one of the example sketches for USB Leonardo. I've edited for the pins I need. I wanted to use DFRobot nova, but I could not find it without the kit. Would've being nice to use the accelerometer as mouse and just add a couple of buttons. Anyway, here it is if you want to check. Comments explains it all.
<p>/*<br>  JoystickMouseControl

 Controls the mouse from a joystick on an Arduino Leonardo.
 Uses a pushbutton to turn on and off mouse control, and
 a second pushbutton to click the left mouse button

 Hardware:
 * 2-axis joystick connected to pins A0 and A1
 * pushbuttons connected to pin D2 and D3

 The mouse movement is always relative. This sketch reads
 two analog inputs that range from 0 to 1023 (or less on either end)
 and translates them into ranges of -6 to 6.
 The sketch assumes that the joystick resting values are around the
 middle of the range, but that they vary within a threshold.

 WARNING:  When you use the Mouse.move() command, the Arduino takes
 over your mouse!  Make sure you have control before you use the command.
 This sketch includes a pushbutton to toggle the mouse control state, so
 you can turn on and off mouse control.

 created 15 Sept 2011
 updated 28 Mar 2012
 by Tom Igoe

 this code is in the public domain

 *</p><p>/ set pin numbers for switch, joystick axes, and LED:
const int switchPin = 4;      // switch to turn on and off mouse control
const int mouseButton = 3;    // input pin for the mouse pushButton
const int xAxis = A0;         // joystick X axis
const int yAxis = A1;         // joystick Y axis
const int ledPin = 13;         // Mouse control LED </p><p>// parameters for reading the joystick:
int range = 12;               // output range of X or Y movement
int responseDelay = 5;        // response delay of the mouse, in ms
int threshold = range/4;      // resting threshold
int center = range/2;         // resting position value</p><p>boolean mouseIsActive = false;    // whether or not to control the mouse
int lastSwitchState = LOW;        // previous switch state</p><p>void setup() {
  pinMode(switchPin, INPUT);       // the switch pin
  pinMode(ledPin, OUTPUT);         // the LED pin
 // take control of the mouse:
  Mouse.begin();
}</p><p>void loop() {
  // read the switch:
  int switchState = digitalRead(switchPin);
  // if it's changed and it's high, toggle the mouse state:
  if (switchState != lastSwitchState) {
    if (switchState == HIGH) {
      mouseIsActive = !mouseIsActive;
      // turn on LED to indicate mouse state:
      digitalWrite(ledPin, mouseIsActive);
    }
  }
  // save switch state for next comparison:
  lastSwitchState = switchState;</p><p>  // read and scale the two axes:
  int xReading = readAxis(A0);
  int yReading = readAxis(A1);</p><p>  // if the mouse control state is active, move the mouse:
  if (mouseIsActive) {
    Mouse.move(xReading, yReading, 0);
  }  </p><p>  // read the mouse button and click or not click:
  // if the mouse button is pressed:
  if (digitalRead(mouseButton) == HIGH) {
    // if the mouse is not pressed, press it:
    if (!Mouse.isPressed(MOUSE_LEFT)) {
      Mouse.press(MOUSE_LEFT);
    }
  }
  // else the mouse button is not pressed:
  else {
    // if the mouse is pressed, release it:
    if (Mouse.isPressed(MOUSE_LEFT)) {
      Mouse.release(MOUSE_LEFT);
    }
  }</p><p>  delay(responseDelay);
}</p><p>/*
  reads an axis (0 or 1 for x or y) and scales the
 analog input range to a range from 0 to <range>
 */</range></p><p>int readAxis(int thisAxis) {
  // read the analog input:
  int reading = analogRead(thisAxis);</p><p>  // map the reading from the analog input range to the output range:
  reading = map(reading, 0, 1023, 0, range);</p><p>  // if the output reading is outside from the
  // rest position threshold,  use it:
  int distance = reading - center;</p><p>  if (abs(distance) < threshold) {
    distance = 0;
  } </p><p>  // return the distance for this axis:
  return distance;
}</p>
Just Plug on the USB and is ready to use.
Step 12: That's It Folks!
Currently, as it is might be quite useless. I really wanted to add a IR sensor that turns it off when you get close to make it even more useful. But there are quite a lot of ideas going on. A Phablet for instance. Connect the Arduino with the GPRS and GPS shield would make it quite interesting.
We thought of adding a extension case, to add the joystick and buttons to make it like a playable game console thing.
Another option would be to connect it with Xbee to a robot for a sensor and process monitoring or even controlling via push buttons.
Note, in order for processing to work for those interested on using the Lidar / radar system on the monitoring:
rm ~/processing-2.2.1/java
ln -s /usr/lib/jvm/java-7-oracle ~/processing-2.2.1/java
attached are couple of vids


