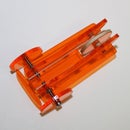
Introduction: Walking on Water: Start Building a StriderBot
This experiment was inspired by the "robots walking on water" from Carnegie Mellon University (CMU).
CMU's robots are called STRIDE, for Surface Tension based Robotic Insect Dynamic Explorer. They mimic the way water strider insects "walk" on water.
I wanted to see how difficult it is to make a "robot" that moves on top of the water surface, purely based on surface tension. I found out that recreating the principle is not hard at all.
When carefully putting the construction on the water, the surface tension keeps it on top. When disturbed, the construction sinks, proving it is really the surface tension that does the trick.
The vibration of pager motor gives it some rudimentary propulsion (both on land and on water actually).
I hope this experiment inspires you and I look forward to hear what you can do with it. And of course, your vote is welcome.
Step 1: Materials
You need a material that is light and stiff, somewhat hydrophobic and available in shapes giving a lot of "contact edge".
A test showed that the small diameter carbon fiber reinforced rods work fine. You can find these "carbon" rods at modeling shops stocking indoor flying materials. I used two 0.8mm diameter rods, about 1 m in length. The more commonly available 1 mm diameter rods are probably also worth a try.
The other materials used are:
A small a pager motor
A small 1.5V button cell battery
Some scotch tape
A tiny piece of double sided tape
Step 2: Basic Construction
The rods are bent and kept in shape by attaching them to each other with ordinary scotch tape. At the center "node" I made support with some more scotch tape, keeping motor and battery out of the water. The motor was fixed with a tiny piece double side tape, making sure the excenter weight turns freely. The motor leads had their electric insulation removed over a couple of mm and each one is taped to one pole of the battery. I learned this method from the "Evil Mad Scientist BristleBot".
Step 3: Further Devellopment
In a first attempt to improve the propulsion somewhat I added som some small scotch tape "fins" to the back "legs". This gives indeed a slightly more noticeable forward movement when testing in the pool. This can probably be improved by repositioning the motor on a "leg" rather than on an "node". But to keep it on top, this needs a more elaborate fixing of the motor than what I had available at the poolside. This also needs some testing in order not to upset the weight distribution to much. Something for a next attempt.
With the nice ripple pattern generated, the construction makes a simple kinetic art bot. In a next stage, the principle could form the basis for an aquatic BEAM, by adding some sensory input controlling two differently oriented pager motors. You can compensate for the extra weight (we are talking of grams of course) by adding extra carbon fiber rods.
With the nice ripple pattern generated, the construction makes a simple kinetic art bot. In a next stage, the principle could form the basis for an aquatic BEAM, by adding some sensory input controlling two differently oriented pager motors. You can compensate for the extra weight (we are talking of grams of course) by adding extra carbon fiber rods.


