Introduction: Waste Oil Furnace for Melting Metal
Four things inspired me to try an oil fired foundry.Detailed instructions on the net,gallons of oil in my garage from changing my own oil, hassles and cost of constantly filling my propane tank and my recent discovery of an endless source of free oil/gas mix removed from vehicles that are being crushed.
Step 1: The Parts Needed
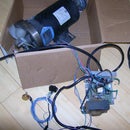
I found This cast iron pipe fitting at the salvage yard. The blower was also salvaged and the intake and exhaust nipples are pipe nipples I had to buy. I drip the oil down from the top center and have the fan on bottom with the hot flame coming out the top. I preheat the double ended stainless steel cone shaped jigger with my torch for two minutes through the removeable-blower hole until it is glowing red hot ,start the oil dripping and quickly remove the torch and add the blower. A permanent built in Torch head for pre-heat might work better. The blower is controlled with a house lamp dimmer for varying degrees of hi-lo (not recommended for inductance motors). After I was sure the contraption would work I encased it in a can rammed full of refractory
Step 2: It Works
The heat is intense! It's good to do a dry run to see what works best before you permanently bury it in concrete-like refractory.
Step 3: The Reservoir
The fuel storage tank was an empty freon tank recovered from the junk yard. I welded on some removeable legs to elevate it and found fittings to adapt the tank to a ice maker needle valve. The valve has a compression fitting on one end to attach the 1/4 o.d. poly tubing. The valve plugged on the first use so I had to dissasemble and add a 3" long 1/4" o.d. copper tubing standpipe to the nipple that threads through the tank. This keeps the furnace from feeding off the bottom of the tank. Much easier than filtering. This will require a dipstick to calculate the useable fuel level as there will always be some unuseable fuel now
Step 4: The Outer Shell
The inner combustion chamber is shown encased. Christmas Popcorn Tins work good for the outer shell. The refractory material is rammed all around the chamber to insulate on all sides. The blower is removeable for pre-heatingt with the Propane torch.
Step 5: The Burner in Action
Here it is in action. It is blowing the heat into my Furnace melting the metal inside. The metal is usually in a crucible of sorts.
Step 6: Too Hot
It is pictured idling here with a small but sustainable flame. I had to turn it down because within 15 minutes the threaded brass plug and the exhaust nipple began to glow red hot on full throttle. This leads me to believe the entire contraption is bound to self destruct as it reaches the melting point of both brass and cast iron. For this reason my next combustion chamber will be all refractory material incorporating the same pre-heated stainless steel shot glass to vaporize the oil. For now I will use this contraption until my self-destruction prediction comes true.
Step 7: The First Melt
It works!


