

Introduction: Wine Bottle Corks Into a Trivet


Our family has been saving our wine corks for a while... At least a week... What to do with all of them. Some are pretty, some clever, some broken.
Seen others make trivets.
I have the corks...
I have the tools...
I have a helper...
Lets begin.
Step 1 (not pictured) - drink a lot of wine, keep the corks. For this step I recommend using a variety of friends and relatives. If you choose to take on this step alone you may be interested in a certain 12 step program.
Many wine bottles have synthetic corks - these are worthless for trivets - only keep the natural corks. Many wine bottles have screw tops - never tried to make a trivet out of these, but I doubt it would be very successful. Many wines come in boxes - never known a box to have a cork
Step 1: Arrange the Corks


This is the most entertaining part. Spread out your corks to see what you are working with - try to remember which ones you preferred, finding the most common corks - a pretty good indicator of your favorites.
With our collection we ended up arranging them for 3 trivets. One small, one medium, and a larger one.
My personal favorite is the first one - three rows of one light cork oriented vertical and 4 dark corks horizontal.
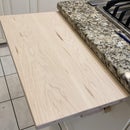
Step 2: Measure the Base


My base is some scrap of quarter inch plywood. Need to know how to dimension it.
Wanted the base to be about 3/8 inch proud of the corks to allow it to fit into the frame. So eyeballed the size of the cork arrangement and added 3/4 inch.
Went to the table saw and cut the 3 bases... (I personally will NOT use any power tools while under the influence of wine, and strongly suggest you refrain from tools if not fully in control of your faculties).
Step 3: Glue Corks to Base


Now that the corks are arranged...
And the bases are cut...
Time to introduce the corks to the base, and make the relationship permanent.
I used plain 'ol yellow wood glue. I made some trivets several years ago (used my mom's corks) and after several years of use none of the corks have decided to liberate themselves from the base. Based on this experience wood glue seems to hold pretty well on cork. My helper is spreading the glue - just used a plastic fork to smear the glue around.
I used a liberal amount of glue - then spread to cover the base (leaving about 3/8 free of glue).
Place the corks in the bed of glue. Don't have to press too hard, just slide the corks around a bit to make sure the cork has coverage.
No way to clamp anything, so I just set the 3 trivet assemblies aside overnight.
Maybe have some time to start a new cork assembly.
Step 4: The Frame


Had some alder left over from a previous project. Ripped it down to 3/4 strips. Alder is fairly knotty, so I cut quite a bit extra to account for waste, and the possible mis-cut.
Pictured are a few of the roughed out pieces of Alder. Also the dadoing bit to cut the slot to receive the plywood.
Also took a picture of the rounding bit to finish the edge of the trivet. This particular rounding bit is a 'thumbnail' bit, I have used it to finish tabletops - seemed like my best option for this project.
After milling the dado and the rounding I sanded to 220 and applied a couple coats of stain. In this case I decided to pre-stain the frame because I didn't want to slop stain on the corks. Forgot to take a picture of the stained framing material.
Step 5: Cutting the Frame and Fitting.


This is the tricky bit.
Since the corks are far from square.
And they are less than perfectly aligned on the base.
Makes it difficult to measure a decent miter.
My approach to cutting the mitered frame was to lay my square across the corks and mark the edges on all 4 sides. after this step there is a little 'x' on all 4 corners. I measured the distance between the x's on opposite sides and took the longer of the measurements for both sides. All of little 'x's were pretty close to the same length so I must have done a decent job of putting my square across the corks.
Cut all 16 sides to their correct length. I used my chop saw to accomplish this task, so no wine was harmed during this step.
Step 6: Gluing the Frame

Glue the frame to the base. Pretty straight forward if all the sides are the correct length. If the sides are not the right length, guess that is where the extra framing material comes in handy.
I had 3 frames to glue, just needed enough tension to hold the frame in place while the glue dried.
I have plenty of inner tubes laying around - decided to use these as a 'tension clamp'.
Tied a square knot in the tube short enough to allow plenty of tension when I put the tube around the frame. Don't know how to tie a square knot, ask a boy scout.
Step 7: Finished Products


Wiped a bit of touch-up stain over a couple chips from my chop saw and these are now ready for use.
I still like the small one, think I'll keep that one for myself and give the others to the friends and relatives that helped me acquire the corks.
We have been using one of these cork trivets for many years. After placing many items from the oven or grill directly on the cork there is no sign of scorching. Cork is an excellent heat insulator, and amazingly durable. I suspect these will last for many years with routine use.
I'm certainly not the first to make a cork trivet from bottles, also not the most talented, but hopefully you enjoyed this instructable and maybe picked up either an idea or inspiration.
Involve your loved ones with your craft projects and you will find them more enjoyable - the same can be said of your wine consumption.

Participated in the
Trash to Treasure Contest 2017


