

Introduction: Wood TV Remote


This is one of my favorite projects yet! I flip a boring plastic TV remote into a two-toned wooden beef stick. And what did I use for a battery cover? Another remote of course! It's two remotes in one held together with magnets!
Step 1: Photograph or Scan

If you have a flatbed scanner that's the preferred way of doing this. If not a camera and some grid paper will do. You can use the grid to fix the skewing and perspective in Adobe Illustrator.
Step 2: Trace and Draw

Using Adobe Illustrator or Inkscape, trace and draw all the buttons on the remote. All areas in black will be cut out.
Step 3: Gutting

You're now done with the old remote and can gut it for parts.
Step 4: Drawing the Enclosure

Now you can draw the enclosure for CNCing. Here I'm using VCarve Desktop but this can also be done in Fusion 360. I'm still working on my Fusion 360 chops and I'm sure this will be my preferred software in the near future.
Step 5: 3D Carve Away

I'm using my X-Carve by Inventables to CNC the enclosure. Notice there's a hole for the battery holder, a pocket for the electronics and a lip for the circuit board to friction fit into.
Step 6: Battery Holder

You could cut out the battery holder from the original case but to make customizing easier I'm using a battery holder from RadioShack. I've hot glued it to the back of the circuit board and soldered the wires.
Step 7: Setting Up the Laser

You can now import your vectors into the laser software. I'm using a speed of 30 and a power of 100 to cut through the 1/8" wood.
Step 8: Vector Cutting the Top

For the top I'm using an exotic piece of veneer (species unknown) glued down to a thin piece of cherry. The total thickness is about 1/8" thick.
Step 9: CNCing the Back

For my remote the battery cover will also house an Apple TV remote. This will serve as double duty and keep the tiny Apple TV remote from getting lost in the cushions.
Step 10: Add Magnets

The bottom/back will be attached with 1/4" magnets superglued into place.
Step 11: Chamfer Edges

To thin down the overall look I'm adding a chamfer to the bottom piece.
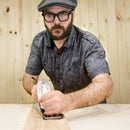
Step 12: Finishing

To bring out the beauty of the walnut I added a coat of boiled linseed oil followed by a couple coats of spray lacquer.
Step 13: Piecing It All Together

I found that all the pieces friction fitted in perfectly. You could also use hot glue if needed.
Step 14: That's It!


I'm really happy with the way this came out! You might find helpful details in the video build of this project.


