

Introduction: Wood Coasters


Rustic wood coasters made from a fallen tree, when stacked together look like a tree limb. Simple, tidy, and fun!
Instead of burning that old tree in the backyard, reuse it and make it into something awesome! These stackable coasters align on a spindle attached to the bottom coaster and are a great way to protect your table top. Making your own is super easy, and a great way to give an old tree a new life.
Ready? Let's make!
Step 1: Tree Limb


There was a an oak tree in my neighbourhood that had a few dead limbs. Because the tree was near power lines the city came by to trim the dead branches. I happened to be nearby when they were working and asked to keep a few of the larger sections of branch arms.
The tree limbs had been dead a long time, so the wood was
already dry. You’ll need wood with a moisture content of about 10% or less to
avoid the wood splitting after you work with it (ideally 6-8%). You can check the moisture content of wood by using a moisture meter![]() . If you have 'greener' wood here's a great Instructable for drying wood at home.
. If you have 'greener' wood here's a great Instructable for drying wood at home.
Using a handsaw I chopped the oak branches down into a manageable length and then brought it into the workshopshop. To make these rustic coasters we'll need a tree branch that has a diameter larger than beer bottle, that way it can accommodate all types of drink containers, like wide mason jars.
Step 2: Measure

I wanted thick coasters so that when they are stacked it looks like a big section of wood. I roughly measured out that each coaster would be about 1 ½”.
Step 3: Cut Branches


Setting up a stop block on the chop saw that matched the thickness of the coasters I carefully cut the branch into 1 ½” pucks.
Step 4: Drill Dowel Opening


In order to line up the coasters when they are stacked a matching reference hole is drilled into each piece which will have a dowel in it. The bottom coaster will have an opening drilled only halfway through, which will house the dowel to align all stacked coasters on top.
I used a forsner drill bit that was slightly larger than the ½” diameter dowel I was using so the coasters could easily slide off. After drilling the first hole in the top puck, stack and align the next piece and carefully mark the opening. This will allow your pice to line up perfectly when stacked.
On the bottom coaster I used a matching ½” forsner bit, and only drilled halfway through, so that the dowel would fit tightly. Drill carefully and not too close to the edge so that the wood pucks don't break.
Step 5: Glue Dowel

After drilling the dowel can be glued into the bottom coaster. This coaster will be the spindle that the other coasters will stack on top of.
Step 6: Stack Coasters


After the glue has dried on the dowel in bottom coaster stack the remaining pucks in order on top. We'll need to trim the dowel flush at the top coaster.
Step 7: Flush Cut


Using a flush cutting saw I trimmed the dowel to match the top coaster, careful not to gauge the top coaster with the sawing action.
If desired you can sand the surface of the coasters. My coasters were in good shape from the chop saw and didn't require any additional sanding.
Step 8: Finish


I coated each coaster with Danish Oil, which really brought out the grain and helped seal the wood against the moisture they would inevitably come in contact with. I applied 2 coasts of oil, allowing about 30 minutes between coats, excess oil was wiped clean.
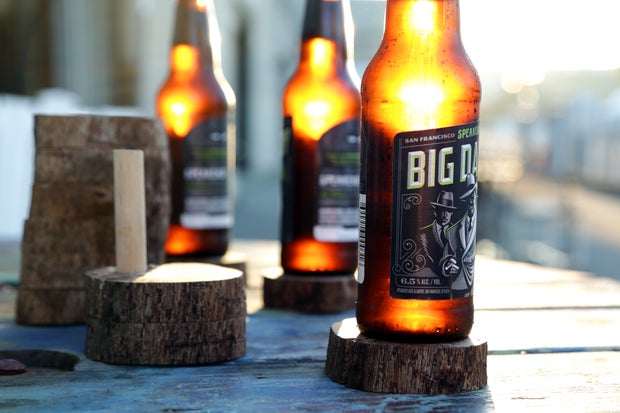
Step 9: Stack and Serve


Stacked together, these coasters look like a branch, lift one off and you're ready to serve up a cold one. Whether stacked or separated, these attractive coasters would be a great additional to your rustic cabin or maybe just in your urban hideaway.
Have you made your own rustic wood coasters? I want to see it!
Happy making :)


