

Introduction: Woodsman Knife Sheath


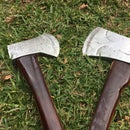


I made a file knife and thought this might be a good instructional on how I make sheaths.
Step 1: Cutting Out Leather

Cut out all your pieces of leather. I am using 3.4mm embossing leather for the front, sides and gusset and 2.5mm for the backing to support the suede.
I used a stanley knife and leather scissors to cut these pieces.
Step 2: Belt Loop Hole

Make any necessary belt holes you think you might need now. I have made two slots for the sheath to be worn on the back or the belt as well as side carry. You can buy these punches at leather shops or you could use a Stanley knife instead.
Step 3: Pencil Design


The next step is to start marking out your border on your face piece so that you can draw your design out. Here I am using a tool called a saddle makers groover. This cuts a nice little line for you and is adjustable from the edge of the leather. The purpose of this tool is to set your border and to set the stitching into a protected area.
Begin being creative and map out a design. I like old 1920s patterns, they always seem to be fun to do.
Step 4: Cut Out Out the Cutouts (hehe!)


Next I have picked a few spots on my design to cut the leather away and these will become my feature effect in suede. Keep these and cut them out carefully as they will need to be fairly neat.
Once cut run your edges with an edge groover. This tool creates a nice small bevel on cut edges.
Step 5: Embossing!!


Now the fun starts. Wet your face piece of leather down with a cloth or spray bottle.
I am using a swivel knife here which makes little "V" grooves in leather. It is a very useful tool and fun to use. Follow your pencil lines with this to create your base pattern. A good tip is to not make your design too tight in its design. Swivel knives take a bit of getting used to and don't do sharp turns and tight circles easily, however are great for setting clear lines.
Step 6: Edging


When your basic design is cut its time to use a small tool called a beveler. It is used to press the leather down to create a raised effect on your patterns. You can also use this tool to pattern the edge of lines.
Step 7: Pearing Tool


Use this tool to create dents in your leather on your flowers and alike. The tool next to it is a small circle pattern tool and I used it to decorate the flowers and make seed pods.
Step 8: Backgrounding


Add any more details to your flowers you desire and border your cutouts with the swivel knife. Then move onto using your backgrounder to fill in all the space around your flowers and cutouts for the suede. When using a backgrounder try to rotate the tool to prevent any pattern of tool marks forming.
Step 9: Cutouts and Staining


Cut around the edge of the pieces you removed from the face so that they are slightly smaller and edge bevel them. I just bevelled on one side.
Next get some gloves ready to stain. I am using an antique here. This means it will stain anything embossed really dark and anything high not so much. You can see in the picture.
Step 10: Stitching


Here I used a stitching awl to punch holes through the leather to run my thread through. I used waxed linen thread and hand sewing leather needles.
I ran the suede between the cut-out pieces and the main face of the sheath, adding a 2.5mm backing piece. I then stitched them together around the cutout shapes.
Step 11: Welt


Once your cutouts are in and stitched, it's time to prepare the welt by running the stitching awl through it and the backing piece.
The welt is important for a knife because it helps to provide a better fitting sheath and protects the stitching from the knife's edge.
Step 12: Tying It All Together


Run your stitching all around your sheath including your strap that will become a loop on the back for belt carry and back carry.
Funny that little bugs always seem to come visit.
Step 13: Cover Suede Clean Edges


Cut duct tape to cover your suede. Use a stanley knife and heavy sandpaper to even and clean up the edges.
Give the sheath a coat of Antique stain and then a leather dressing.
Step 14: Handle Clasp


Cut a thin strip of leather, about 20mm in width, and stitch this on for the clasp.
Sew the belt loop in place using awl first to punch holes.
Lastly use a rivet setter and a press button set to finish your new sheath off.
Step 15: Finished


All done!
Here's a few ways you can carry your new sheath.
Hope you enjoyed.
Nick

Finalist in the
Leather Goods Contest

Participated in the
Halloween Props Contest


