

Introduction: Camera Stand


A camera stand that is like furniture. Specifically for taking pictures of what you are doing for instructables, or whatever reason you have for doing something like that.
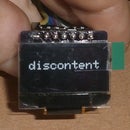
Used to shoot this: Learning Arduino, button.
Step 1: Parts

- 2 adjustable friction hinges - http://www.mcmaster.com/#1791A44
- 8 screws -- 8/32 x 1/2" --- or close to that
- 8 tee nuts -- 8/32
- Screw driver
- Drill - 1/4" drill bit, 1" bit
- Hammer
- Saw
Step 2: Cut


Cut out the pieces. This is scrap wood. The arms (no paint) are about 1/4" thick. The base (white) is 1/3" MDF. The shapes are not critical, as long as the ends are wide enough for the hinges.
Step 3: Drill


Drill 1/4" holes, these are a little big, but that is good.
Step 4: Assemble - Base


Put the tee nuts in the wholes and screw an the hinges.
Note: I had to drill a 1" hole halfway through the base because it was too thick (or the screws were to short).
Step 5: Assemble - Arms


Screw the hinges to the arm pieces, using the tee nuts.
Step 6: Hinges


These are adjustable friction hinges with a max torque of 7lb/inch. Tightening the screw in the middle makes the hing stiffer, loosing makes it looser.
Step 7: Cracked

The tee nut cracked the wood here.
Step 8: Helpers


Hi Jack.
Hi Hazel.
Step 9: Mount Smart Phone


If you are brave, you can just use an elastic to mount a camera phone.
Step 10: Mount Camera


A camera can be attached with a 1/4-20 bolt.
A ball joint would be great for the camera, or at least a 3rd hing.
Step 11: Folds

It folds up, but not great.

Participated in the
Furniture Contest


