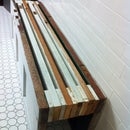
Introduction: Hardwood Floors
1 planer, 1 mitre saw, 140 4"x4" Treated Fence Posts
13,000 cuts, sand, stain, sealer, wallah!!!!!!
Step 1: Cure the Wood
very simple but completely monotonous.
1. first I let the wood dry and cure for a number of weeks.
Step 2: Planer
then I used a 13" planer to shave off about 1/8 inch off each side to have a perfect edge.
Step 3: Miter Saw Cuts
3. next I set up a sliding template using painters rollers and rolled the wood onto my miter saw. with which I cut each piece 5/8 thick. (about a gazillion times) ( I found it a good idea to use a really nice facemask for this type of work, unless you want to have a headache as big as TX and pass out and die of strychnine poisoning)
Step 4: Acclimate Wood to the A/c
4. after these were cut I would take them inside the house in the air conditioning and let them cure for another two weeks.
Step 5: Wait
5. twiddle your thumbs
Step 6: Lay Them Straight
6. as they were drying we set them all through the house in order to make sure my math was correct. I had two milk crates full left over.
Step 7: Prep the Concrete
7. next I prepped the concrete slab.
Step 8: Glue
8. then I went on to applying hardwood floor adhesive all over myself and the floor by using a grout trowel. (this was the most difficult part because of the speed at which the glue begins to harden vs. how fast you can lay down a row of wood tiles and go back to the first of that row)
Step 9: Sanded It
9. after adhesion I rented a floor sander from the depot and smoothed out the surface. then cleaned all the dust away.
Step 10: Stain
10. then we stained it a dark honey color which brought out the colors and lines more.
Step 11: Sealed It
11. final step was applying hardwood sealer everywhere. this took a couple of days and I did about 3 or 4 coats.
Step 12: Finally
12. last I added all the trim around the edges and I was done.
oh by the way, I ended up using every last piece of wood. down to final slivers which went into my master bathroom entrance.


