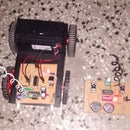
Introduction: Homemade Rc Car
this is my first instructable so please bear with me guys :)
I loved playing with rc cars when i was small so i thought of making one now when i have some knowledge of it.
moreover i faced some problems while making it and tried to solve those problems via different sources across the net.
thought of uploading it as it may help someone facing the same problems...
Step 1: GETTING STARTED
Gathering material
For the car you will need:
1.car chassis
2.caster wheel
3.two geared dc motors
4. 2x 1000uf capacitors(the more the capacitance the better it is)
5. ic ht12d
6.ic l293d
7.315mhz receiver
8.wheels for motors
9. pcb
10. 1x 51k ohm resistor for ht12d oscillator pins
11. 3x white leds, 2x 1k resistors, 16pin and 18pin ic base, female burg strips,double tape,some nuts and bolts to get the chassis together
for remote:
1. 2x dpdt switches
2. ic ht12e
3.315mhz transmitter
4. 1x megaohm resistor for transmitter oscillator pins
5. 1x red led and 1k resistor
6. battery connectors,female burg strips,18 pin ic base, pcb
you may use 16 gauge wire to make a small antenna for better reception,soldering rod ,soldering flux and soldering wire, and of course some batteries to power your car and remote and red and black wires to connect the circuit. 9v battery will be good enough to power remote and for the car i used two 4 volt batteries to give a combined voltage of around 8v.
Step 2: HT12D and HT12E ICs
these ics are used to encode and decode the data to transmitter and from receiver respectively.
both are 18 pin ics, the encoder is feed with our data in parallel to its four pins which is converted to serial form and transmitted through the transmitter.receiver receives this serial data and feeds it to the decoder ic which again converts it to parallel data.i have added images to show the pin configuration.
the following is a link to a video on these two ics which will offer quite an insight :video
Step 3: IC L293D MOTOR DRIVER
the motors need quite a good amount of current to run so we use this ic to which the output of ht12d is feed in its signal pins and power and motor are connected according to pin config ,since here we are not using any microcontroller the supply to 1,8,16 are the same.
here's a link to informative video :video
Step 4: REMOTE CONTROLLER
lets start with making the remote control.
place the required components on the pcb as you like and solder them ,i have uploaded an image of mine for reference.
as you can see i have placed the two dpdt switches at the end with 20pin ic base in middle (as i dint had 18pin base :D),from the three resistors one is for led and the other two combined make a resistor of approx. 1 mega ohm(value must be close no need to be accurate) for oscillator of HT12E,then i have placed 4 female burg in strips for my transmitter (place as much required because some have just three pins i.e vcc,data,ground. Here fourth pin is for antenna connection).i have made an antenna out of the 16 gauge wire by winding it over a pen,and finally you can see the battery connector in place.
EDITED:I have attached pcb schematics of the same and also an image of it for quick reference.
Now about connections:
The first 8 pins of ht12e are address pins(A0 to A7) which need not be connected i.e they can be left floating or else you may ground all of them,pin 9 has to be grounded.
In dpdt you will find a pair of 3 connectors (if you find more some would be internally shorted check it with a multimeter)join them as in fig using red and black wire.After doing so with both dpdt you will have four output wires, connect them to pins 10,11(from one dpdt) and 12,13(from other dpdt) of ht12e.
pin14 is transmission enable pin, when it is grounded only then the signals are transmitted so ground this pin.
pins 15 and 16 are the oscillator pins where you need to connect your 1 mega ohm resistor.
pin 17 is the data output pin of the ic which has to be connected to data pin of the transmitter,finally pin 18 is the vcc pin so connect it to the positive terminal of the battery.
if you want u can place a led light also connected to the battery terminals through a resistor.
finally connect the vcc and ground terminals of the transmitter to battery terminals.
Here battery terminals are the battery connector that i have used.
and you are done with the remote.I have attached a picture of the back side of the remote though it may not be much of a help but still :p...
Note:please try and use at least two different color wires and if possible use three(one for signal and other two for battery connections)as it would be easier to debug at the end which is the toughest part.
Attachments
Step 5: ASSEMBLING THE CAR
NOW ABOUT THE CAR
place the components on the top of your pcb and solder them on it ,two led in front for headlight,one led is to show that valid data transmission has occurred between transmitter and receiver.See the attached image to place the components.4 female burg in strips are in front for receiver ,then we have the two ic bases for HT12D and L293D( 18 pin and 16 pin bases resp).out the three resistors two 1k resistors for headlight leds and one is 51k approx. for oscillator pins of HT12D.solder the two capacitors in parallel to increase net capacitance (more the capacitance the better it is).
EDITED:I have attached pcb schematics of the same and also an image of it for quick reference.
Now ,how to connect
firstly pins 1 to 8 of the ic HT12D need no connection or ground them if you have done so with the address pins of HT12E or else leave them floating.then pin 9 is grounded.pins 10,11,12,13 are the data output pins from this ic ,connect them to 2,7,15,10 of L293D resp. pin 14 of HT12D is data input pin which you need to connect to data pin of receiver,next up pin 15 and 16 are the oscillator pins so connect your 51k resistor across these pins (again i would say accurate value doesn't matter),pin 17 is the valid transmission pin connecting an led to it will show whether the data has been received or not,this pin remains active high and when the ic receives a signal it goes low,so connect the -ve pin of led to pin 17 and +ve pin of led to battery positive terminal.now whenever data is received the led will glow and otherwise remain off. finally pin 18 is vcc pin so connect it to positive terminal of battery.
we initially connected the pins 2,7,15,10 of L293D,now its time to connect its other pins also...
pins 1,9 are the motor enable pins when the are high only then motors will catch signal and run so connect these pins to positive of battery.connect pins 3,6 to one motor and 14,11 to the other motor,pins 4,5,12,13 are to be grounded,now connect pin 8,16 to positive battery terminal and battery ground is connected to all the ground pins of L293D.
capacitors act as glitch busters,connect their positive and negative to vcc and ground resp. of receiver and also connect the vcc and ground of receiver to the battery,in other words from both vcc and ground terminals of receiver we have two wires each one to suppy and the other to capacitors.
i dint had these caps in the beginning, so the car wasn't responding to the signals properly ,it will catch the initial signal only and keep on running on that signal until and unless i give signal being in very close vicinity of car.this happens because initially motors are at rest therefore the receiver is having an appropriate supply which enables it to catch the signal but when the motors run they draw a lot of current due to which insufficient amount of current goes to receiver and it fails to catch the signal ,so placing capacitors with it gives it a boost of current and receiver catches the signal.
And that's it we are done with the car too...
Step 6: TESTING AND FINAL WORDS
watch the video to see a test run of the car.
if anyone has any problem regarding the instructable please mention it in the comment section ,i will try to solve your problem. the schematic files are .fzz files and u will need fritzing software for it.
here is the download link: http://fritzing.org/home/
please leave your comments and review which would help me do a better job in writing instructables ,and thank you for bearing me guys :)...
Step 7: Rc Car V2.0
i have uploaded a new instructable on updated version of this car which you can check out here-rc car v2.0.

Participated in the
Remote Control Contest


