

Introduction: How to Weave on a Cardboard Loom


Weaving on a cardboard loom is really fun and super easy to do. I originally did this in school - my mom still has some of the stuff I made. I was the weaving master. :D
In this instructable I'll teach how how to make a cardboard loom and weave on it. It's a great activity for long car rides, waiting at the doctor's office, or classroom arts and crafts. Weaving on a cardboard loom is also great for people of all ages - you can make lots of modifications to make it suitable for folks of all skill levels. You can do quite a bit with a simple cardboard loom.
So come on, let's learn how to weave on a cardboard loom and be the envy of elementary school children everywhere! :D
Step 1: What You'll Need:

- yarn
- scissors
- large plastic or metal needles
- cardboard
- a ruler
Young children and those with poor motor skills will benefit by using very large plastic needles and thick yarn as it will be easier to handle. Advanced crafters/weavers can use finer needles and yarn. :)
I'm using Lion Brand Yarn bonbon yarn for this - it's really fine so it makes the finished weaving look really nice. :D
Step 2: Make Your Loom


You can really make this any size you want! With this project, I figured I'd make a coaster size weaving. I'm using a piece of cardboard 5x5 inches.
Draw a line 1/2 inch in on every side of the loom. These will be your guides and will make holding it a little easier.
Now, you'll draw the lines for the notches! In most cases you want these to be 1/4 inch apart. However, you can make them as big as you want. The wider they are the easier the weaving will be. :)
Start at the 1/2 inch line, and make marks every 1/4 inch (or your chosen width) all the way across the top and the bottom of the loom.
Cut on the marks, stopping at the 1/2 line you've drawn.
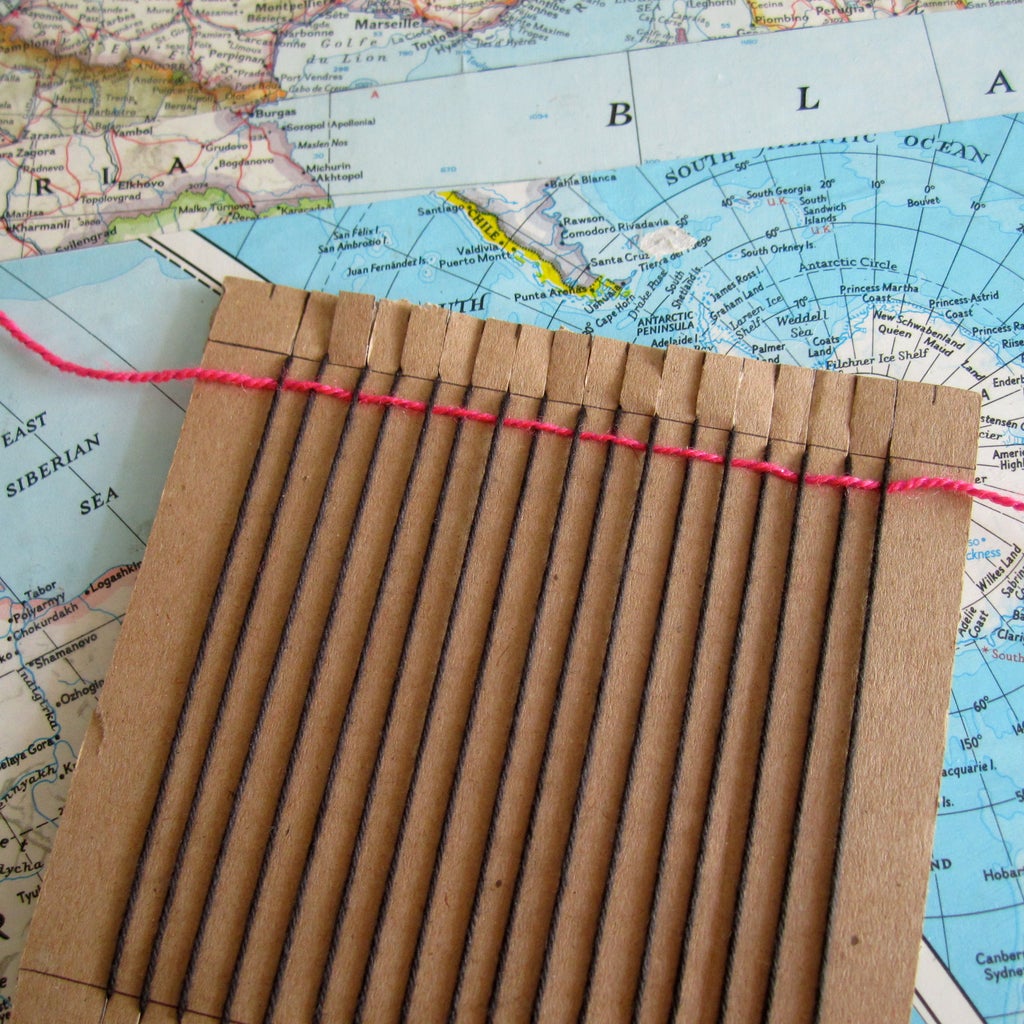
Step 3: Stringing the Loom


Choose a thinner, smooth yarn for this part.
With the marked side of the loom facing up, thread a bit of yarn into the first notch on the upper left side. There should be a tail of a few inches on the back side of the loom. Tape this to the back of the loom.
Carry the thread down to the bottom left notch on the loom and pull it into that notch. Bring the thread back over to the front by bringing it up through the notch directly to the right of the leftmost bottom notch.
Continue doing this all the way across the loom - the pictures will explain this better. The front side of the loom with have yarn going from notch to notch, the back side of the loom will just be small segments of yarn looped around the notches. Leave a tail of the end of the yarn and also tape that to the back of the loom. :)
Step 4: Weaving!


Now for the fun part!
Cut a length of yarn (shorter is easier to work with at first - no more than 2 feet) and thread the yarn through the needle. I like to make a knot so that it stays in the needle - it has a tendency to fall out if you don't.
You'll be using the needle to guide the yarn through the loom in an under-over pattern. (Under the first string, over the second, under the next, etc.) Once the needle has passed through all of the strings, pull the yarn through and leave a tail of a few inches at the end. Push the yarn up on the loom so that it's about 1/4 inch away from the notches.
Bring the needle and yarn back through the loom from the side you just exited using an over-under pattern that's the opposite of your first line and pull the yarn through. (If your first line of yarn goes under the last string to the right, it needs to go over the last string to begin the second row.) Just don't pull too hard on the yarn - you don't want to warp the strings on the loom!
Push the second line of yarn up to meet the first.
Step 5: Continue + Introducing New Yarn Once You Run Out


Continue each row, alternating the over-under pattern, making sure not to pull the yarn too tight.
Every few rows, it's a good idea to use your thumbs to push the yarn up the strings so that it looks nice and uniform.
When you get to the end of a color, take it to one edge of the loom and leave a tail of a few inches hanging off to the side. You can either cut a length of yarn that is the same color or introduce a new color.
Take your new length of yarn, and insert it into the same side where your ending tail is. You'll be following the same over-under rules as before. So if the tail of the yarn ended going under the last string, you'll start your new yarn going over it. Pull your yarn through and make sure to leave a tail at the end.
Continue weaving as usual. :)
I've included a few photos of introducing the new lengths of yarn - I think they explain it better than words!
Step 6: General Weaving Tips


- Tie your yarn to the needle. Otherwise it will slip out quite often because you're gonna be pulling the yarn through the strings on the loom like you mean business.
- Use your fingers to hold the last string on the loom while pulling the yarn through. This is prevent you from pulling the yarn too tightly and warping the strings. If you don't leave the yarn a little loose on the left and right strings on the loom, it can warp your work. It won't lie flat when you're done and it might not turn out the shape you intended.
- Use short lengths of yarn. Going all gung ho and using lengths of sting that are several feet long will more often than not create lots of knots. I do it anyway, but don't say I didn't warn you. :D
- Use your fingers to push your work up quite often. This makes the finished weaving look much cleaner and you'll be able to get more rows of yarn on your loom this way.
- Leave at least 1/4 inch of empty space at the top and bottom of your work. It'll make finishing your weaving much easier. :)
Step 7: Tucking in All the Loose Ends


The pictures illustrate this very well, but here's a breakdown of how it works:
- Thread the end of the yarn through the needle.
- Insert the needle into the side of the weaving, on the outside edge of the string.
- Pull the needle through the edge of the weaving
- Pull the yarn through, pull it tight, and cut off the end.
- Use your fingers to rub the edges of the weaving and make things look nice and neat.
Step 8: Taking It Off the Loom.


Remove the tape from the long strings on the back of the loom. Release the top loops first, and then the bottom. Hold the weaving near the top, and pull up on the top loops.
You want to pull the string through the weaving, so that the bottom loops are brought up to be flush with the bottom of the weaving, and the top loops gain extra length.
Once the weaving is scooted down to the very bottom of the strings, you can cut the top loops in the middle and tie those off.
We'll take care of the long strings in the next step. :)
Step 9: Finishing It Up!


After tying off the loops, you'll still have two long strings to take care of. We're going to deal with them like we did with the loose ends in step seven.
The only difference here is that you will want to bring the string over the first row of the weaving and then push it through the side. By looping it over the top row of the weaving, you keep the string from getting pulled completely out of the weaving. You kinda have to anchor it in there. :)
And now you're done! Enjoy your coaster, placemat, loincloth, pin cushion or other completely awesome thing you've just woven. :D
Let me know if you have any questions or comments below.
Especially if you have suggestions on easier ways to finish the weaving!

Participated in the
Hands-on Learning Contest

Participated in the
Back to School Contest


