

Introduction: Laser Etching a Spiral Design on a Glass


This project was sort of a goof that worked out OK.
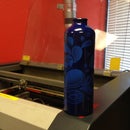
A logo was etched on a glass, and then by mistake that same glass was picked up to try a spiral design - in this case, a music staff with notes.
Step 1:

I recently took the laser rotary class at the TechShop http://www.techshop.ws. One example they had in the room was a spiral design from the epilog laser site which has free downloads available http://www.epiloglaser.com. Had to try it out.
Step 2:

The design needed to be sized according to the dimensions of the glass. The height of the glass was put in as the design width and the length was the diameter x pi. It ended up being 3.7" by 14". This would give almost two full rotations of the design on the glass.
Step 3:

I attached the rotary device. This sends the message that this is a rotary job and so the laser head centers itself to the center of the attachment.
Step 4:

I used a level, placed on the glass, to level the glass, by cranking the back rollers or the attachment.
Step 5:


I set the laser head to begin near the very top of the glass. Made the settings on my design (there is a chart nearby) for the speed and the power and got the machine going.
Step 6:
As I said, this was an oops - which wasn't realized until the job was begun and the etching already etched.
So watching closely, I stopped the job when the design was near, but not overlapping the logo.
Not a total disaster.
Because the glass has different angles to it - the design is a bit 'tweaked 'as it was etched over the lip and angles changed, but I think it works just fine. I now plan to make some beer glasses for the music nonprofit I work for using this same design.


