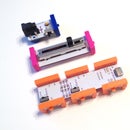
Introduction: LittleBits Serial Controller
littleBits are fun little electronic modules you can use to build things. With the release of an Arduino module, you can now connect littleBits to your computer to control applications and other things running on your desktop.
In a previous Instructable I talked about getting serial data from the littleBit Arduino module. This time I'll get into using that serial data to control something.
Step 1: Get Up to Speed
If you haven't follow the Instructable for littleBits Serial Data, do that first. It will walk through the process of getting the Arduino code installed and running. Once that's done, you'll need to install Processing. Go to processing.org and download Processing. (It's open source/free, and very useful!)
Once you have Processing installed, you'll need some code that can read the serial data and react to it.
Step 2: Write Some Code
Here's a simple Processing sketch:
/*
 * littleBitsSlider
 */

import processing.serial.*;
Serial myPort;

void setup () {
  size(400, 400);
  println(Serial.list());
  myPort = new Serial(this, Serial.list()[7], 57600);
  // Serial.list()[7] chooses the 8th serial device listed (remember we start counting at zero!)
  // you'll need to determine which serial device is the Arduino module...
  myPort.bufferUntil('\n');
}

void draw () {
  // everything happens in the serialEvent()
}

void serialEvent (Serial myPort) {
  String inString = myPort.readStringUntil('\n');
  if (inString != null) {
    inString = trim(inString);
    float inByte = float(inString);
    inByte = map(inByte, 0, 767, 1, 600);
    background(0);
    fill(255,0,0);
    rect(150,300,100,-inByte);
  }
}
The code uses a serial event to read the incoming data and act upon it. The tricky part here is choosing the correct serial port. In the setup we're printing a list of all the serial ports that your computer sees. You can see that I chose the 8th serial port listed, which is known as Serial.list()[7] because we start counting at zero.
Once you've got your littleBits Arduino connected and powered up and running, we can run the code.
Step 3: Run Some Code
If all goes well, your code will run, and you can now use the littleBits slide dimmer to adjust the colored bar. Processing is a fairly easy language to get into. If you've never done any programming before, it may be a little intimidating, but there's some great tutorials and a nice reference to help you out.
Step 4: Slide That Slider!
This is a simple example, but it shows using the littleBits Arduino module and slider dimmer to animate something on your computer from the physical world. Think of the possibilities!


