

Introduction: Paper Plane I Invented #3


i have designed several planes due to boredom during high school classes
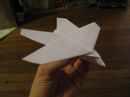
this was my third
it uses standard 8.5"/11"
this plane is extremely hard to fold and just as hard to fly
it is THE MOST complicated plane i know of
however, it is completely different from all other planes i know of in that
the central fold is significantly rotated from the wings and opens both ways
also, if you can successfully fold and fly it it will flap it's wings
slight imperfection will eliminate flapping
i have made Sevres dozen of these and only one flapped
Step 1:

first fold in half long ways and unfold
Step 2:


now fold the paper such that both intersections between the edge of the paper and the central crease touch one of the long sides
pics 2 and 3 show where these intersections should go
Step 3:


now fold and unfold along the original fold as shown
note it is important to fold towards the side that has the fold already on it
otherwise the paper will shift and the entire plane will turn out askew
Step 4:


flip and repeat
then reverse the fold from step3 so that it is in the same direction
Step 5:

fold in the middle such that the folds from steps 3 and 4 are brought together
you can now see which parts will become the wings and body and they will henceforth be referred to as such
Step 6:


fold the wings up
fold the body such that the end of the central fold touches the back edge of the wing
and the back tip of the body is lined up with the fold of the wings (illustrated in pic 1)
unfold
Step 7:


open the plane and invert body at the fold from step 6
close the body again
Step 8:


fold wings down
fold between the front tip and the back corned of each wing
i apologize for the rotation between pics 1 and 2
last pic shows plane so far if winds are put to flight position (does not fly yet)
Step 9:


fold wings up
fold front of the plane such that:
the fold passes threw the front bottom corner of the body
the tip is on the wing fold (shown clearly in pic 3)
unfold
Step 10:


open the body and invert at the fold from step 9
note that the central fold on the inverted part will line it's self up with the central fold in the main body
Step 11:


fold the wings down
fold each wing such that:
the fold hits the front edge of the wing fold
the front corner of the wing goes slightly past the fold from step 8
Step 12:


if you look at the wing from behind (pic 1)
you will see that the fold from step 11 created a Z shape over the flap from step 8
readust it such that the flap from step 8 is in the Z shape from step 11 (pic 2)
press down (pic 3)
repeat on other side (pic 4)
Step 13:


you are now done
optional step:
add tape so as to keep flaps on the wings down
you should consider if you want to do this
without the tape it is much easier to fly
with the tape it follows an interesting, bumpy flight path
also the one i made that flapped its wings had tape
the flapping was probably caused by the bumpy path
Step 14:

learn to fly it
without tape:
throw at a slightly downward angle
with tape:
there seems to be only one possible successful flight path
this path begins from a vertical drop with the nose downward
the path then levels it's self out as the plane speeds up
it drops about 10 feet before leveling out
to avoid this drop you must match the angle and speed of another part of the flight path with your initial launch


