

Introduction: Laser Etching a 3D Photograph


I took the advanced techniques for the laser cutter class at the TechShop http://www.techshop.ws . The teacher was really good and I wished we had had more time since he definitely had more to teach. It is always a good idea for me to go in to the TechShop soon after a class and try things out to better retain what I learned. I decided to play around with photo options.
Step 1:

I use Corel Draw which Is used at TechShop (along with Adobe Illustrator) I uploaded the profile picture I had taken of my granddaughter and then traced it to make it into a vector drawing. It reminded me a lot of a topical map. I got rid of the back ground by using the point and delete and also the eraser.
Step 2:

then I chose the epilog "dash board" - the advanced set up option. I chose the 3D set up which is strictly a raster setting.
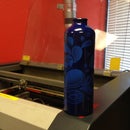
Step 3:
I watched the laser do its etching.
Step 4:

I tried tweaking things a bit using other photos of other grandkids. None was very successful. If you look very closely you can see some dimension to the etching. But I obviously have a lot more to learn about transferring photos to the laser cutter. Next time I will take the pictures with a white sheet as a background which will give me a head start. (you can see I opted not to remove all the background in one of the photos) Maybe I should first turn the photo into more of a 'drawn' image.
All sorts of options for playing around at the TechShop.http://www.techshop.ws next time.
In the meantime the kids enjoyed seeing their silhouettes.


