

Introduction: Knitting Stitch Decreases and DPNs


To shape the top of a hat, we’ll decrease the number of stitches incrementally using a stitch decrease called “knit two together.” Reducing stitches every other row will create a gradual rounding of the hat culminating at the apex of the dome.
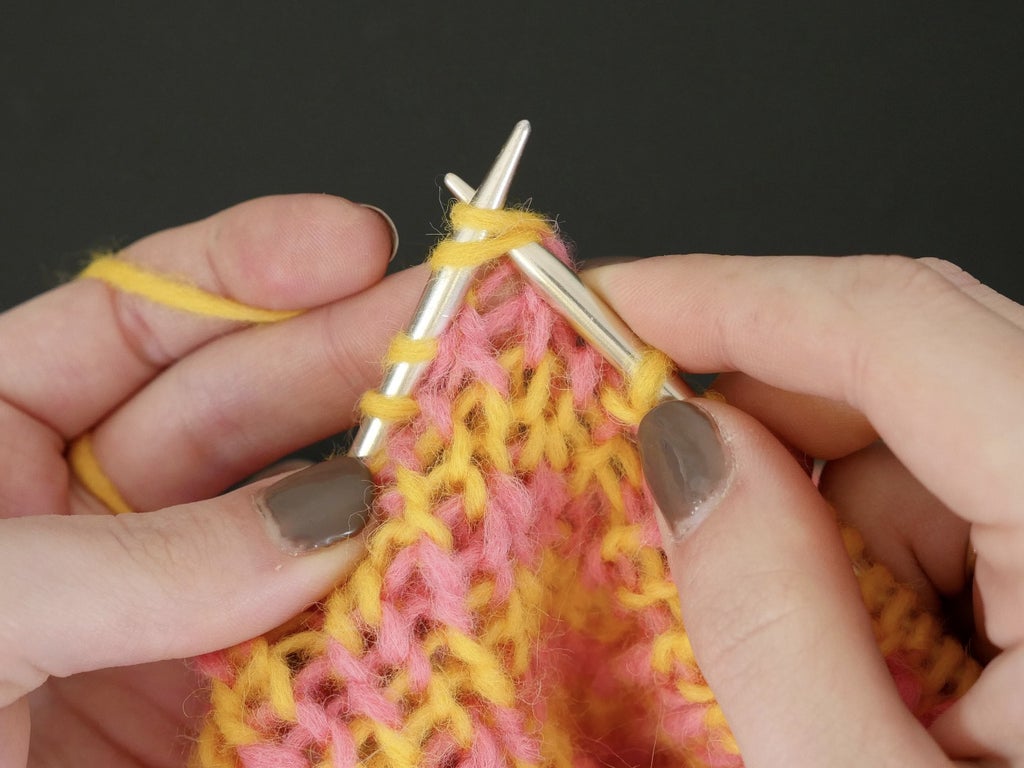
Step 1: Knit Two Together
It is just like it sounds— enter two stitches from the left, and knit them as one (abbreviated k2tog).


Since the hat has 88 stitches, first we’ll decrease every 11 stitches, for a total of eight decreases. To keep track, I like to count as if stitches 11 and 1 are knit together, so I count 2, 3, 4, 5, 6, 7, 8, 9, 10, 11and1 (k2tog), 2, 3, 4, 5, 6, 7, 8, 9, 10, 11and1 (k2tog), all the way around the hat. Alternate decrease rows with regular (non-decrease) rows. Your K1, P1 pattern will be disrupted by the decreases and that's ok-- just keep knitting into the knit stitches and purling into the purl stitches. The next time around, count to 10 instead of 11 before each decrease.


The columns of decrease stitches will appear two ways, depicted above, depending on whether they decrease started with a knit or a purl stitch. Continue decreasing in pattern until there are so few stitches that it’s becoming difficult to use the circular needle. Complete a row and get ready to switch to double pointed needles (DPNs)!

Step 2: Switch to DPNs
To knit small round things, like the very top of your new hat, double pointed needles (DPNs) are necessary, and not as hard to use as they may seem!


At the start of a new row, pick up a DPN in your right hand and start knitting in the same K1, P1 rib onto it. Knit one third of the stitches (does not have to be exact) onto this first DPN, then scrunch the stitches to the center of the needle and pick up another one. Knit another third of your stitches onto the next DPN, and so on for the third DPN.


To knit the next row, position the first DPN on top of its neighbors, and pick up your fourth DPN. Knit all the stitches from your first DPN onto the new one (remember to count stitches and perform decreases), then your newly emptied needle will become the right needle for the following set of stitches. You are still knitting in the round, but now the round can shrink smaller as the work does. Continue alternating decrease rows until 16 stitches remain.


Step 3: Finishing Touches!

Cut both colors with a 12 inch tail, and thread the working color onto a yarn needle. Pull the nonworking color tail to the inside of the hat.


Slip all stitches onto the yarn needle and pull tight to cinch the top of your hat closed.

Thread the needle through the top stitches one more time before weaving in the end.


At the brim of your hat, you can smooth the seam a bit by weaving in the yarn tail across it. Weave in any other yarn ends on the inside of the hat.

Huge congrats! You've completed your first hat! You can wear it like a floppy beanie or fold up the brim.
Class table of contents:


