

Introduction: Wireless Slideshow Clicker


//Rustlabs
Overview:
this is a slide show clicker i whacked together for an English assignment a few years ago. It is basically a simple wireless left mouse click (for flicking through PowerPoint slides during an essay).
Story:
well i was looking for ways of avoiding doing my assignment (as i am a professional procrastinator) and i figured a usb slide show clicker would be perfect.
The outlines for the clicker are:
+ storage of files.
+ decent range from computer
+ cheap and simple
+ use readily available items
Stuff you will need:
+ an old (working) usb mouse
+ some form of wireless device eg:
+ gate opener controll systems (best)
+ old remote control car/things
+ any wireless device that can run a relay
+ two way usb devider (optional)
+ usb storage device (optional)
+ various materials (wood, plastic,metal ect)
+ plugs switches screws ect
*my camera was broken for most of the building process, thus there aren't many pictures of construction.
Step 1: Planning

what it dose
I wanted to create a device I could use as s simple wireless left mouse click for use in slideshows ect. I included. I included a usb divider so that you are capable of still using the USB port in use for the clicker, as well as giving the device internal storage.
how it works
since (as i said before) i don't have many construction photos, i have drawn a diagram of how it works. it starts by dividing the single USB (from the computer) into 3 separate ones:
+mouse input
+storage device
+external USB (used for other stuff you may want to plug in)
the mouse input simply takes connections from the computer mouse left click and puts them through a relay. The relay is then controlled by a receiver of some sort. In my case it was an old gate opener setup, as it already has a relay it is excellent for the job, but you can use just about anything that could power a relay, such as the drive motor output form an old RC car.
the storage device is a storage USB plugged into one of the inputs of the USB divider.
the external USB can be used for alternate storage devices, or in cases where a computer may require use of all USB ports you can continue using the device that was previously using the port.
design
well this is entirely up to you, and i recommend you experiment with the aesthetics of your device, its no fun to just travel to your local electronics shop and buy an ugly black box, make something different.
Step 2: Receiver/transmitter


the receiver/transmitter
I used a gate opener receiver, it conveniently has a built in relay. But sadly needs an external 12v powesupply. I provided this by adding an additional power cable to the clicker. you can use just about anything that can output enough power to flick a relay, old remote control vehicles will do nicely here. If you are able to find a receiver device that can run of 5v then no additional cable will be necessary as 5v can be acquired thought the USB divider.
Step 3: Mouse/click

the mouse
crack open a USB mouse and de-solder the left clicking button take two cables from where the button used to be, and connect them to the relay that your receiver setup controls, easy as pie!
Step 4:


the divider
the divider is a simple and cheap 4 port usb divider (i don't use the forth). this is where all the internal devices are connected to the computer(mouse, storage device & maby power if you have a low voltage receiver)
Step 5: Transmitter
If you are converting RC car/whatever, it may be hard to fashion your transmitter into a small single handed device, as they are usually designed to be large two handed devices. my transmitter is simply shrink wrapped (or heat shrink as some people call it).
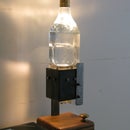
Step 6: Finished Box


Now you have your very own USB slideshow clicker!


