

Introduction: 3D Printed Any Earth Terrain Map


Hii.
This instructable is to make your City map 3D printed Map for Navigate around the city.
Collect all Supplies and be Ready to make this Project.
Check out Whole Procedure in video Formate On Youtube for Better understanding.
👇👇👇👇👇
Supplies
1> Laptop
2> Internet connection
3> 3D Printer Access
4> Your City name
Step 1: 3D Printed City Map [Custom Place]
![3D Printed City Map [Custom Place]](https://content.instructables.com/FIA/9K1E/KSJD4J8X/FIA9K1EKSJD4J8X.png?auto=webp&fit=bounds&frame=1&height=1024&width=1024auto=webp&frame=1&height=300)
![3D Printed City Map [Custom Place]](https://content.instructables.com/F3Z/W27Q/KSJD4J90/F3ZW27QKSJD4J90.png?auto=webp&fit=bounds&frame=1&height=1024&width=1024auto=webp&frame=1&height=300)
![3D Printed City Map [Custom Place]](https://content.instructables.com/F9S/3NKI/KSJD4J91/F9S3NKIKSJD4J91.png?auto=webp&fit=bounds&frame=1&height=1024&width=1024auto=webp&frame=1&height=300)
![3D Printed City Map [Custom Place]](https://content.instructables.com/FLA/XVO0/KSJD4J99/FLAXVO0KSJD4J99.png?auto=webp&fit=bounds&frame=1&height=1024&width=1024auto=webp&frame=1&height=300)
![3D Printed City Map [Custom Place]](https://content.instructables.com/F9B/X4YV/KSJD4J9C/F9BX4YVKSJD4J9C.png?auto=webp&fit=bounds&frame=1&height=1024&width=1024auto=webp&frame=1&height=300)
![3D Printed City Map [Custom Place]](https://content.instructables.com/F73/LGSP/KSJD4J9D/F73LGSPKSJD4J9D.png?auto=webp&fit=bounds&frame=1&height=1024&width=1024auto=webp&frame=1&height=300)
![3D Printed City Map [Custom Place]](https://content.instructables.com/FSA/3GSJ/KSJD4J98/FSA3GSJKSJD4J98.png?auto=webp&fit=bounds&frame=1&height=1024&width=1024auto=webp&frame=1&height=300)
- Search “blender gis GitHub” in the browser.
- Select the GitHub link and open it.
- Download code in .zip file.
- Direct Page Link as Below.
- https://github.com/domlysz/BlenderGIS
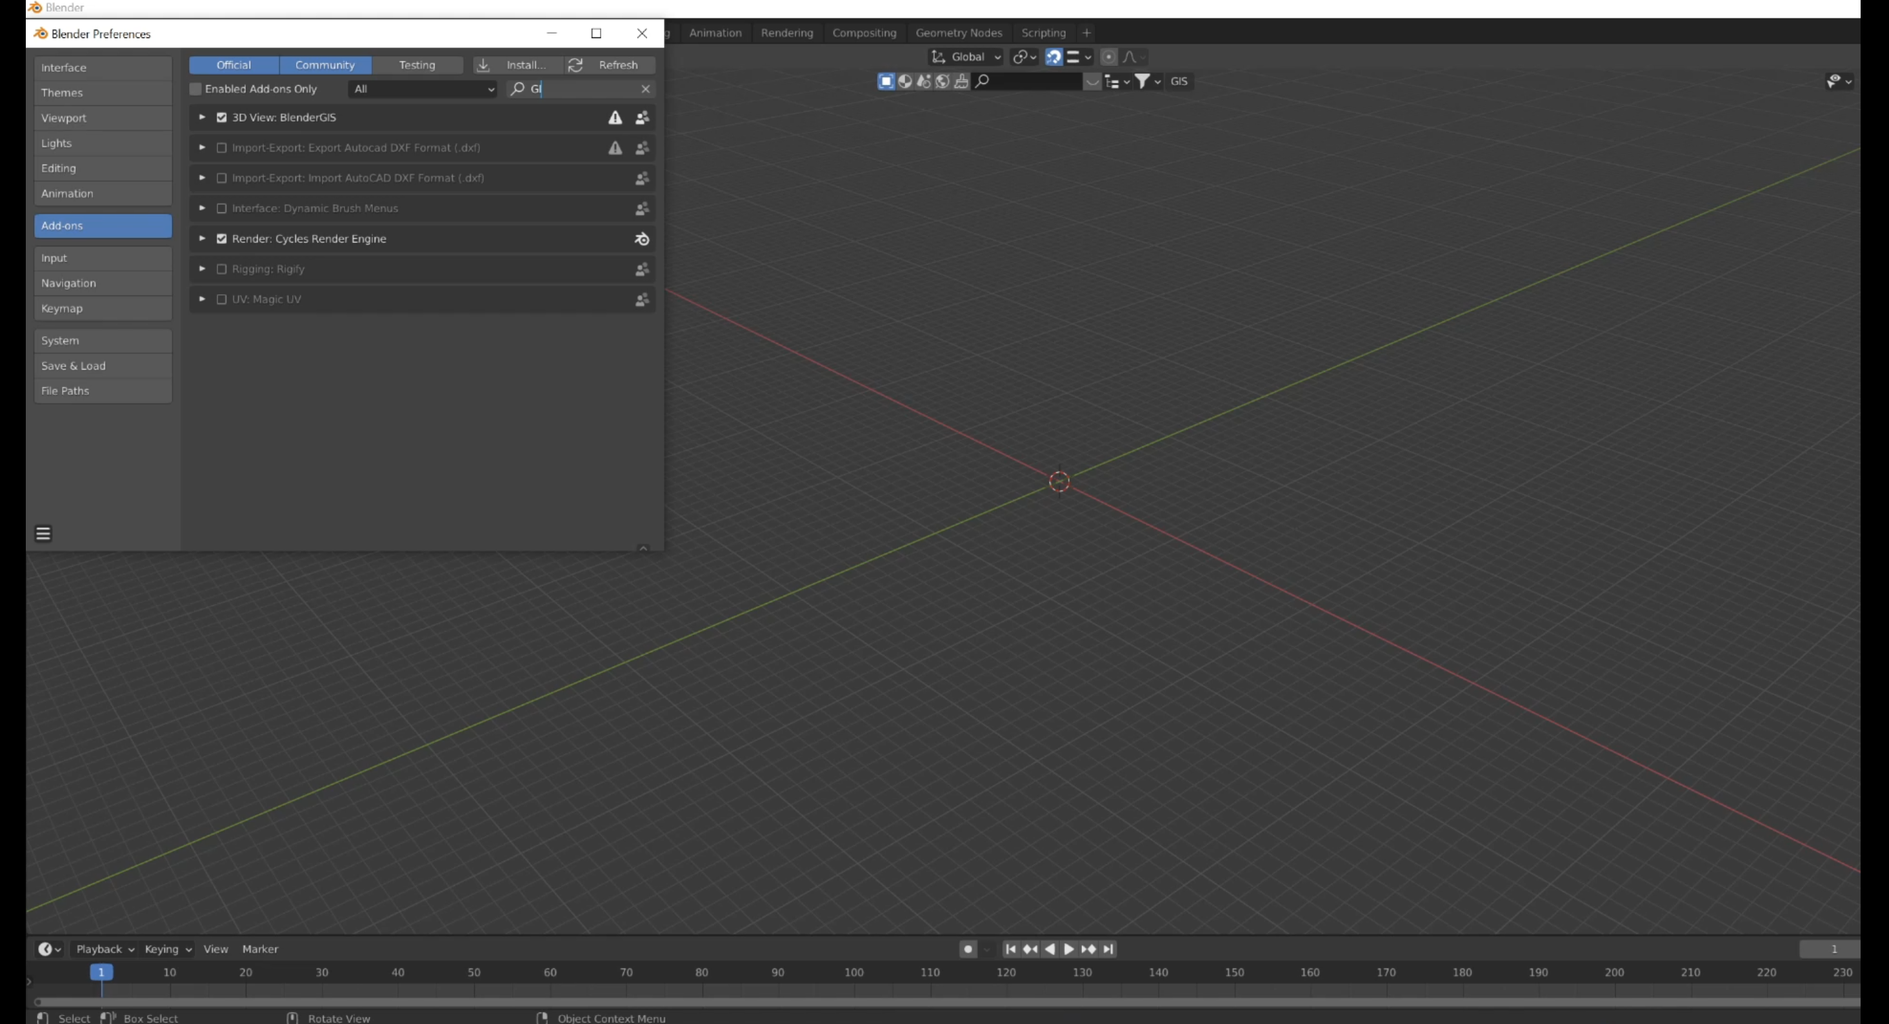
Step 2: Install GIS Add-on in Bender


- Open Blender 2.9 (Use Latest Version if Possible).
- Download blender free from here.
- https://www.blender.org/
- Select “EDIT > Prefaces >Add-ons >install.
- Select Downloaded file from Install Tab and press Install Add-ons.
- Back in Add-ons and Search GIS and Select if not selected.
- GIS button appears on the Top-center screen.
Step 3: Generate File Using Blender

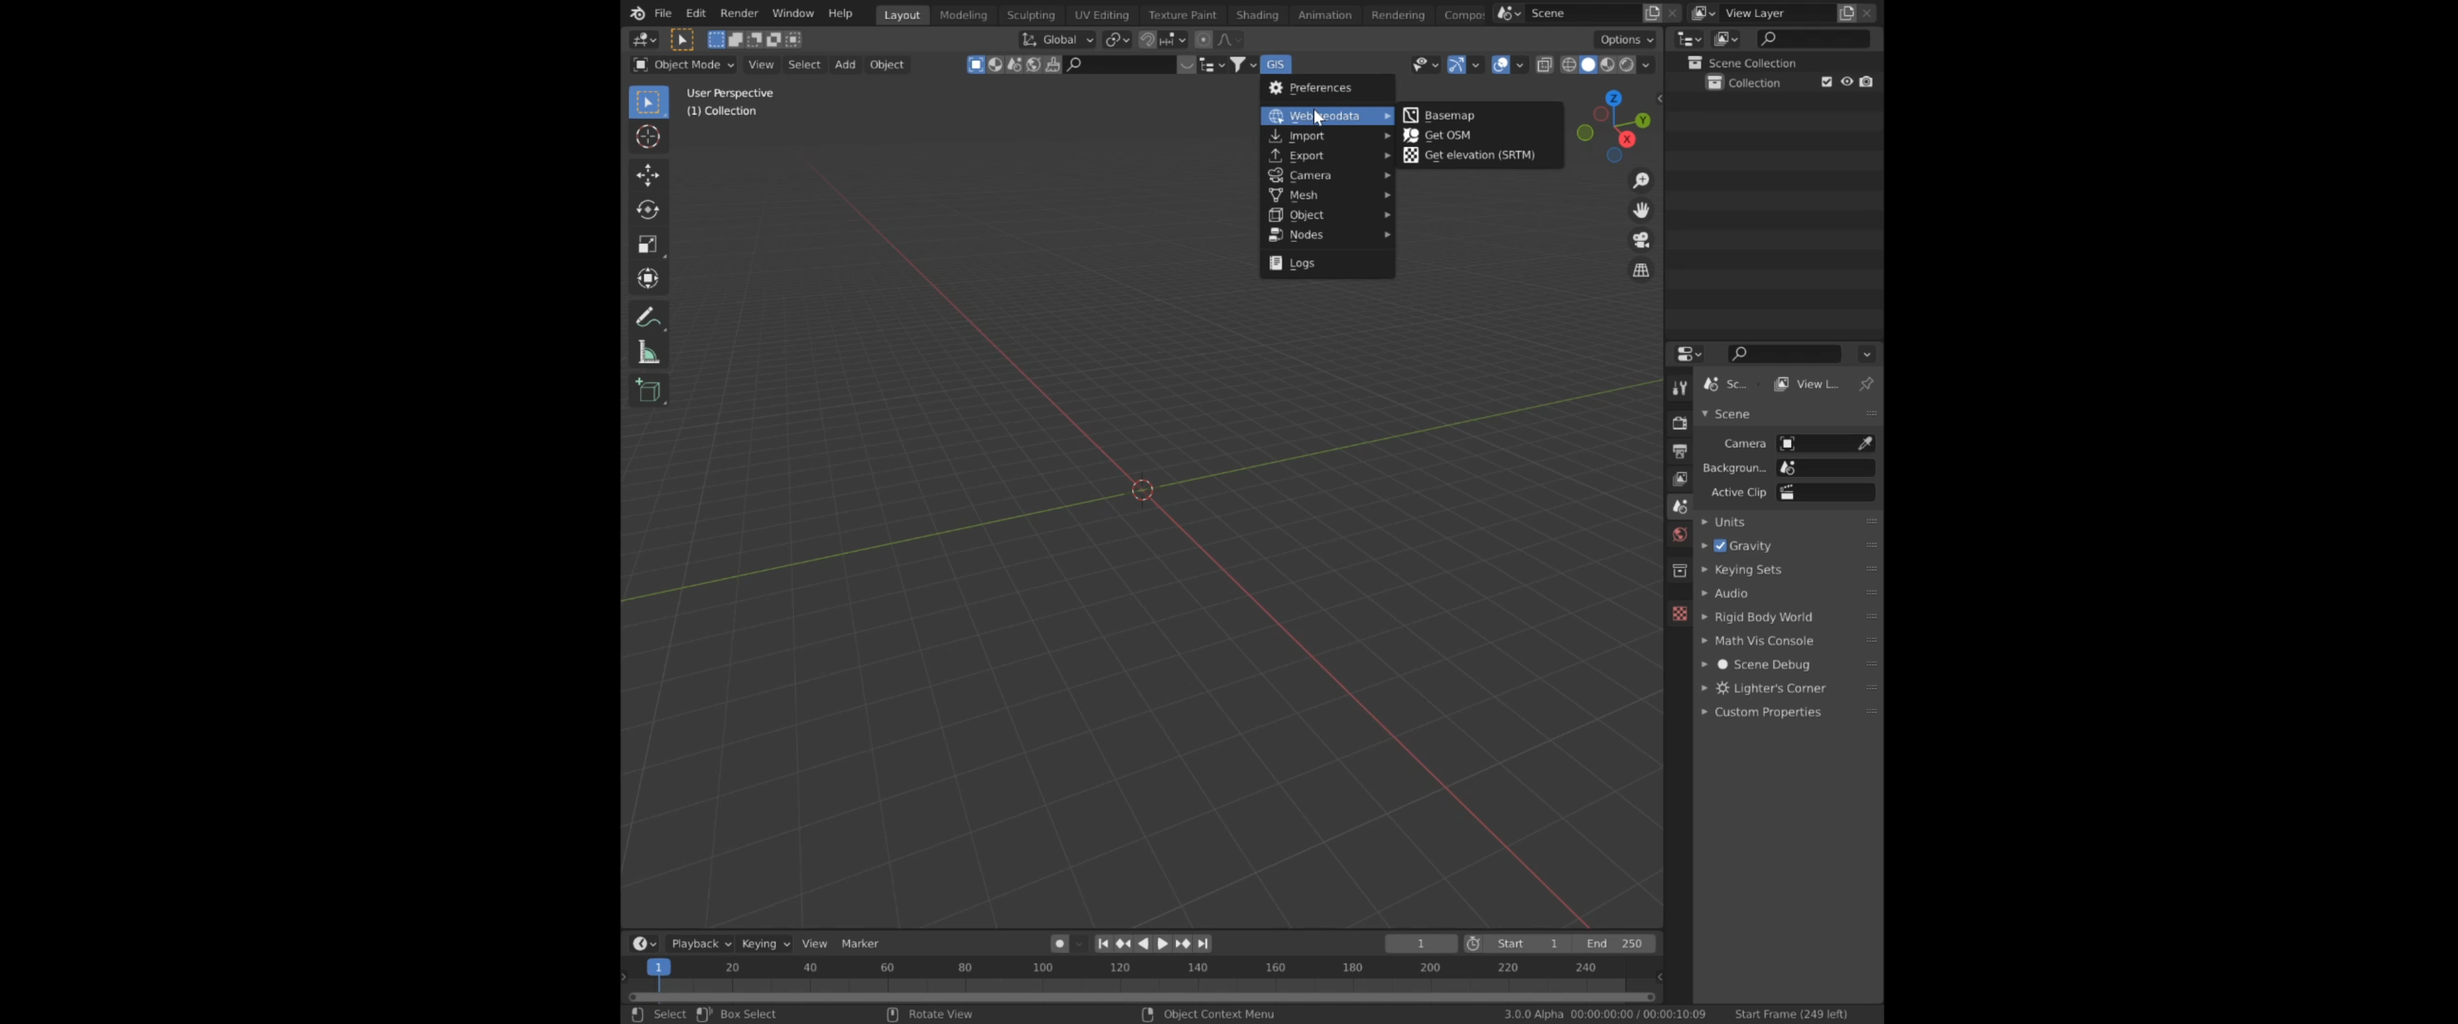


- Click on the GIS button Select Import>Web Geodata > Basemap.
- Select Source = Google.
- Select layer = Satelite.
- Press on the title box.
- Map Appears on screen.
- Press G For Search Location and Zoom.
- Set Zoom level 16 for a better view.
- Set any Place on earth and press ok.
- Wait for a while and a map of the place is shown.
- Cheese place you want to 3D print using LMB to Drag in map location.
- Zoom in and Out Using Mouse Wheel.
- For generating a 3d File, press “ Hold Mouse wheel and Press E “.
- It automatically crops your Selected region with a yellow boundary.
- Press GIS button > Web geodata > Get OSM .
- Select Data that you want to Add to your Map using Shift Key.
- Press ok and wait for 2 to 5 minutes according to model size to generate 3d model from your selected region.
- Now we need to add a bottom plate for Hold Building geometry.
- Press Shift+ A To generate a new Plane at the bottom.
- Press the S key to Scale Your plane according to the model.
- Select Face and press TAB for edit mode.
- Press e for the extrude face for generating some bottom height.
- Press TAb to get out from edit mode.
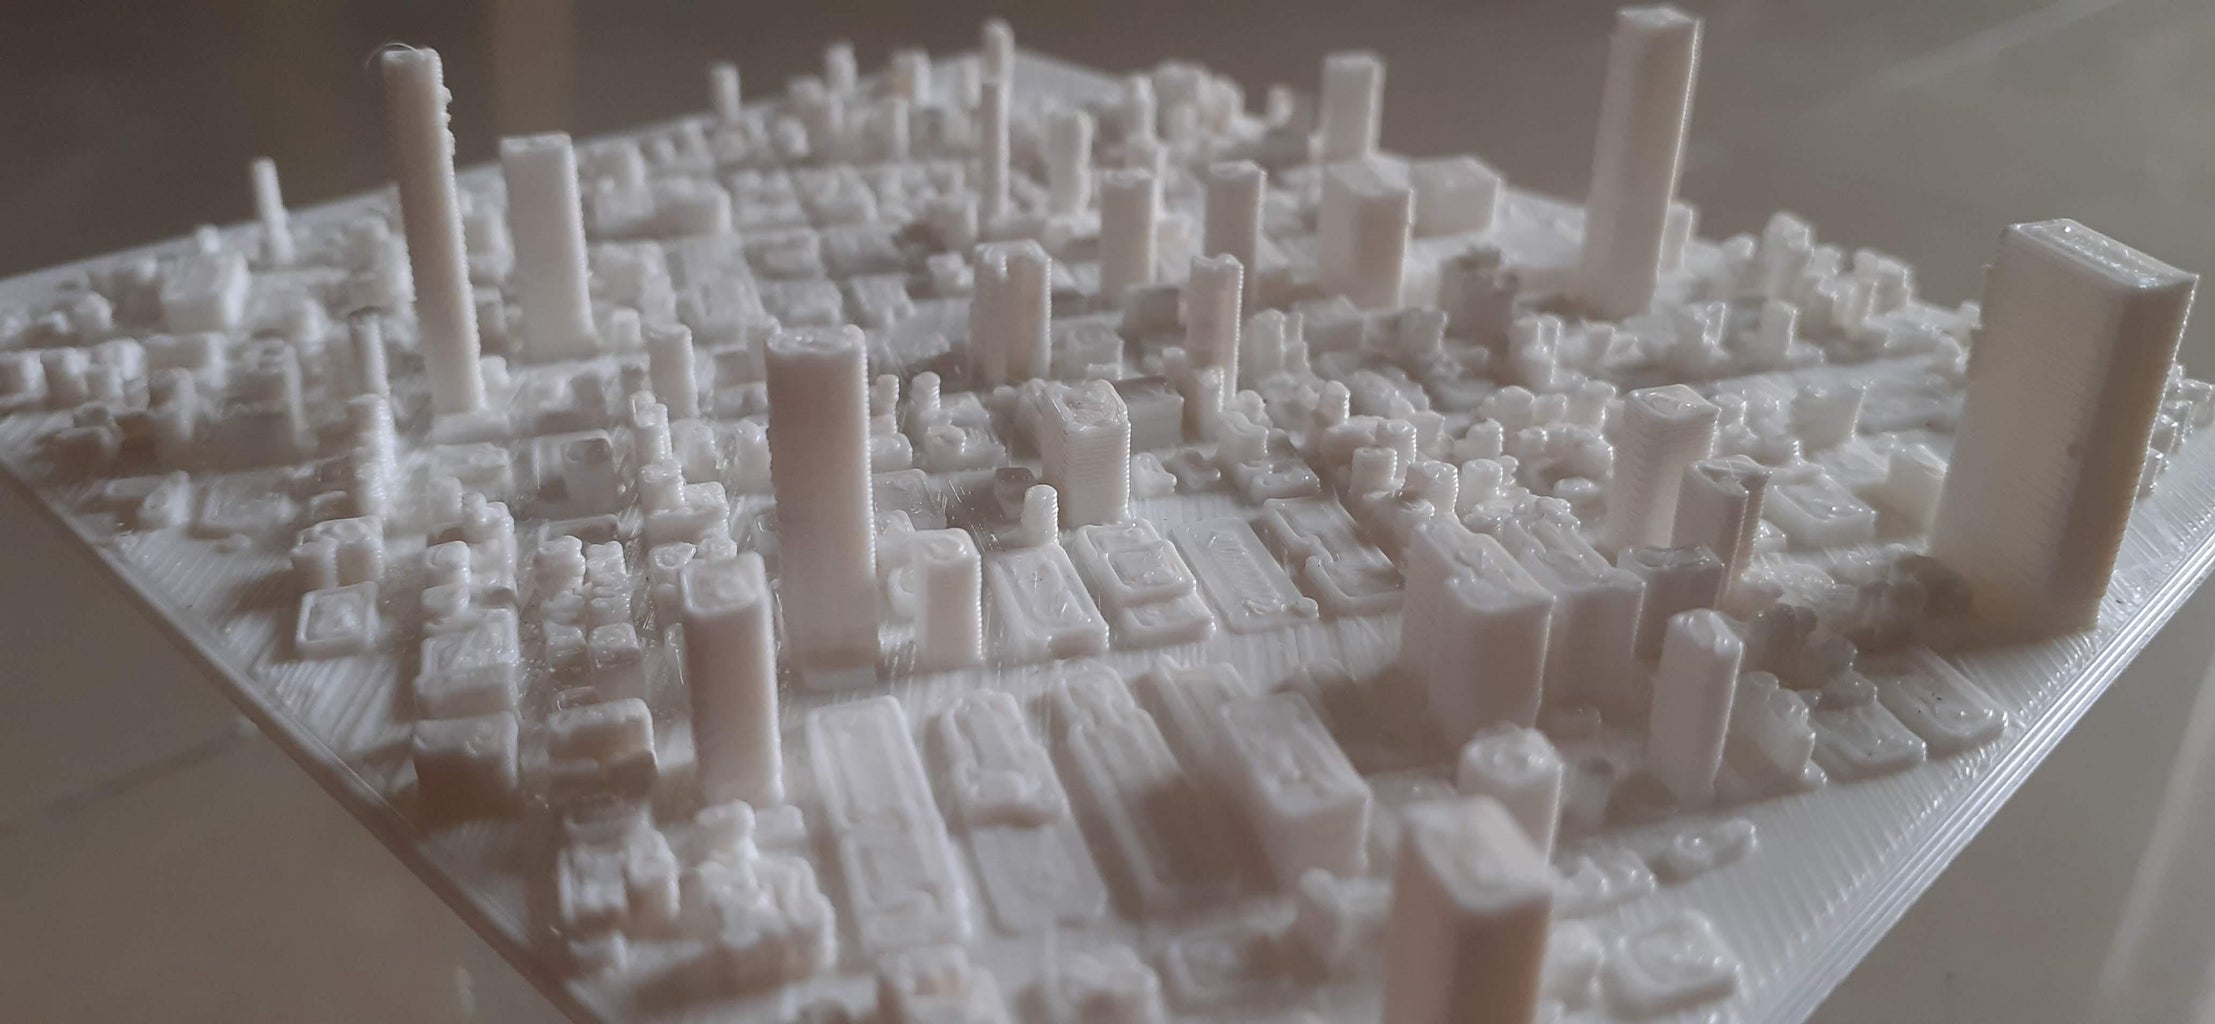
Step 4: 3D Print Your City Map
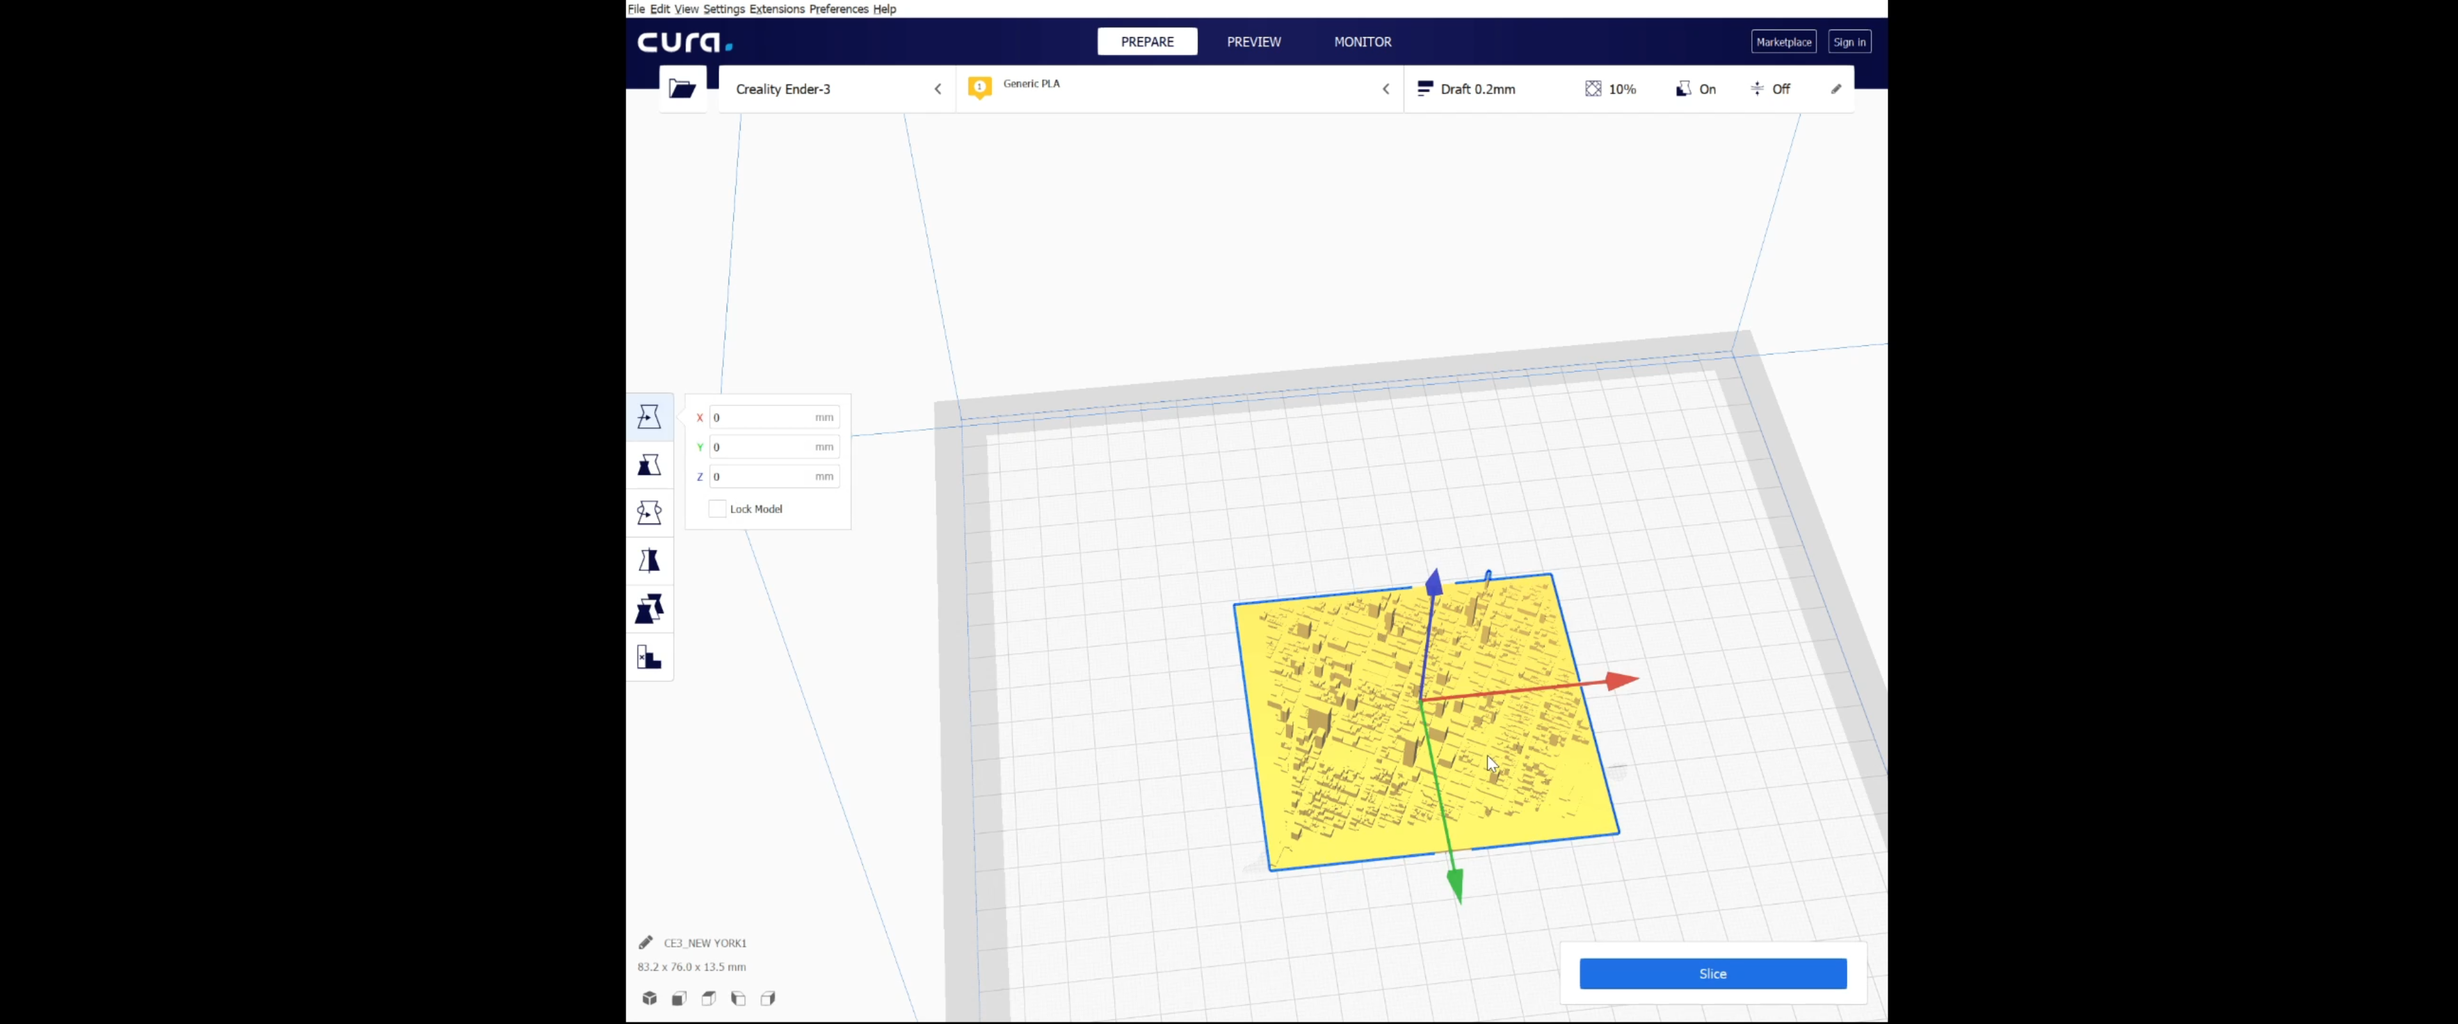


For 3d Print, we need a GCODE file to command a 3d printer to print our model.
Use your printer Slice to generate files and print your Model.
I am using Ender-3 and CURA as slice software to generate the 3D print files.
Use the Below parameter of good print Resolution.
Nozzle=0.4mm
Print Speed = 45mm/s
Infill = 20
Adhesive = Brim
Generate a file and put it into 3d printer to print your model.
Happy Printing.
If you are stuck anywhere with this project please Check out my Youtube video.
Also, need any additional help please contact me through a comment.

Participated in the
Maps Challenge


