

Introduction: 8 Keys to Lifting and Lowering

Properly utilizing the 8 Keys to Lifting and Lowering is one of the most essential aspects of performing any job at the United Parcel Service. Whether you are a loader, an unloader, a supervisor, or even a semi-truck driver, the proper utilization of the 8 Keys to Lifting and Lowering will ensure that you stay safe while on the job. The 8 Keys to Lifting and Lowering a designed to keep you safe while you lift and lower packages, or any other objects while on the job. It is not only important to learn the 8 Keys to Lifting and Lowering, but it is also important to practice the 8 Keys any time that you lift or lower a package, or object, while on the job. This Instructable will thoroughly explain the proper way to lift a package using the 8 Keys to Lifting and Lowering.
Materials:
Lightweight, breathable clothing
Steel-toe boots with a sturdy leather upper
Re-fillable water bottle
A package or object that needs moved
DISCLAIMER!!
Nobody should ever attempt to complete a lift using the 8 Keys to Lifting and Lowering if you have not properly stretched. Cold muscles should never attempt to bear the weight of an object, no matter the weight of the object!
Step 1: Get Close to the Object; Work Within the Power Zone
Identify the object that you wish to lift. Approach and get close to the object,ensuring that you work within your power zone. The power zone is the area that extends from your mid-thigh to your armpit. Ensuring a close proximity to the object in Step 1 helps to ensure that you will continue to work in your power zone through the rest of this process.
Step 2: Position Feet; Shoulder Width Apart

After we are close to the object, your feet must be positioned shoulder width apart. Positioning your feet shoulder width apart helps to ensure that you have a strong foundation to complete the next step in our 8 Keys.
Step 3: Bend at the Knees; Keep the Natural Curve of the Back

After ensuring that we are close to the object, working within our power zone, and we have our feet positioned, it is vital to the process that we bend at the knees, while maintaining the natural curve of the back. This movement is almost the exact same movement as completing a back squat. We are bending at the knees and keeping the natural curve of the back to ensure that the weight of the object will be transferred directly to the muscles in your legs, which are far stronger than the muscles in the back.
Step 4: Test the Object for Weight and Shifting Contents

As you have now bent at the knees, the object must be tested for its weight and shifting contents. Testing the object for its weight before lifting helps to ensure that your body and mind are prepared for the strength that lifting the object will require. Placing two hands on the package and giving the package a slight wiggle will allow you to test the object’s weight and shifting contents.
Step 5: Establish a Firm Grip; Grasp Opposite Diagonal Corners

Now that we know how heavy the object is, it is time to begin lifting the package. Grasping opposite diagonal corners ensures that you are balancing and distributing the weight of the package evenly unto your body. Grasping the opposite diagonal corners of the object also ensures that you are in control of the package and any of the shifting contents that it might contain.
Step 6: Lift With a Smooth, Steady Motion; Do Not Jerk

Now that we have identified the weight of the object and have a firm grasp on the object, it is time to begin lifting the object off of the ground. While grasping opposite diagonal corners, lift with a smooth motion. Do not attempt to move too quickly because we are trying to avoid any sudden motions that will trigger more strain on your body.
Step 7: Step or Pivot, Do Not Twist

Now that the object has been lifted off of the ground, it is vital to remember not to twist while placing the object in the direction that you would like it to go. Twisting your torso while bearing the weight of an object puts unnecessary and dangerous strain on an individual's back. This strain can easily be avoided by keeping the package in close to your torso, while stepping or pivoting, instead of twisting, in the direction that you would like to place the package.
Step 8: Use Existing Equipment to Facilitate the Lift (If Available)

The final step to completing a successful lift while demonstrating the 8 Keys to Lifting and Lowering is to use existing equipment to facilitate the lift. Existing equipment refers to any equipment in your work area that could help you in leveraging a package. This could be adjusting a conveyor belt to facilitate the lift, utilizing a table cart on wheels to facilitate the lift, or even using other existing equipment such as an unload stand that is near by. The chair in the picture is representative of a table cart that could be used to help leverage yourself while lifting the package.
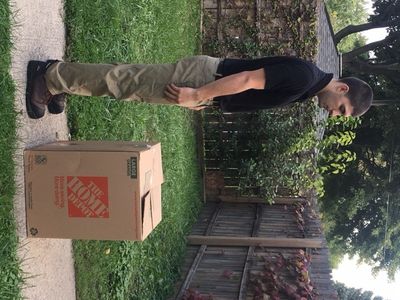
Step 9: 8 Keys to Lifting and Lowering in Action
Now that we have individually broken down each of the individual 8 keys to lifting and lowering, it is time to see the 8 Keys to Lifting and Lowering in Action. The 8 Keys to Lifting and Lowering are designed to reduce the strain on the back, and, in turn, transfer the weight of the object to the individual's legs where most of our power is naturally stored.


