

Introduction: Archimedean Spiral Table Lamp


Hello Makers.
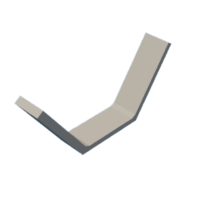
I was inspired by the Archimedean spiral to make this lamp. First, I tried to design on paper with make segment design. Then I cut paper and stick all parts with paper tape to ensure the design is feasible or not.
I use Fusion360 to accurately design and fabrication of design with an accurate angle.
Gather all supplies to start making lamps.
Supplies


1> 6 color 2 mm Acrylic sheet ( Yellow,Violet,orange,green,blue,red)
2> Fevi-quick adhesive
3> Glue gun
4> Paper tape
5> Laser cutting machine access
6> Laptop or computer for design
7> White Led Strip & 12 v adaptor
Step 1: Make Paper Prototype


- First, i start to draw lamp designs from archimedean spirals.
- I want to make this lamp from different colors of acrylic.
- The different parts had different lengths & widths and become smaller to bigger from the center to the outer region.
- After designing in 2D, I start to make it in 3D using paper.
- I cut paper pieces in approximate dimensions and join them with paper tape.
- With approximation, the dimension model design looks well.
- After making a paper prototype it is ensured that the design is feasible to make.
- Then choose the material for my lamp.
- I choose 6 different types of acrylic with a thickness of 2mm which is better for laser cutting and easily joinable with adhesive.
- For very accurate fabrication I use to design lamps in CAD software.
Step 2: 3D Design in Fusion360


- I use fusion360 for 3D design.
- First, I start to draw all pieces in 2d sketch.
- Then I extrude all pieces in 2mm thickness.
- Apply Color to all pieces as per the color available in my acrylic sheets.
- I arrange 3 same-color parts at 125 degrees to make my design.
- Similarly, place other parts. Now I have 15 different small assemblies of the same color.
- Now I arrange them in decreasing angles to make an internal archimedean spiral design.
- I started from 148 degrees on the outer part and decrease to 125 degrees while going inside.
- I want to place a light strip inside, so, I designed supports from 2mm acrylic to support the LED strip inside the lamp.
- Place them in the center of each flat part of the lamp.
- To make the rigid connection of the side parts with the center part, I design a port to connect it from the inside to make the lamp rigid and stable on the table. This part is made using 3d printing.
Step 3: Preparation for Laser Cutting
- For making this lamp I use different colors of Acrylic.
- That’s why we separate designs for different colors of acrylic for laser cutting.
- I export separately.DXF file for laser cutting as per color code of acrylic.
- Here I attach .DXF file for cutting.

Step 4: Laser Cutting


- For laser cutting, we have 6 color acrylic sheets. we arrange all designs as per the color of acrylic.
- We upload one-by-one designs in the machine and cut acrylic as per design.
- After all laser cutting, we have all 2D parts.
- We cut a total of 45 parts for the lamp and 15 LED supports.
Step 5: 3d Print Part

- To connect side parts to the center part, I design supports which is 3d printed and join 3 acrylic part at the correct angle.
- I attach reference .stl for 3d print.
- Also, attach the Internal support part which is useful to connect the side and center parts connection.
- print "Internal support part " 20 pieces.

Step 6: Test Assembly.


- After laser cutting, I assemble the part with paper tape to ensure the cut angle is as per design.
- it looks good and the joining angles are perfect as per design.
Step 7: Proceed Final Assembly


- Now we move to the final assembly.
- For actual assembly, we use Gluegun and Fevistick adhesives.
- For the outermost part, I use Feviquick for making strong bonds between parts.
- For internal support, I use a Glue gun to stick parts inside.
- Use a few quick-to-joint parts on 125 degrees using 3d printed support.
- Then I stick LED strip supports in the center of the center part with a glue gun.
- Place LED strip inside LED support.
- Then stick all 15 parts at an angle to make an archimedean shape.
- checkout the next steps for a detailed procedure.
Step 8: Sperate All Part As Per Design Color and Size


- we separated all parts as per the design to connect with glue.
- Sperate & place All Part As Per Design, Color, And Size.
- with this separation, it's easy for us to join the part one by one.
- Also, place 3d printed parts side by side for smooth assembly process.
Step 9: Connect Side and Center Part


- first, I glued the side and center part with a 3d printed connector.
- after gluing 15 different p[art as per design we are ready to connect led support inside that part.
- For accurate gluing, I design an outer support part for placing and gluing part on it at an accurate angle.
Step 10: Sequencing and LED Connection


- For joint 3 same color part, I place all 15 parts in increasing size sequence to attach LED strip inside them.
Step 11: Assemble All Part


For final assembly, we attach all 15 parts together in the shape of a Spiral.
To attach all parts I use a glue gun to join them.
after 55 minutes of assembly time, I join them together and we have our spiral shape lamp ready to test.
Step 12: Testing


- After assembling all parts, now we are ready for testing.
- Plug LED adopter in the switchboard and turn the switch on.
- It glows.
- You have an Archimedean Spiral lamp on your table.
- You can orient the lamp in any direction, it is seen as beautiful in any orientation.

Runner Up in the
Colors of the Rainbow Contest


