Arduino IR Remote Receiver
Intro: Arduino IR Remote Receiver
I have been successful in programming my Arduino to identify sets of digits transmitted from my IR remote.
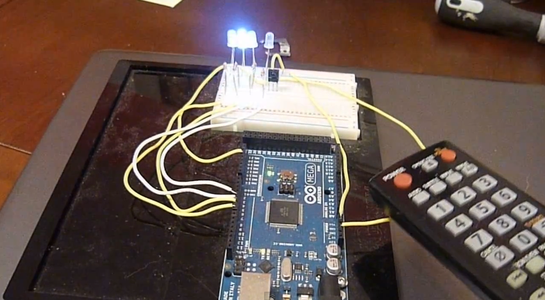
With this program you can control 4 LEDs over a IR Remote.
STEP 1: Parts
You will need:
- A TV IR Remote (I used one from samsung)
- 4 LEDs or more
- A IR Receiver (TSOP4838, or a similar)
- any Arduino
- A TV IR Remote (I used one from samsung)
- 4 LEDs or more
- A IR Receiver (TSOP4838, or a similar)
- any Arduino
STEP 2: Building
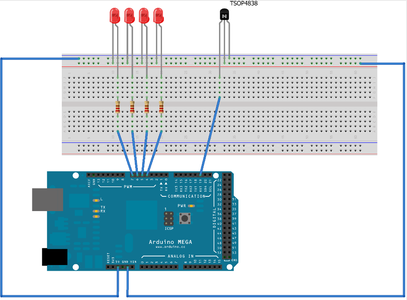
Connect The LEDs and the Reciver like in the picture
LEDs:
LED1 = Pin D4
LED2 = Pin D5
LED3 = Pin D6
LED4 = Pin D7
Reciver:
Pin1 = Pin D19
Pin2 = Gnd
Pin3 = 5v
If you don`t use the Arduino Mega: Use an Digital Pin and write the Pin into the Code.
LEDs:
LED1 = Pin D4
LED2 = Pin D5
LED3 = Pin D6
LED4 = Pin D7
Reciver:
Pin1 = Pin D19
Pin2 = Gnd
Pin3 = 5v
If you don`t use the Arduino Mega: Use an Digital Pin and write the Pin into the Code.
STEP 3: The Code
Unzip "IRremote_Library.zip" and put it to -> documents -> arduino -> liabraries...
Restart arduino...
Then unzip "IR-Reciver.rar" and open it with Arduino.
You are Ready to go !!!
Restart arduino...
Then unzip "IR-Reciver.rar" and open it with Arduino.
You are Ready to go !!!
STEP 4: Finishing
LED1 = Reverse Button
LED2 = Forward Button
LED3 = Play Button
LED4 = Pause Button
If you press one of the Button, the LED will light up.
And if you press the "Stop Button" they will go out.
Sorry for the watermark, I will replace the video soon.
19 Comments
HGK. 5 years ago
I have got an original Arduino mega and the code with the ir sensor doesn't work
How can I do?
PeopleAreWeird 6 years ago
working great with my remote controlled room lights
kehaldoshi 8 years ago
Arpan2103 8 years ago
It shows compiling error, when i upload IRrecvDemo to uno.
big_tacy 8 years ago
Be careful with the diagram above. I've done a few projects really just a beginner. Not sure if it's right or wrong but I like to wire the source power to the breadboard to start my project. In the case above I wired my positive and negative terminals to the breadboard from my Arduino. Then continued to place my IR receiver. However in the diagram the negative terminal is going to the positive side of the breadboard. Needless to say my IR receiver overheated shortly after turning the power on. They have IR receivers at Radio Shack for $1.99. So the diagram above will work but you have to pay close attention to the polarity of the pins.
AramV 9 years ago
3.3 actually heated it too, using any resistor works
lini27 9 years ago
AramV 9 years ago
AramV 9 years ago
5 volts was too much for my reciever, 3.3 might work better. it heated up and left an imprint on my finger
RonanL 9 years ago
I need to know how to get the remote-control values.
lini27 9 years ago
agis68 9 years ago
Hi, I have an old cellphone with broken battery but works using the adepter. I have photos and notes in this phone but are reachable only through IR. So with your hardware can i take my photos back????...the video doesn’t work
thanks
lini27 9 years ago
Yes, i deleted the video because it was made a long time ago.
codegamc 10 years ago
what opens .rar files? the Arduino IDE won't?
RonanL 9 years ago
7Zip does
ranil1234 10 years ago
compactcd 10 years ago
codegamc 10 years ago
that doesn't solve it. its a larger library problem.
ranil1234 10 years ago