

Introduction: Arduino MP3 Shield


More by the author:


About: Maker, PCB designer , electronics instructor from Jordan just one word ! I Adore electronics follow me on FB https://www.facebook.com/Mohannad-Rawashdeh-Raw-774983565988641/
Hi , I would today to share my experiment with MP3 Shield from ELECHOUSE , this Shield have Inboard Keys which is can control the Audio file very easy , Support FAT16 And FAT32 , And can read MP3 , WAV Format from SD Card , U disk , and from Build in SPI Flash memory , that Give you an ability to save your Audio file on the Board and play it later, so no need to External Storage device .
as I mentioned before , this shield Has Inboard Keys to control the Audio file , and You can Control the Audio File by Programming from Arduino , You can program your Audio when it's begin , Switch between file and Control the Volume Up and Down very easy .
I want to Show you How we can Play Audio from SD Card and U Disk .
The component that we need is :
1) Arduino Board .
2) Arduino USB-SD MP3 Shield From ELECHOUSE You can buy it from here .
3) SD Card With adapter.Or USB Flash .
4) Speakers Or Headset .
Step 1: Arduino MP3 Shield


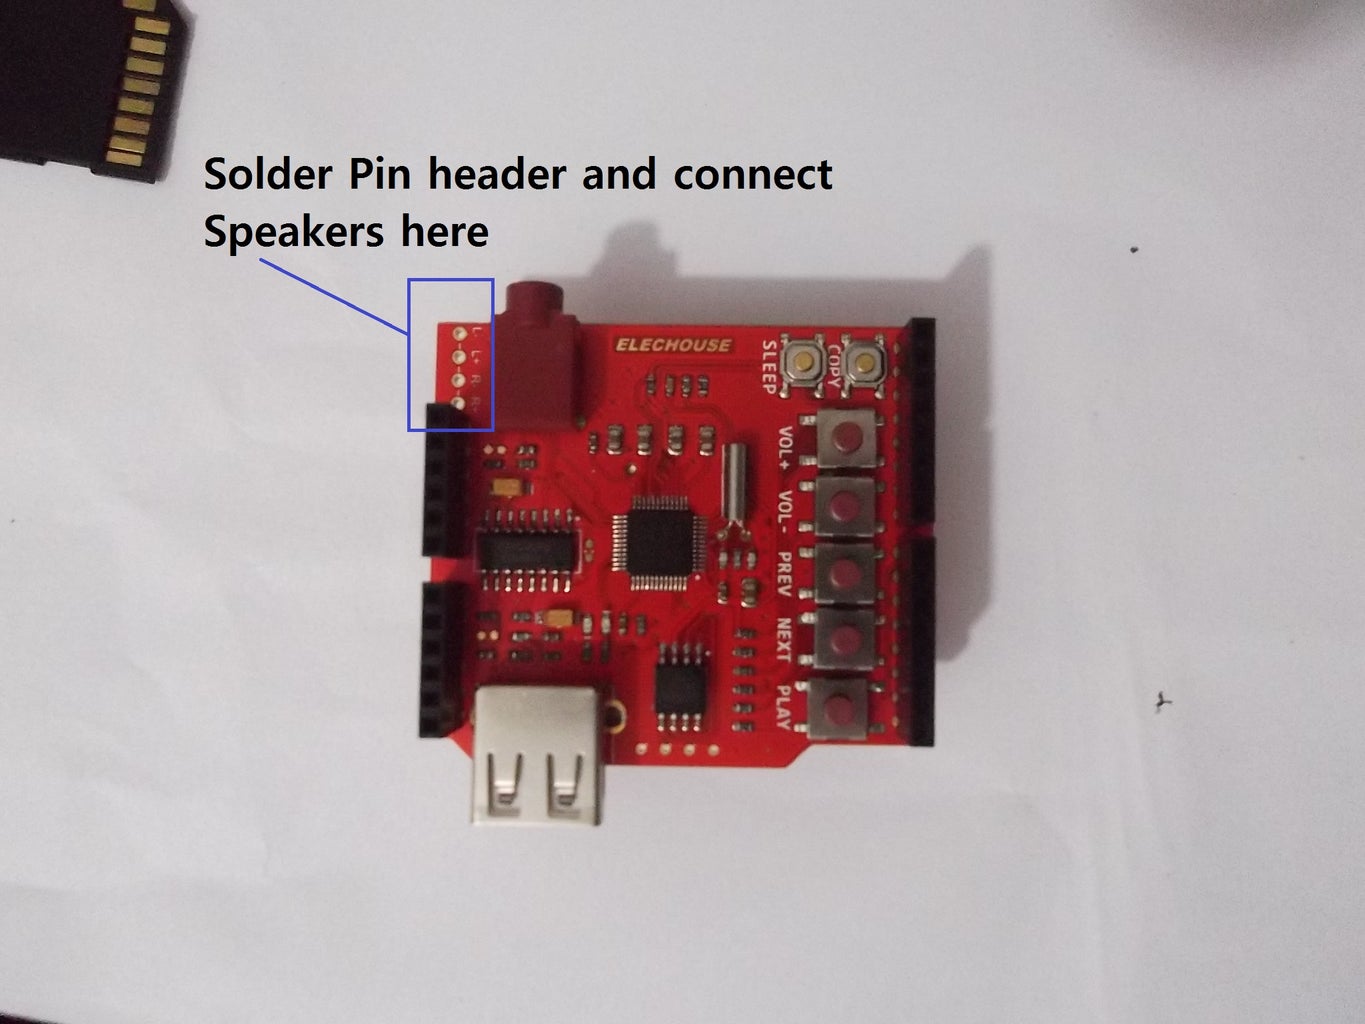

The Arduino MP3 Shield Have many Advantages such like Control by Serial UART interface or keys onboard , Have Build in Audio Amplifier 3W , and has On board 64MBit SPI-FLASH, which you can Save Your Audio file , and play it later .
This Shield can controlled from Arduino By Hardware Serial "Rx D0 , Tx D1 " and By Software Serial " RX D7 , Tx D8" So at first You can Use Hardware serial , easy to use but you must remove the shield when you want to Upload new sketch .
You can change The Serial interface pin by solder tools , Just remove the solder from Upper 2 pads and solder a small bridge between the 2 pads below to active Software serial Pin . look to the image attached to see these 3 pads .
You can also Bridge amplifier control bridge so you can turn on or Off by solder Amplifier Control pin , so This pin attached to arduino D9 Pin , I didn't use it in this experiment
You can also Solder Pin header on This shield "Look at the Picture" So You can connect Speakers to this shield
Step 2: Prepare Your Audio File


You can play 2 audio file format , MP3 And WAV , Before you can play your Audio file on this shield you must :
1) Copy your Audio File to SD Card or U- disk storage Device .
2) Add prefix 0000~9999 to the file names like 0000-My music.mp3 So the shield deal with the Files number , Not with Names .
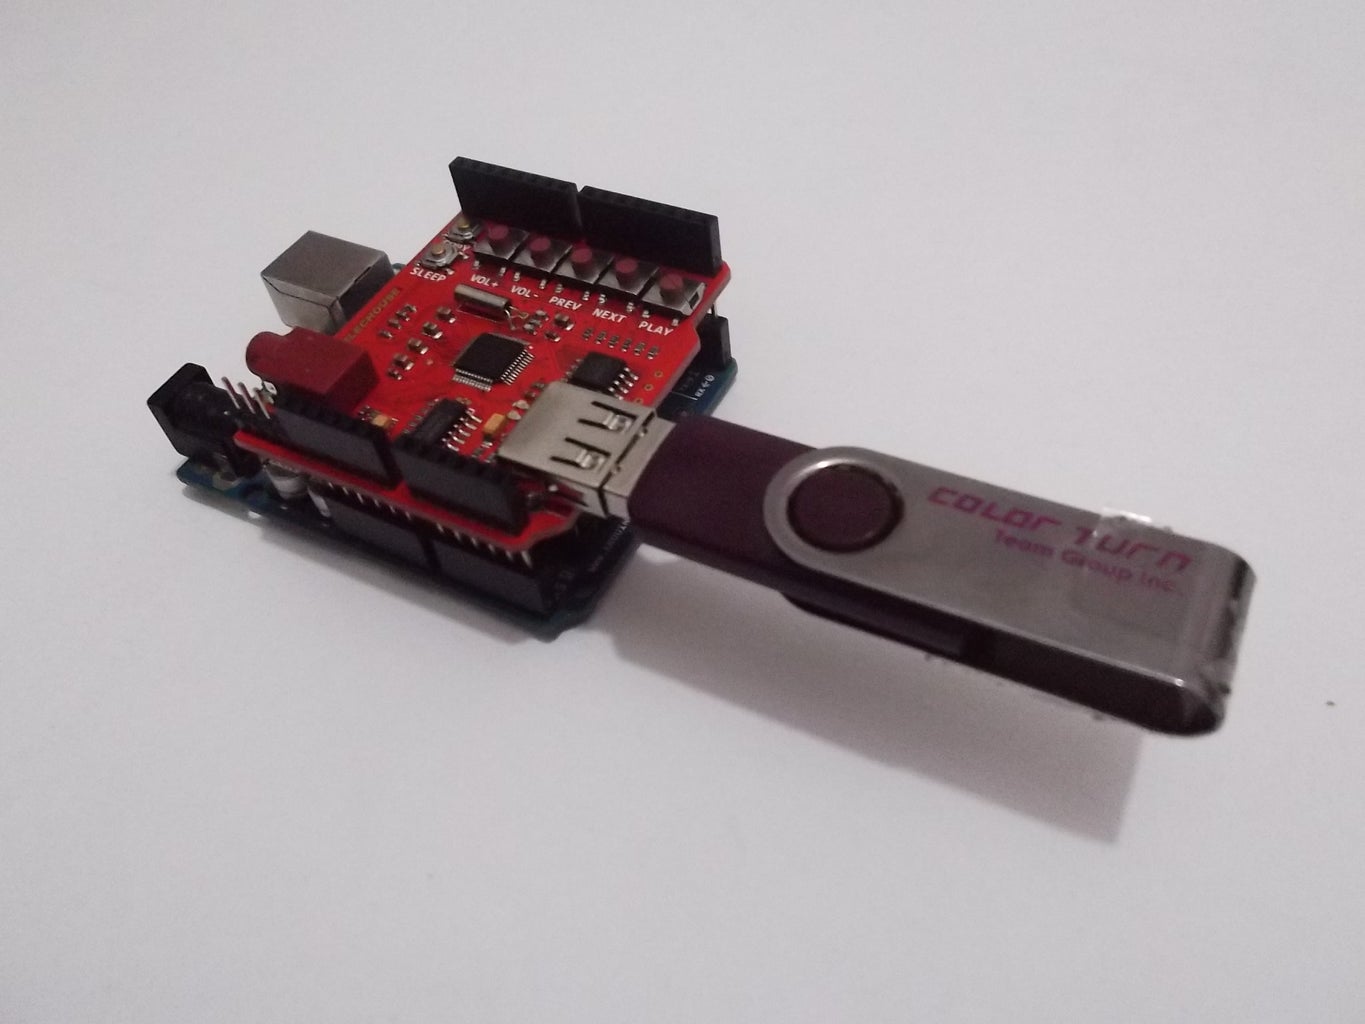
3) insert Storage device on the shield , power it on .
So let's see how we can control the audio file .
1) Copy your Audio File to SD Card or U- disk storage Device .
2) Add prefix 0000~9999 to the file names like 0000-My music.mp3 So the shield deal with the Files number , Not with Names .
3) insert Storage device on the shield , power it on .
So let's see how we can control the audio file .
Step 3: Play the Audio File


What ever if you are modify This shield to control it via Software serial or leave it as Hardware serial , Just you need is upload the sketch below to your arduino , in this step You can control the Audio file , Play , pause , Volume up and down , and Put the shield in sleep mode , through The button on Board .
This code for play sond from SD Card , you can change it to play U Disk , read the code below .
Upload this code if you are Using Software serial :
//..............................................................................................
//Written by : Mohannad Rawashdeh
// this code For MP3 Shield Elechosue
// Software serial interface
// For product : http://www.elechouse.com/elechouse/index.php?main_page=product_info&cPath=168_170&products_id=2193
//https://www.instructables.com/member/Mohannad+Rawashdeh/
#include <SoftwareSerial.h>
SoftwareSerial Geno(7,8); // Rx , Tx
unsigned char cmd_buf[10];
unsigned char i;
void ArduinoMP3Shield_SendCMD(unsigned char *cmd_buf, unsigned len)
{
unsigned i;
for(i=0; i<len; i++){
Geno.write(cmd_buf[i]);
}
}
void setup(void)
{
/** wait until arduino mp3 shield get ready */
delay(1000);
Geno.begin(9600);
/** set volume */
cmd_buf[0] = 0x7E; // START
cmd_buf[1] = 0x03; // Length
cmd_buf[2] = 0xA7; // Command
cmd_buf[3] = 0x0F; // new volume
cmd_buf[4] = 0x7E; // END
ArduinoMP3Shield_SendCMD(cmd_buf, 5);
/** set play mode repeat all */
cmd_buf[0] = 0x7E; // START
cmd_buf[1] = 0x03; // Length
cmd_buf[2] = 0xA9; // Command SET MODE
cmd_buf[3] = 0x02; // set mode
cmd_buf[4] = 0x7E; // END
ArduinoMP3Shield_SendCMD(cmd_buf, 5);
/** select SD card first music and play */
cmd_buf[0] = 0x7E; // START
cmd_buf[1] = 0x04; // Length
cmd_buf[2] = 0xA0; // For U Disk change this line to 0xA2
cmd_buf[3] = 0x00; // file number high byte
cmd_buf[4] = 0x01; // file number low byte
cmd_buf[5] = 0x7E; // END
ArduinoMP3Shield_SendCMD(cmd_buf, 6);
}
void loop(void)
{
}
//..............................................................................................
Upload this code if you are Using Hardware serial :
//.......................................................................
// this code For MP3 Shield Elechosue
// Software serial interface
// For product : http://www.elechouse.com/elechouse/index.php?main_page=product_info&cPath=168_170&products_id=2193
//https://www.instructables.com/member/Mohannad+Rawashdeh/
unsigned char cmd_buf[10];
unsigned char i;
void ArduinoMP3Shield_SendCMD(unsigned char *cmd_buf, unsigned len)
{
unsigned i;
for(i=0; i<len; i++){
Serial.write(cmd_buf[i]);
}
}
void setup(void)
{
/** wait until arduino mp3 shield get ready */
delay(1000);
Serial.begin(9600);
/** set volume */
cmd_buf[0] = 0x7E; // START
cmd_buf[1] = 0x03; // Length
cmd_buf[2] = 0xA7; // Command
cmd_buf[3] = 0x0F; // new volume
cmd_buf[4] = 0x7E; // END
ArduinoMP3Shield_SendCMD(cmd_buf, 5);
/** set play mode repeat all */
cmd_buf[0] = 0x7E; // START
cmd_buf[1] = 0x03; // Length
cmd_buf[2] = 0xA9; // Command SET MODE
cmd_buf[3] = 0x02; // set mode
cmd_buf[4] = 0x7E; // END
ArduinoMP3Shield_SendCMD(cmd_buf, 5);
/** select SD card first music and play */
cmd_buf[0] = 0x7E; // START
cmd_buf[1] = 0x04; // Length
cmd_buf[2] = 0xA0; // Command For U Disk change this line to 0xA2
cmd_buf[3] = 0x00; // file number high byte
cmd_buf[4] = 0x01; // file number low byte
cmd_buf[5] = 0x7E; // END
ArduinoMP3Shield_SendCMD(cmd_buf, 6);
}
void loop(void)
{
}

Step 4: Control the Audio Using Aduino


You can control the audio Play , pause , and Volume up and down , Depend on commands you program it on arduino , You Just send Serial Command , It's too easy to send command , this Sketch below show this method .
No need to library to program it , But if you want there is a Library for this Shield you can Download it from Here
//..............................................................................
// Mohannad Rawashdeh
// MP3 1.2V Shield test .
#include <SoftwareSerial.h>
SoftwareSerial Geno(7,8); // Rx , Tx
unsigned char Data[10];
unsigned char i;
void setup() {
// put your setup code here, to run once:
Geno.begin(9600);
SetVolume(20); // set volume from 0-31
delay(1000);
FileSource('SD_card',0x05);
SetPlayMode('Single_play');
delay(5000);
play_pause();// Pause
delay(3000);
FileSource('SD_card',0x01);
play_pause(); // play
delay(5000);
Next();
delay(5000);
Next();
for(int v=15;v>0;v--){
SetVolume(v); // set volume from 0-31
delay(1000);
}
for(int j=0;j<15;j++){
SetVolume(j); // set volume from 0-31
delay(500);
}
delay(1000);
FileSource('SD_card',0x04);
delay(5000);
FileSource('SD_card',0x05);
// FileSource('SD_card',0x03);
//Stop();
}
void loop() {
// put your main code here, to run repeatedly:
}
// Select File sorce "SD Card, SPI Flash , U Disk "
void FileSource( char type, byte track ){
play_pause();// Pause
Data[0] = 0x7E;
Data[5] = 0x7E;
switch (type){
case 'SD_card':
// START
Data[1] = 0x04; // Length
Data[2] = 0xA0; // Command
Data[3] = 0x00; // file number high byte
Data[4] = track; // file number low byte
break;
case 'SPI_Flash':
Data[1] = 0x04; // Length
Data[2] = 0xA1; // Command spi flash 0XA1
Data[3] = 0x00; // file number high byte
Data[4] = track;
break;
case 'U_Disk':
Data[1] = 0x04; // Length
Data[2] = 0xA2; // Command
Data[3] = 0x00; // file number high byte
Data[4] = track; // file number low byte
break;
}
Command(Data,5);
play_pause();// Pause
}
void SetVolume( int vol){
Data[0] = 0x7E; // START
Data[1] = 0x03; // Length Not 0x02
Data[2] = 0xA7; // Command
Data[3] = vol; // new volume
Data[4] = 0x7E; // END
Command(Data,5);
}
void SetPlayMode(char type){
Data[0] = 0x7E; // START
Data[4] = 0x7E; // START
switch (type){
case 'Single_play':
Data[1] = 0x02; // Length
Data[2] = 0xA9; // Command
Data[3] = 0x00; //Mode parameter
break;
case 'Repeat_single':
Data[1] = 0x02; // Length
Data[2] = 0xA9; // Command
Data[3] = 0x01; //Mode parameter
break;
case 'Repeat_all':
Data[1] = 0x02; // Length
Data[2] = 0xA9; // Command
Data[3] = 0x02; //Mode parameter
break;
case 'Play_Random':
Data[1] = 0x02; // Length
Data[2] = 0xA9; // Command
Data[3] = 0x03; //Mode parameter
break;
}
Command(Data,5);
}
//...............................
void play_pause(){
Data[0] = 0x7E; // START
Data[1] = 0x02; // Length
Data[2] = 0xA3; // Command
Data[3] = 0x7E; //Mode parameter
Command(Data,4);
}
void Stop(){
Data[0] = 0x7E; // START
Data[1] = 0x02; // Length
Data[2] = 0xA4; // Command
Data[3] = 0x7E; //Mode parameter
Command(Data,4);
}
void Next(){
Data[0] = 0x7E; // START
Data[1] = 0x02; // Length
Data[2] = 0xA5; // Command
Data[3] = 0x7E; //Mode parameter
Command(Data,4);
}
void Previous(){
Data[0] = 0x7E; // START
Data[1] = 0x02; // Length
Data[2] = 0xA6; // Command
Data[3] = 0x7E; //Mode parameter
Command(Data,4);
}
void Command(unsigned char *Data, int length){
for(int i=0; i<length; i++){
Geno.write(Data[i]);
}
}
The video Below show to you how it worked .
Step 5: Final , Document , Helpful Links


This shield Consume about 120mA with 2 speakers 3.2W - 5 Ohm, So it's safe to feed from arduino and 70mA with no headphone or speakers connected
For more information about this shield You can return to the Manual of this shield , From Here You can Find all commands for this shield , And how you can save your audio file on Board SPI Flash memory
I will prepare some projects about this shield and share it with you .
Thank you
For more information about this shield You can return to the Manual of this shield , From Here You can Find all commands for this shield , And how you can save your audio file on Board SPI Flash memory
I will prepare some projects about this shield and share it with you .
Thank you
