Introduction: Carving a Native American Face
In this video I show my process for carving a Native American face from a 2x2" stick of basswood. I made this video earlier this year but didn't get around to making an Instructable for it until now.
I am using an 11 piece Flexcut palm carving set and a Flex cut 2 knife "Whittler's Kit"
***I want to emphasize that I admire and respect Native American art and culture and this video is not intended to disrespect Native American people in any way***
Thanks for looking!
Step 1: Divide Face Into 3rds
The first step is to divide the face into thirds - The chin to the nose, the nose to the brow, and the brow to the hairline.
Step 2: Dig Out the Eye Sockets
Then, I dig out the eye sockets with a gouge.
Step 3: Indent Outsides of Nostrils
The deepest parts of the face are the eye sockets and the outsides of the nostrils. You cut a really small and deep indentation on each side of the nose.
Step 4: Cut Out Mouth Area
From the nostril indentations you score a line of decreasing depth to the outside of the chin. Then you round the mouth area down and cut either a smile or frown or something for the mouth. I've found that less is better for the actual mouth - just a line where the lips purse and rounding the lips over a little works great. This is where it really starts to look like a face... kind of.
Step 5: Carve the Eyes
Eyes are usually the hardest part and require the most practice. I carve a slit out for the actual eye instead of trying to carve an eyeball. For proportions, the eyes should be the same width as they are far away from each other (see picture). After I carve my eye slit, I carve creases around them for the eyelids.
(There are TONS of videos on the internet for carving eyes for little figurines like this if you want more detail just search youtube: "woodcarving eyes")
Step 6: Shape Face
Now you just kind of dig out parts to make it look more like a face. I take the neck and cheeks down and touch up other areas until I'm tired of carving.
Step 7: Decorative/Details
Finally, I put in whatever wrinkles and decorations I want to. The more wrinkles you have the older you look ;). I really like carving feathers and I don't like carving hair so feathered headdresses end up being a fun detail to work on.
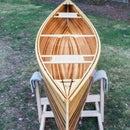
The video explains the steps also - I always feel like it's easier to understand carving concepts on video rather than pictures. If you like the video feel free to subscribe to my channel - I make a lot of fast paced instructional stuff like this (working on a cedar strip canoe now).
Thanks for looking!!!

Participated in the
Homemade Gifts Contest 2016

Participated in the
Epilog Contest 8


