

Introduction: Creating Your Own Shape-O Shapes


The Coronavirus Pandemic has been a long slog here in Melbourne. We are now officially the longest locked down city in the world - and with that comes lots of spare time to clean out old boxes of things and learn new skills! I'm currently living with my parents, and my mum discovered this old Tupperware Shape-O toy while she was cleaning out some things. I used to LOVE this toy as a small child, but it seems I managed to lose most of the shapes along the way.
Mum wanted to clean up the toy and give it to my nephew who may have a better use for it as an almost one year old, but I wanted him to have the full set of shapes to play with. So I set about designing the missing shapes in Fusion 360 (and then decided to do the ones that we had as well, to make a brand new, full set!). I then printed them on my 3D printer.
This guide will take you through the design in Fusion 360, printer settings and tips to get them printed and the finished product.
Oh and if you like my work, please:
Supplies
For this project you'll need:
- A 3D printer
- Filament in the colour of your choice (I chose yellow to stick as close to the original as possible)
- Access to a computer/laptop with Fusion 360 installed (optional if you're creating your own shapes, otherwise, I'll include the files for the ones I created here)
Step 1: Start Out in Fusion 360

You can install Fusion 360 on your computer for free if you are a hobbyist and using it for personal use. Click here to download the program if you don't already have it installed.
Once it's installed, open it up and you will be faced with a blank canvas ready for your design.
I am the first to admit that my 'skills' in Fusion 360 are all self taught from Youtube videos, and so I wanted to keep this Instructable to a few simple tasks that can be transferred to a number of different designs/projects.
Fusion 360 works with each of the 3 planes. I found that the best way to create each shape was to draw the 2D shapes to the dimensions I required.
On the Solid tab, click on the first icon under it (the one with the green plus) to Create Sketch.
Then choose the plane you want to work on. I chose what would be the bottom of the design.
Choose the 2 point rectangle (or if you're doing another shape, choose the appropriate shape).
Then use the grid as a guide to draw the shape to the dimensions you need. Click the starting point for the first corner and then again at the other end to complete the square.
Once done, click Finish Sketch (with the white tick in the green circle) in the toolbar.
Watch the GIF to see the steps in a visual format in the step below (the GIF combines step one and two).
Step 2: Making It 3D

After you've created the square shape and clicked 'Finish Sketch' you'll need to make this into a 3D shape.
In order to do this, you click on the shape you created, click the Extrude button (next to the Create Sketch button) in the toolbar.
Then either click and hold the arrow that appears and drag to make it your desired height, or enter a value in millimetres (mm) and click OK.
You now have your first 3D shape! Congratulations!
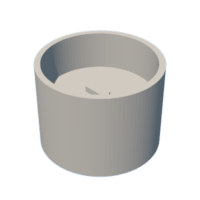
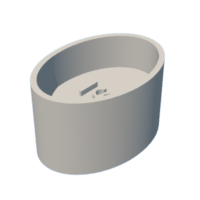
Step 3: Cutting the Hollow Out

A characteristic of the Shape-O shapes is that they are hollowed out from the top and bottom with a small number printed in each of them (to assist with counting to 10 as well as recognising shapes).
In order to get these hollow areas in the shape, we need to cut into them. The easiest way I found to do this is to click on Create Sketch again.
Click on the face of the shape you want to cut into. In our case, I'm starting with the top.
Choose 2 point rectangle again (or the shape appropriate for your design).
Use the grid lines as a guide for measurement (I zoomed in a bit so I could see the gridlines representing 1mm). I decided I wanted 2mm walls for my shape.
So I started drawing my square 2mm in on both axes and finished drawing my square in 2mm on both axes on the opposite side of the shape.
Click Finish Sketch and you should see your square within a square.
Click on the Home icon in the top right corner to return back to your 3D view.
You'll still see the square you just drew sitting on top of the cube.
Click on the square, making sure that you've just selected your most recent square.
Click Extrude.
This time, drag the design down or type in a number with a negative value (EG: -24). My design is 50mm high, so in order for the middle section to match the width of the walls, I'm cutting in 24mm. If I do the same on the bottom, the middle section will be 2mm like my walls (50 - 24 -24 = 2mm).
Click OK and you should see the hole that you've cut.
Repeat the process for the bottom of the cube.
If you get stuck, watch the GIF to get a visual understanding of how the program works.
Step 4: Adding the Number

Adding the number (or any text really) is pretty simple.
Click on the face you want to add text to (it must be the face you want the text to come out of).
Click Create Sketch.
Under the main shapes, there is a menu that says CREATE with a downwards arrow. Click that, and select Text.
Click where you want the text to start and draw a rectangle that you think will fit the text. A box will appear.
Type what you want it to say in the sample text area (I just put the number 4).
Choose your font, typeface and enter the height of the lettering in mm. You can also make other edits like alignment. Click OK.
Move the text around if it needs better centering on your design and once you're happy with it, click Finish Sketch.
Step 5: Finishing It Off

To finish off your design, we just need to raise the number (you can also deboss it if you would prefer, just make sure you have enough depth in the middle section if you decide to do this, otherwise it may end up see through!)
Click on the number so it's highlighted and then go back to Extrude on the toolbar.
I just entered a measurement on this one of 2mm. You may choose to go more or less.
Then check out your amazing design!
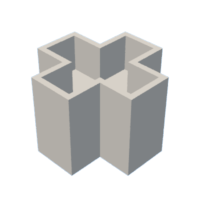
Step 6: Other Shapes

I just wanted to step through how to make one of the shapes and keep it simple, but once you understand the basics, your options are really endless. I would recommend other simple shapes like the circle and triangle to get your practice up. Then move onto some of the more difficult shapes.
You might decide to use circles, arcs, ellipses or just use the line tool to get a range of edges.
Your geometry and angles will be put to the test. When drawing lines, you can specify how long you want each line to be (side of the shape) and also enter the number of degrees for the angle of the next line. I found this functionality particularly helpful when I was creating the Pentagon and Hexagon shapes. An example is that each interior angle in a Pentagon is 108 degrees. Google is definitely your friend here.
Step 7: 3D Printing


Once you've completed your designs you need to export them to STL files. Do this by clicking on the downwards arrow next to the 'new' icon in the menu. Click Export, choose a filename and in the type, choose STL.
Choose the location to save it and then click Export.
Once you've got your STL, you can slice it in an application like Cura.
Make sure you include supports (as you will need them to ensure the middle part of the shape prints on top of the hollow under it).
Because these shapes are small, I did have some problems with adhesion of the print to the bed of my 3D printer. If you find you have the same problem, try some of these in order to improve adhesion and ensure a successful print:
- Reduce print speed to 40% or so for the first few layers (I'm printing at about 50mm/s at 100% speed).
- Reduce fan speed to half
- Try a glue stick or hair spray (I found this was the best option in the end)
Each shape took about 2 hours to print.
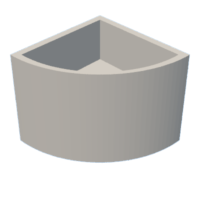
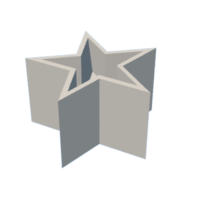
Step 8: The Finished Product


Here are the 10 shapes that I created using Fusion 360. They all fit in the Shape-O holes and are all numbered with a raised number like the original ones. If you want to print your own, then I've attached the STL files below.
Hopefully you can use these skills to make other objects with basic shapes or for projects where you need to include lettering.
Post your makes below, I would love to see what you make!
Attachments


Runner Up in the
Plastic Challenge


