

Introduction: DIY Lithium Battery Charger


Hey! everyone My name is Steve.
Today I'm gonna show How to Make a Universal Battery Charger it can charge any battery up to 22 Volt and it can deliver up to 100 watts fo power
I'll use this charger to charge my 18650 4S3P Lithium-Ion Battery
Let's Start
Step 1: Features


Input Power
- 110-220 v AC
Output Power
- 1.25-24 v DC Adjustable at 8 Amps
- Max output 100 Watt
Built-in Protection
- Short Circuit Protection
- Over Load Protection
- Over Charge Protection
Charger Features
- Constant Current Charging
- Constant Voltage Charging
- Full charge indicator
- Charging Indicator
Continuously asked Questions
Q - Can I leave it overnight
A - Yes! For Sure this will not overcharge your battery just because we're using constant voltage there will be no potential difference to make your battery overcharge but you just need to set it correctly
Google it for more information
Note - Please see the images for better understanding
Step 2: Thing I've Used


LCSC
----------------------------------------------------------------------
- XT60 - http://bit.ly/2mtWmU3
- Stand-Off - http://bit.ly/2z8qpDU
- LCSC 8$ OFF on your first order - https://lcsc.com/?href=STEVE&source=referral
----------------------------------------------------------------------
Banggood
----------------------------------------------------------------------
- 24v SMPS - https://goo.gl/bvKXN3
- Dc to Dc Step Down - https://goo.gl/bvKXN3
- Volt Meter - https://goo.gl/bvKXN3
- Heat Shrink Tube - https://goo.gl/bvKXN3
- XT60 Connector - https://goo.gl/bvKXN3
- Alligator Clip - https://goo.gl/bvKXN3
- Soldering Iron - https://goo.gl/bvKXN3
- Rubber Bumpers Pad - https://goo.gl/bvKXN3
----------------------------------------------------------------------
Amazon
----------------------------------------------------------------------
- 24v SMPS - http://amzn.to/2wSnT0Y
- Dc to Dc Step Down - http://amzn.to/2wSnT0Y
- Volt Meter - http://amzn.to/2wSnT0Y
- Heat Shrink Tube - http://amzn.to/2wSnT0Y
- XT60 Connector - http://amzn.to/2wSnT0Y
- Alligator Clip - http://amzn.to/2wSnT0Y
- Soldering Iron - http://amzn.to/2wSnT0Y
- Rubber Bumpers Pad - http://amzn.to/2wSnT0Y
----------------------------------------------------------------------
Aliexpress
----------------------------------------------------------------------
- 24v SMPS - http://bit.ly/2Vva3P9
- Dc to Dc Step Down - http://bit.ly/2Vva3P9
- Volt Meter - http://bit.ly/2Vva3P9
- Heat Shrink Tube - http://bit.ly/2Vva3P9
- XT60 Connector - http://bit.ly/2Vva3P9
- Alligator Clip - http://bit.ly/2Vva3P9
- Soldering Iron - http://bit.ly/2Vva3P9
- Rubber Bumpers Pad - http://bit.ly/2Vva3P9
----------------------------------------------------------------------
Note - Please see the images for better understanding
Step 3: 3D Printed Enclosure


I used Fusion to design my Enclosure
3D Printing Files - http://bit.ly/2kXDxIs
Note - Please see the images for better understanding
Step 4: Sponsor

Today's Article is Sponsored by lcsc.com
They are the Largest Electronics Components Supplier From China Ready to Ship within 4 Hours and they ship World Wide
Step 5: Wiring Diagram

Note - Please see the images for better understanding
Step 6: Assembly

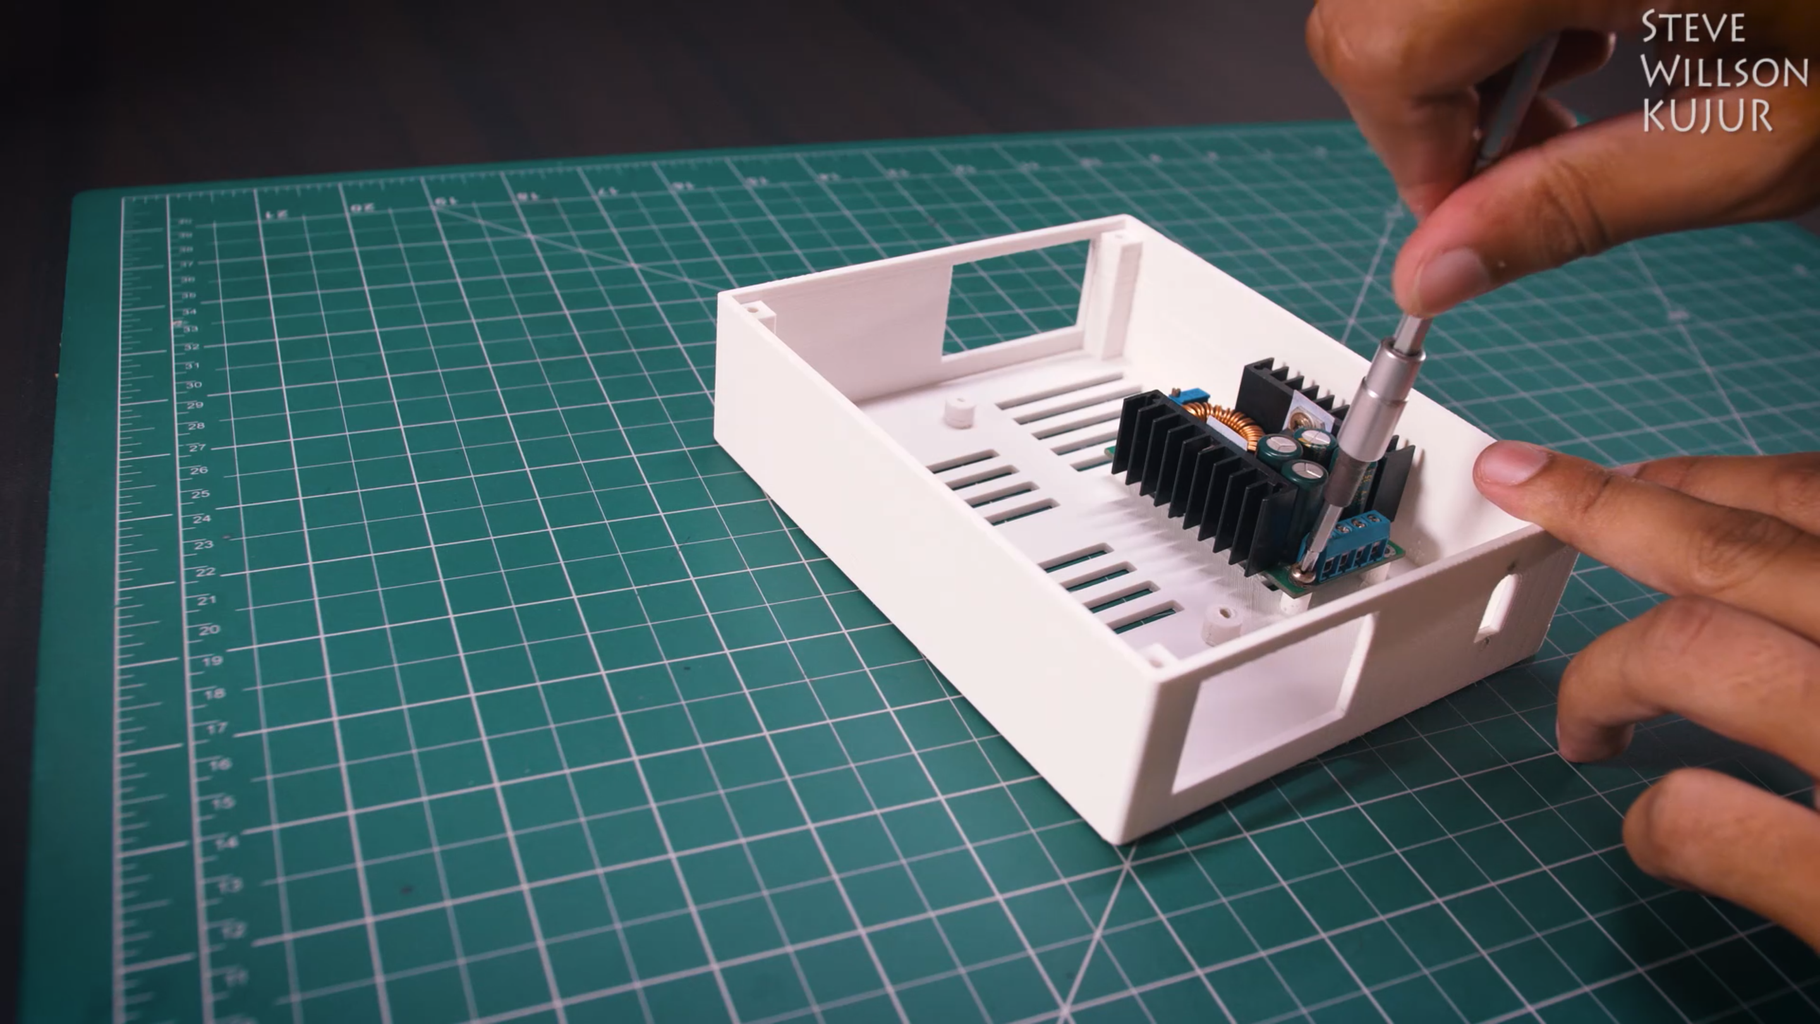


I gathered all the component and started with installing the 2 main boards first I've installed the step-down converter module and then I've installed the SMPS Module using couple of screws
Note - Please see the images for better understanding
Step 7: Soldering Power Socket


First, I've tinted the legs of the power socket and then used some small size wire to connect it
Make sure you do this
- This module has 3 things, 1 Fuse 1 Switch 1 Socket make sure you connect all the things in series the fuse is already connected in series with a socket you just need to connect the switch with socket
Note - Please see the images for better understanding
Step 8: Soldering Voltmeter & Ammeter


I always try to use some good quality silicone wire as it is softer to handle and can handle high amps and high temperature I soldered 3 wire to the Voltmeter and used some heat shrink tube to shield it
Note - Please see the images for better understanding
Step 9: Wiring

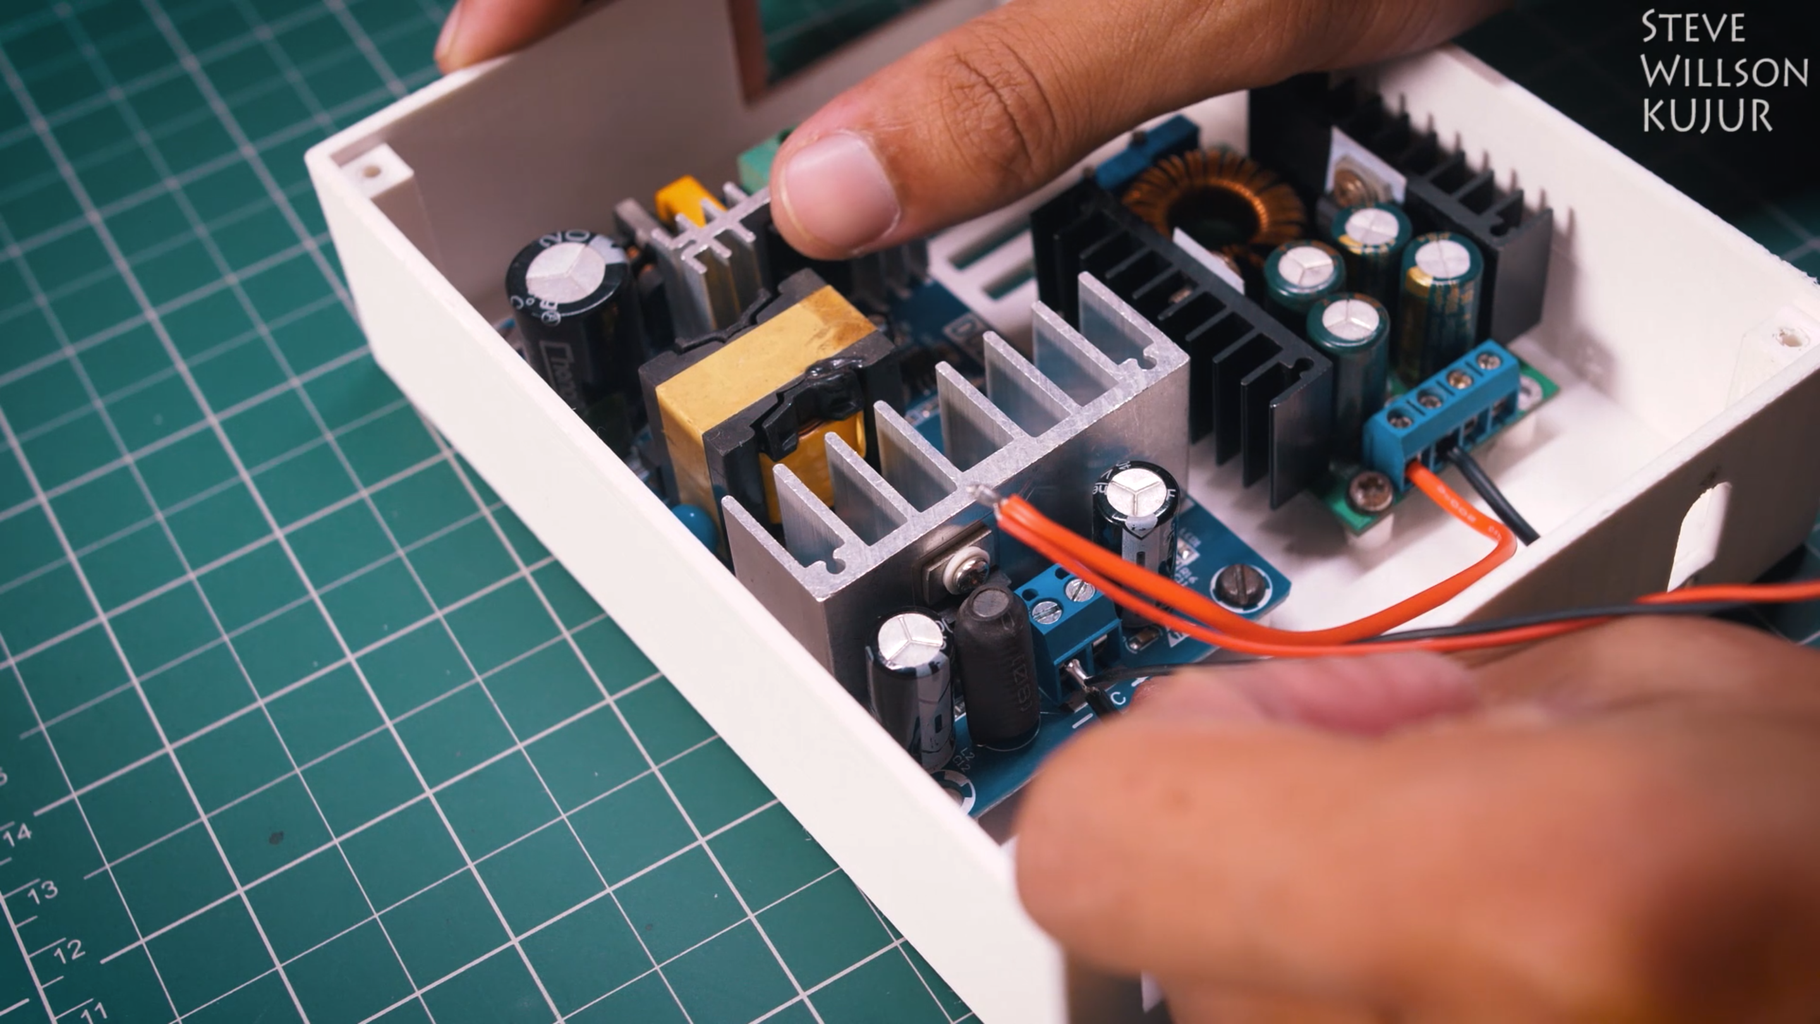


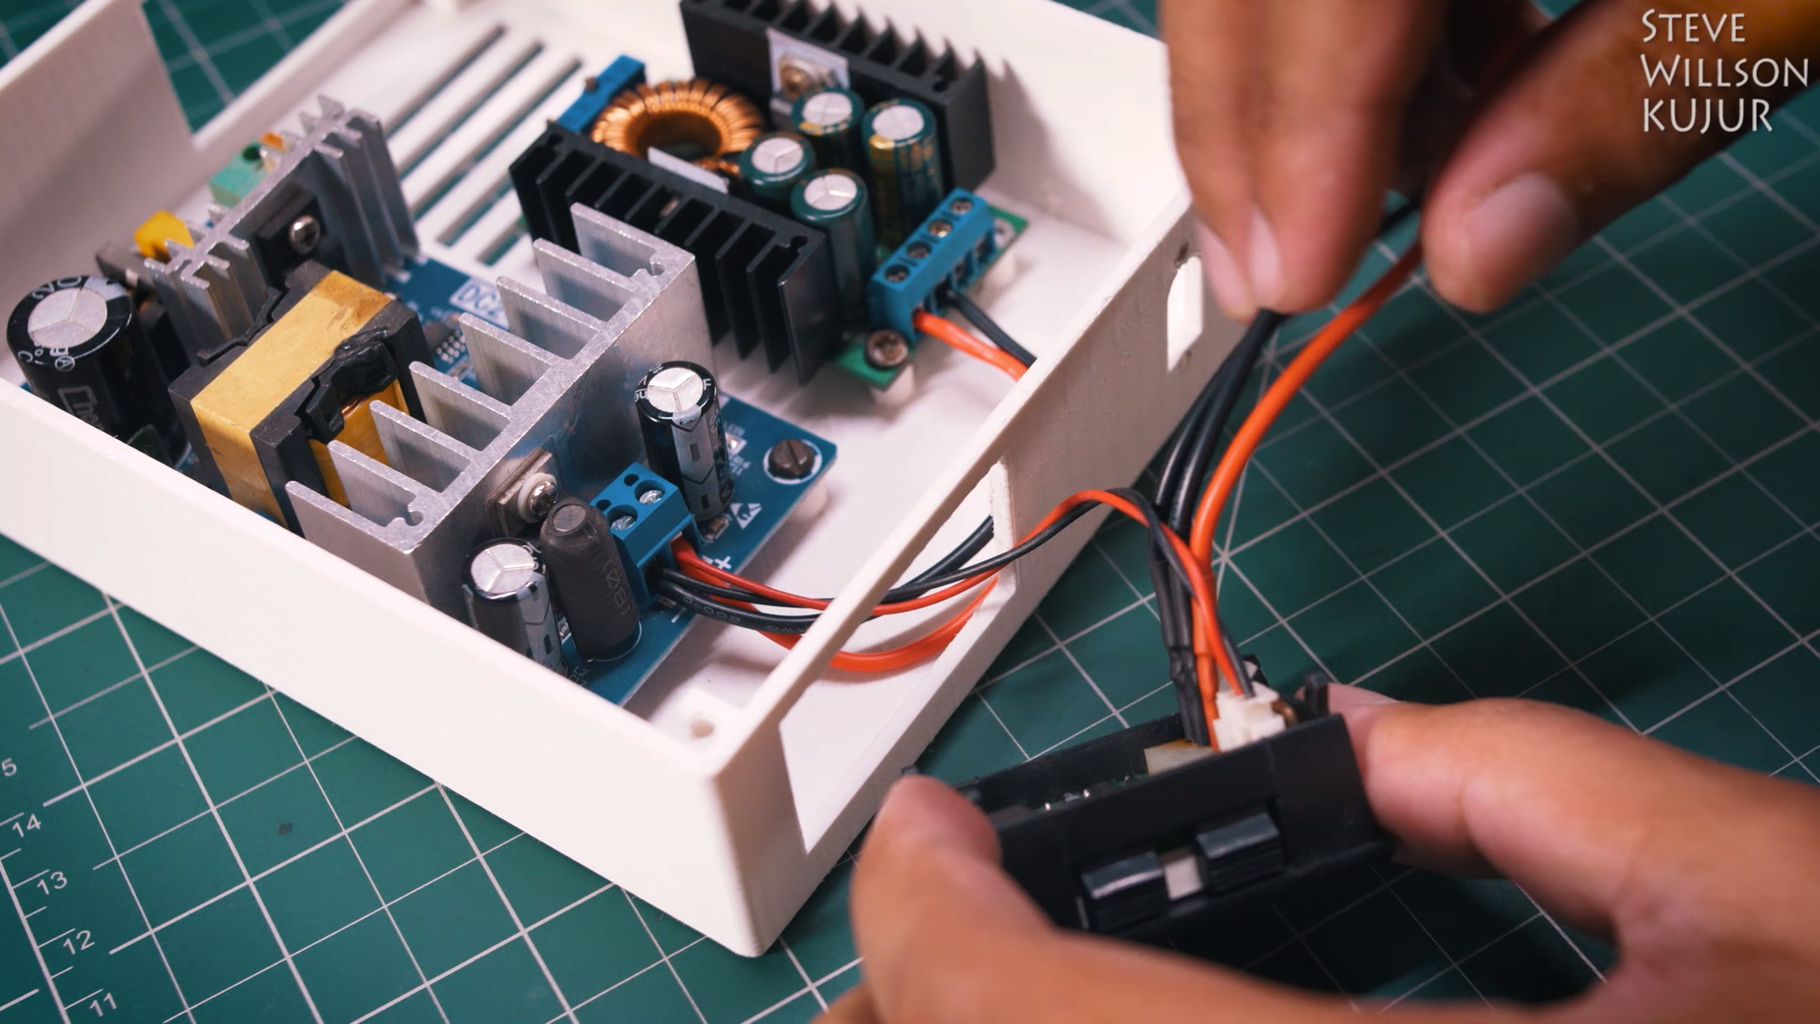


It is very hard to write connection over a text So it is highly recommended to see the wiring diagram
After connecting all the wire I've soldered the XT60 and then used some heat shrink tube to shield it
and then used some bolt to fix XT60 in place
Note - Please see the images for better understanding
Step 10: Wiring Power Socket


Used some force to push power socket in place and used a screwdriver to insert the wire in place
Note - Please see the images for better understanding
Step 11: Wiring Completed


Note - Please see the images for better understanding
Step 12: Power Cord


I've inserted the power cable and turned the switch on
Note - Please see the images for better understanding
Step 13: Setup


Potentiometer
- Right - Current
- Left - Voltage
Increase and Decrease
- Clockwise - Increase
- Anti-Clockwise - Decrease
Setting Up
First I used a small screwdriver to adjust the voltage via left potentiometer and then I've connected the battery and set the current via right potentiometer
Note - You can't set the current without any load " So be sure to connect the battery first and then set the current "
3SLithium Battery
- Voltage - 12.6V "4.2 x 3 = 12.6"
- Current - According to the manufacturer
4s Lithium Battery
- Voltage - 16.8V "4.2 x 4 = 16.8"
- Current - According to the manufacturer
5s Lithium Battery
- Voltage - 21V "4.2 x 5 = 21"
- Current - According to the manufacturer
Led Acid Battery 12V
- Voltage - 13.8v
- Current - According to the manufacturer
Find out the current " Only For Lead Acid Battery "
- Use this formula - Battery Capacity x 1/10 = setting
Example " Only For Lead Acid Battery "
- I used a 7 amp battery, now let's put the formula
- 7 x 1/10 = 0.7 and here I set it to 1 amp " You can go for little higher current but not too much "
Note - Please see the images for better understanding
Step 14: Finishing


I used 4 screws to close the upper half and then I put 4 rubber legs "pad" to bottom
Note - Please see the images for better understanding
Step 15: Finished

That's all for today guys!
You Just Made It
Thank you for visiting my Instructables
Stay tuned for next Projects


