

Introduction: Hoth Leia Boots


This is a guide for one method of making the boots Leia wears during the Hoth scenes in Empire Strikes Back. Supposedly, the design is loosely based on Mukluks, which makes sense, even if they're fugly as hell and totally unlike anything anyone else has ever worn, outside of truly dedicated Star Wars cosplayers.
Unfortunately for everyone, I am a truly dedicated Star Wars cosplayer, and because I thought it’d be a great friggin’ idea to make this costume, I got to make these things, too.
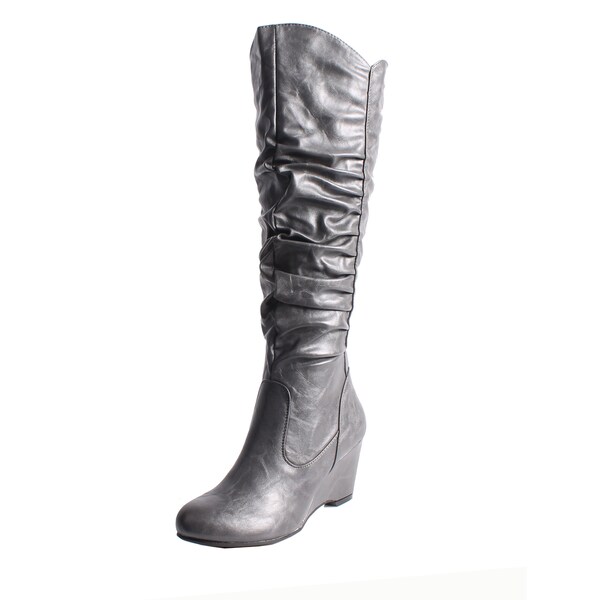
I couldn’t find grey wedge boots – or even booties – for anything less than an arm and a leg. What I did find was a pair of grey, knee-high boots at a thrift store for $8 USD.
- Cons: block heel, slouch style, shiny finish, 1/2 size too big
- Pros: right-ish color, right height, freaking cheap
So I ran with it.
Before you embark on your own boot-altering adventure, there are a few things to keep in mind:
- I’ve never done anything like this before. Like, ever. I can make miracles happen with clothes, but I actively avoiding doing anything with footwear, even boot tops, so bear in mind that this is all trial and error.
- These are intended to meet the costume standards for the Rebel Legion, so the attention to detail is way above and beyond for normal person cosplay.
- For gods’ sake, start with wedge heels. DON’T REPEAT MY MISTAKES!
I’m going to assume all of you are smarter than I am and will take #3 to heart. I have a separate tutorial for turning block heels into wedges, but this is not that tutorial. This is is the tutorial for making some kick-ass Hoth Leia boots.
(This tutorial was originally posted on my cosplay blog, Geek Girl Hero. All reference photos are from The Padawan's Guide.)
Step 1: Gather Your Materials
You will need:
- Knee-high grey boots with a wedge heel, pull-up or zip closure (like these)
- 3 yards of grey nylon webbing (like this)
- clear Shoe Goo (like this)
- Needle and matching thread
- Small clamps (like in the picture on Step 4) or binder clips and cardboard
- Something to stream on Netflix, because you’re going to be sitting for a while (I watched Daredevil, s2)
For the boots, your best options will be suede, leather, or some imitation thereof. Other materials might work, so long as they aren’t shiny, and the boot is lined. Rubber boots and lace-up boots will NOT work for this. If you do get a shiny material, like I did, you’ll also need a piece of fine-to-medium grain sandpaper.
Remember that you’ll need to adjust each step depending on the style of boot you’re starting with. I was using slouch boots, so there was a lot of extra space and trimming. Use your best judgement and take your time.
Step 2: Open Up the Front of the Boot

If the boot has a fold-over top, remove it so that there’s nothing covering any part of the front of the boot.
If the boot has a front seam (like mine), use a seam ripper to open the front of the boot all the way down to where the shaft meets the instep. Open the seams connecting the shaft and instep about an inch in either direction.
If there is no front seam, use sharp* scissors to carefully cut a straight line down the front of the shaft to the instep. BE CAREFUL NOT TO CUT THE LINING. YOU’RE GOING TO NEED THAT. Then open the seams connecting the shaft and instep about an inch in either direction OR make two one-inch cuts along the top of the instep, perpendicular to the long cut.
*When I say sharp, I mean so sharp you wouldn’t let a child anywhere near them. When working with tough materials like leather, sharp implements are actually safer, since they’re less likely to slip or get stuck, and a sharp edge will give you a much cleaner cut.
You should now have two flaps on the front of your boot and be able to see the lining underneath.
Step 3: While Wearing the Boot, Take in the Lining So That It Fits Snugly Around Your Calf

If the boots are already tight-fitting, you may not need to do this. I had about an inch of slack, so I pulled in the lining around the center seam and tacked the base flush against my shin, then folded over the excess and top-stitched it down. I used a matching color thread (black on black) and small stitches, so the adjustments are mostly invisible.
In the picture, the little divots in the lining are the tacks, and the line is the top stitching. It looks much less obvious when the fabric is pulled tight.
The reason you need to do this with the boot on is that most boot linings are stretchy, even if the outside material isn’t. You want to make sure it is stretched to fit your calf so the weight of the outside doesn’t pull the lining out of whack. Just be sure you leave enough room to tuck in the jumpsuit pants.
Step 4: Fold the Flaps Under to Form Hems and Secure Them With Shoe Goo.

There should be 1-2 inches of space between the folds where the lining is visible. Once you have your fold lined up, lightly smear Shoe Goo inside and press firmly closed, using clamps or something heavy to keep pressure while the adhesive sets.
You’ll want to apply the clamps as quickly as possible, since Shoe Goo starts to set almost immediately, though it will take about half an hour before it’s fully adhered. You can use almost anything that will apply even pressure, just be careful not to use anything that will leave marks in the leather. One idea might be to sandwich the fold between thin pieces of cardboard and hold it in place with binder clips.
The big question here is: Why use Shoe Goo? Why not just stitch the hems down? The answers are: speed and appearance. You may have noticed that shoes are usually made of tougher materials than your ordinary apparel fabric, for obvious reason. Sewing those kinds of materials is an ordeal without special equipment, especially leathers. Shoe Goo is designed to keep bits of shoe together and is much faster than trying to stitch two layers of heavy material.
The other reason to use Shoe Goo is the lack of visible stitching. The material may bow a little, but that only makes the boots look broken-in. A line of uneven stitches – because, lets be real, they’d be uneven – makes it obvious that the boots have been altered and weren’t made with this weird opening in the front.
At this point, the flaps should move freely. Do NOT secure them to the lining.
Step 5: Trim Excess Material and Rough Up the Outside of the Boot.

Make sure all your edges are smooth and there are no weird bits poking out anywhere. It’s not a bad idea to walk around a little bit and see if anything’s rubbing where it shouldn’t.
If your boots have a shiny finish, use a piece of sandpaper to gently buff the surface until you get the finish you want. Click HERE for a good tutorial on turning leather into suede and generally making leather look aged and lived-in. In the picture, you can see the difference between the buffed instep and the un-buffed shaft.
I ended up doing this step twice in order to get the boots a shade lighter, and I used fabric paint to lighten the color even further.
Step 6: Cut the Nylon Webbing Into Six Segments and Attach Them Around the Shaft of Each Boot.


You know what I said about trial and error? Well my first attempt at this part was definitely in error.
I didn’t realize the straps were actually webbing, a detail only visible in the official costuming guide and which was pointed out to me by a very kind member on the Rebel Legion forums. In my ignorance, I used strips of grey vinyl, secured with Shoe Goo, which actually looked fine and, I was told, would be accepted by the RL judges.
Where I goofed was that I measured the straps based on the size of the boot, rather than the size of my leg, so that, when the boots went on, the straps were too tight. Those of you with tiny calves may not be familiar with this problem. Those who also check the “Extended Calf” option when boot shopping will know EXACTLY what I’m talking about.
I wore the boots to work as a test run and, sure enough, one of the straps popped off. (I also realized that I definitely needed insoles and thick socks, but that’s another issue.) Rather than reattaching the not-quite-right strap or cutting new ones, I went ahead and used the webbing, this time using the measure of my calf as a benchmark, instead of the boot.
Using a lighter, I melted the cut ends of the webbing to keep them from unraveling and stitched them to the zipper facing with matching grey thread. I decided to sew them on, rather than return to Shoe Goo, because I think the stitches will hold up better to being pulled on and webbing-to-pleather wouldn’t bond as well as pleather-to-pleather. I also adjusted the position of the straps to cross over the zipper, for the sake of accuracy, and went over the whole boot a few times with fabric paint, trying to get them to a lighter color.
As you can see, I also learned that, unlike vinyl, webbing won’t hold its shape and needs a little help staying in place. I added some extra tacks to the straps to help keep them from sagging.
Step 7: Lessons Learned

In the end, they turned out pretty well, especially for an experiment.
For next time (and yes, I’m already working on version 2.0):
- Start with a wedge heel. FFS.
- Start with new(er) boots. They work fine, but all the work has made the already weak vinyl start to crack. These will only hold up for two or three conventions.
- Start with a lighter color. Even after a few coats of paint, they’re still a little too dark and starting to get stiff.
- Buy the right size. These were 11; I wear a 10. Functional, but not the comfiest.
- Incorporate elastic in the straps. This will help them fit more snuggly, while also allowing more room to maneuver the zipper.
I’d love to hear tips and suggestions from anyone else who’s made these and thoughts from anyone who tries this method.
Happy cosplaying!

Participated in the
Heroes and Villains Contest

Participated in the
Space Contest 2016


