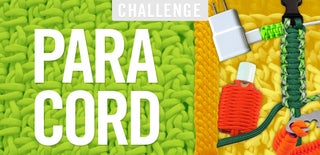
Introduction: The Knife Blank
The knife blank I will be using to demonstrate is one that is of aluminum and was used to teach some how to profile a blank on so thats why it looks like it does. You may use any blank you choose though I recommend using a scrap or practice piece for your first time.
Step 1: Time to Drill
Center punch the blank about 1/2 in. up from the end and l how ever far from the blade its self that looks/feels right, in my case this was about 3/4 in. I used a 1/4 in. bit for these two holes.
Step 2: Keep on Drilling
Now you will make a series if holes so that you can make the slot in tang. This is done by first using layout fluid or sharpie to color the space between initial holes. Then you have to scribe a line connecting the holes. After this is done center punch a series of holes that are equally spaced with a 3/16 in. drill bit. The spacing doesn't have to be precise.
Step 3: Filing the Slot
Now that you have the rough slot cut its time to file, and file, and file, and file. This can be done with most files but a flat file works best. As long as you keep the slot at a consistent width it will look ok. Also, if you cut or gouge a little too much with the file or drilled off of the mark don't bother to try to fix it unless its really bad because it will most likely be hidden by the paracord.
Since this is process creates lots if particles and those particles get stuck in the file they can be cleaned out with a file card or wire brush.
Step 4: Wrapping the Handle
Now on to the part where you actually use the paracord. This can also be done with leather but since this is the paracord challenge so I used paracord. So start with about one inch if the 6 foot section of paracord and put it in the slot at the end of the shank. Then proceed to weave the cord through making sure to keep the inch of cord in the slot and making sure to keep tension on the cord so the inch does not come through. Ensure you do an " over, under, over, under" type pattern much like you would in a fishtail braid bracelet. Once you reach the end of the slot closest to the blade continue to the next step.
Step 5: Final Details and Wrist Strap
Now that you have finished the initial wrapping you can finalize the handle. This can be done by poking the last 12 to 18 inches through the gap between the slot and the end of the wrap. This will be near the blade so after that is done pull it taught and pull it toward the end if the tang and poke it through that hole as well. Once this is completed pull it with moderate force and put a half-hitch knot in it to prevent it from coming out.
Now you can finish it how ever you would like, I used a figure 8 knot to make a bit if a wrist strap (made smaller to it was more easily visible on camera) and you are done. Hope you liked this Instructable and vote for me in the paracord contest. Thanks!

First Prize in the
Paracord Challenge


