

Introduction: Building Custom Quadcopters (Monarch 230)


Hi, I'm Rahul, an engineer from Kerala and this is my second instructable. Today we will be focusing on making custom drones for racing.
If you are into building foam airplanes as well, check out my other instructable on building a 4-axis CNC hot-wire cutter (Arduino).
With that, let's get started.
When I first started learning to build and fly quadcopters, I was terrified of the props hitting something and breaking. So I wanted a way to protect them. The easiest way is to buy some prop guards and put them at the end of all the motors, but these are ugly and not available for the mini quad size. So we will make our own frame with integrated prop protection on it, making it very safe to fly and somewhat crash-resistant.
Bonus! it can be flown indoors as well, but with caution, top and bottom planes are not protected.
Supplies
Frame - 3-4mm Birch plywood. (laser cut to shape)
Flight controller - F3 or F4 Flight controller(Omnibus F4, SP Racing F3)
Power distribution board - Mateck Power distribution board
ESC - HGLRC 28A BLHeli ESC (4Nos)
Motors - Racestar BR2204 2600Kv Racing edition (4Nos)
Propellers - KingKong 5X4X3 (4Nos)
Radio & receiver - Flsky TH9X radio with 8Ch receiver
Battery - Gens ace 3800mah 25C lipo battery
35mm (20mm+15mm) Nylon Standoffs (16nos)
M3 x 10mm Hex screws (any M3 screws would do) (16 Nos)
Step 1: Frame


The frame holds the quad together and is where all the components are bolted to. They are usually made from lightweight and rigid components like Fibreglass, carbon fibre, wood, aluminium etc. There are many different kinds of frames shapes available but we will be focusing on the quad motor configuration.
In quads, the frames come primarily in either the H- shape or the X-shape. The X-frames are good balance between stability and manoeuvrability and we will use that configuration here. Go for H-frames if you don't want props to come in your FPV video.
Step 2: Flight Controllers


Flight Controller Quads have no moving parts other than the motors, the way they fly and keep stability is by constantly varying the speed of the individual motors and thereby creating differential lift to keep the craft stable. You can see in the diagram that all the motors spin in opposite directions to cancel out the torque generated by each motor. The flight controller is the brains of the operation, it is basically a small computer which is using its sensors to constantly measure the angle and the rotational rate of the quadcopter and running a software autopilot to help stabilise it against external disturbances.
Flight controllers are classified mainly on the specification of the processer and the number of degrees of freedom it can map.
For example,
The Omnibus F4 board uses an STM32 F405 processor It has a 6 DOF IMU with an additional Barometer for keeping the altitude.
The SP Racing F3 board uses an STM32 F3 processor and has a 6DOF IMU.
Step 3: Motors


Motors are where all the action is happening. There are two types, Brushed motors and Brushless motors. Most quads use Brushless motors, which are really power-dense and can respond very fast to changes in rpm and torque requirements. Brushed motors can be run with regular DC supply but Brushless motors require a special Electronic speed controller (ESC) to run them.
Motor Sizing
The Size of brushless motors is indicated by a 4-digit number – AABB. “AA” is the stator width, while “BB” is the stator height or stator diameter, both in mm (millimetre). For example, the Racestar BR2205 has a stator with a diameter of about 22mm and with a height of about 05mm.
Basically, the taller stator is the more power you have at higher RPM and the wider the stator the more torque at lower RPM, because of larger mechanical advantage.
The KV value of a motor indicates the speed with which the motor would rotate when you apply one volt across its windings. It is determined by the number of copper wire winding in the motor stator, and the magnetic strength of the magnets. But generally, the higher number of winds decreases the KV of the motor, while the lower number of winds increases the KV of the motor.
Fewer the winding means less resistance, meaning more current can get through, and get higher RPM. That’s why higher KV motors generally have fewer winding int the stator.
The KV determines what propeller you can use with a motor. The lower the KV the larger the prop that it can spin and the vice versa. We can't generate more lift by putting a larger propeller on the higher KV motor as the torque requirements will push the motor beyond its rated power limits and overheat.
For eg,
BR2205 2600kv motors can run 5x4 inch props
BR2212 1000kv motors can run 10x4.5 inch props
Note -The KV is by no means an indicator of the power output of the motor, higher KV motors are not necessarily more powerful than lower KV motors. The power of the motor is determined by the wattage of the motor, or the amount of amps (A) it can withstand at a particular voltage (V).
Power = Voltage X Current
500W = 12V X 42A
500W = 20V X 25A
Step 4: Electronic Speed Controllers (ESC)


The recent advancements in mini quad have been possible because of the introduction of small electronic speed controllers which enable brushless motors to work. The job of the electronic speed controllers is to receive the throttle signal from the flight controller and keep the motor spinning at the required speed.
Inside these small devices runs a whole host of technologies, which are beyond the scope of this instructable. The way they work is that they take the DC input and generate a 3-phase AC current that is fed into the brushless motors, which need a rotating magnetic field to work. The frequency and strength of the 3-phase current is varied according to the control signal.
Things to look out for when buying ESC
Current Rating
When Brushless motors work, they pull current through the ESC and if it is more than what the ESC is rated for then it will fail, sometimes in flames. Things that put more stress into the ESC include Higher KV motors, larger props, larger motors.
There are 2 current ratings to an ESC, Continuous and Burst. The continuous current rating indicates the maximum amount of continuous current which the ESC can safely handle. ESC’s are designed to withstand a higher current for short periods of time (e.g. 10 seconds) and this is the Brust current rating.
Note- Get an ESC with at least 20% more continuous current rating than the motors are able to pull, this should be a safe margin.
Firmware
Most hobby ESC's come with either Bl-Heli or Simonk firmware pre-installed, it is possible to update them via the flight controller. Both are good performers with some minor differences.
Step 5: Propellers


Propellers convert the mechanical energy of the motors into thrust. They are basically small wings, which are mounted to a hub. The size and shape of the propeller play a huge role in the efficiency of the flight.
Propeller specifications
There are 2 types of format that manufacturers use.
L x P x B | LLPP x B
L- length, P – pitch, B – number of blades.
For eg,
A 6×4.5 (also known as 6045) propellers are 6 inches long and has a pitch of 4.5 inches.
A 5x4x3 (sometimes 5040×3) is a 3-bladed 5″ propeller that has a pitch of 4 inches.
Material
Propellers can be made from different materials like plastic composite, carbon fibre, wood etc. Each type of material gives unique features, for example, carbon fibre and wooden props are really stiff and best known for their smooth performance. While certain plastic compounds are extremely durable. The majority of props used in mini quads are made from plastic composites.
Choosing props
The size of the propeller you can use is limited by the size of your frame and the power and KV of your motor. Generally, the larger the propeller you can use to generate a certain amount of thrust, the more efficient it will be.
For mini quads, they range between 5-6 inch props with a pitch of 4-5 inches.
Also, the more number of blades a propeller has, the more work it can do on the air, the more grip it can generate, the more power it consumes and the less efficient it is.
Step 6: Batteries


The majority of drones these days use Lithium polymer batteries, commonly known as Lipo batteries. The battery along with the ESC and the motor forms your power system.
Don' think of the battery as just a reservoir of energy, think of it also as a supercharger, the motors can pull monstrous amounts of Amps in very short times, it's up to the battery to supply these current and still keep cool.
Battery Voltage and Cell Count (S)
LiPo batteries are a collection of cells, each LiPo cell has a nominal voltage of 3.7V. If higher voltage is required, these cells can be connected in series to form a single battery. Cells in series are denoted by 'S' and cells in parallel by 'P'
The more cells in series the higher the voltage and the more cells in parallel means the higher the capacity and discharge rating.
1S = 1 cell = 3.7V
2S = 2 cells = 7.4V
3S = 3 cells = 11.1V
4S = 4 cells = 14.8V
5S = 5 cells = 18.5V
6S = 6 cells = 22.2V
LiPo Battery Capacity
The capacity is denoted by the 'mah' or the milliamp-hour rating. It is the amount of amps a battery can supply for one hour.
For eg - A 3S 2000mah battery can supply 2 amps for 1 hour. so if your quad is pulling 20A to fly, then it will last for 2/20*60min = 6 mins.
C Rating (Discharge Rate)
The discharge rating denotes the maximum rate at which you can pull current from the battery. It is denoted by a 'C' number on top. The higher the C rating the larger amounts of current eh battery is able to give.
Maximum Discharge Current = C-Rating * Capacity
eg- A 2000mah 25C battery can deliver up to 2000x25 = 50,000ma or 50A
Step 7: Designing and Building the Frame


The Design of the Frame was inspired by the Monarch Butterfly when you look at it from the top, it looks like two wings on either side.
I drew the design in Fusion 360 and Rhino CAD, forgot to take some screenshots in between, but the idea is simple.
The frames size is about 230, it denoted the diagonal distance from one motor hub to the other, most popular frame sizes are 210,250 etc.
Once you fixed on a frame size, draw the hubs for the motor in to establish the X-shape. These will act as a reference for the rest of the build.
Draw some circles to establish the max propeller size you want to fit and then create the central body.
The central body is the place where all the electronics will mount to, it includes the flight controller, receiver, battery etc. You can see in the midpoint has 4x M3 holes spaced at 30.5mm apart. This is usually the stand size for the flight control boards. You can thread the Nylon Standoffs in this hole to mount your FC.
The outer holes are for the standoffs for connecting the top plate to the body. The rest of the cutouts are for reducing weights and anchor point for zip ties.
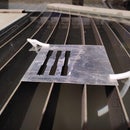
Fabrication
The design is laser cut on 3mm (top) and 4mm (bottom) wood. I've included the design files in the zip file, you can either CNC mill or use an online laser cutting service like Ponoko to make the part. Just send them the design files and they will make and ship it for you.
Attachments

Step 8: Putting It All Together


There are many good online tutorials on assembling your own quadcopters, hence I will not stress them here.
Painless 360 has some good videos on Sp racing series boards.
Here are the steps to follow.
- Flash the board with the Betaflight firmware.
- Do the sensor calibration and the change configuration to X-quad.
- Connect the receiver to the flight controller and calibrate the radio.
- Fix the motors on the frame following the X-frame motor diagram with proper rotational direction.
- Solder the motor leads on to the ESC pads and fix the ESCs on the arm.
- Fix the power distribution board and solder the ESC pads to them.
- Soler XT60 connector to the power cable and then to the power distribution board.
- Fix the flight controller on top of power distribution using nylon standoffs.
- Connect the ESC signal lines to the flight controller.
- Secure the Receiver on the frame.
- Put the top cover on using 35mm Nylon standoffs.
Now for the Smoke test! Before powering On, always double-check the connections, you definitely don't want to short lipo batteries and everything will go up in a puff of magic smoke.
Step 9: Maiden Flight


The maiden flight is often the trickiest. You hope that all the parts are connected properly, everything is secured tightly. The software is configured properly and the hardware is responding correctly.
Check and double-check everything.
Turn on the power to the radio, hope you have already configured it, else look up your radio on Painless 360's channel.
Secure the battery on the drone using battery straps and connect the battery to the Flight controller, you will be greeted by a bootup tune.
Kepp fair distance, place quad in level ground and Arm the quad using the Radio. Use a beginner mode like Angle or Altitude hold. Throttle up and lift off.
I know there is much more to that than this, but it's an instructable all in itself. I hope I have covered enough so that you can get an idea of how to choose the components, how they work together, and the build process. There are a lot of other resources online, please check them out, I'm happy to help in any way I can.
Keep the props tight and Fly safe!

Runner Up in the
Make It Fly Challenge


