

Introduction: How to Make a Paper Cup

This will teach you how to make a paper cup. It can actually hold water, so fun.
Step 1:

Obtain an 8.5”X11” piece of paper
Step 2:

Take the top right corner and fold it down until the corner is flush with the opposite side, as seen below:
Step 3:
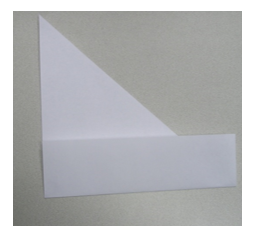
Fold bottom portion up
Step 4:

Carefully tear off bottom section
Step 5:

If you unfold the paper, you should now have a square
Step 6:

Fold square paper back into a triangle
Step 7:

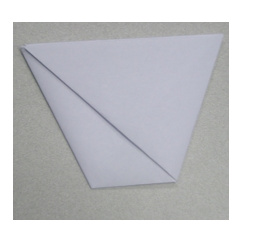
Grab the right corner of the big triangle and bring the tip of the triangle across to the left side so that the top of the resulting triangle is parallel to the bottom of the big triangle.
Step 8:

Rotate paper 180 degrees about the y-axis
Step 9:

Grab the right corner of the paper and bring the tip across to the left side so that the top of the resulting triangle is parallel to the bottom.
Step 10:

Grab the top section of the top triangle and fold it down towards the bottom.
Step 11:

Rotate 180 degrees about the y-axis
Step 12:

Grab the other section of the top triangle and fold it down towards the bottom.
Step 13:

Open up pocket as shown in picture below
Step 14:

Take the triangle from step 11 and insert it into the pocket and crease tightly
Step 15:
Rotate 180 degrees about the y-axis
Step 16:
Repeat steps 13 and 14 for the triangle from step 9
Step 17:
Grab paper and open interior pocket
Step 18:
You should have a super awesome cup! Go get a drink


