

Introduction: Illuminate a Simple Model Pvc


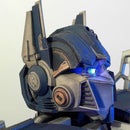

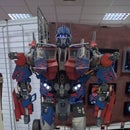

Here the model I will illuminate with optical fiber
this is a big project, long and complicated. but with my experience I hope it will inspire you to models of smaller
IT IS POSSIBLE TO APPLY THIS METHOD TO ALL KINDS OF OBJECTS
I will detail you my method wherever possible. note that its construction and therefore , the photos date back to 2008.
Step 1: Necessary Material
we must start :
glue (will use mostly no universal model glue or special glue because it dissolved the optical fiber which is also called fiber pvc)
optical fiber Ø 0.2mm
optical fiber Ø 0.5mm
optical fiber Ø 0.75mm
drill Ø 0.6mm and Ø 0.8mm
white LEDs Ø 3mm
blue LED Ø 3mm and 5mm
flexible plastic pipes
duke tape
9v battery with its connection
cables
bread board
Step 2: How to Proceed?


I first started conventionally, like all the models. the painting.
I has removed partitions. it would have been annoying to switch the optical fiber. I also drilled the back wall to pass the cables to the motors.
turn to serious things. before moving to the bonding of the panels of the ship, we'll drill them. do as you please. I tried to make lines to mimic the facades of buildings. I drill with the diameter slightly superior to that of the fiber. once finished drilling, I glue the panels on the lower part of the model. suite only, I pass the fiber through the holes. I let them exceed of 1 to 2 cm only, and in packs of 10 or 20. Then I stick to the panels, with my glue cyano
each pieces, make a bundle of fibers with the duke tape. and repeat the operation as many times as necessary.
after, cut the extremity of the fiber bundle to put them on the same level. enter by following the package, or with another if possible, in a hose. on the other side of the hose, place a white LED.
Step 3: Electronic


at that time, I made the mistake of using adjustable resistances, over time, it ended up grilling by LED short circuit. I recommend using resitances 230 ohms. I also added a battery charging system 9v placed underneath, and a interuptor placed between the two towers.
5mm blue LED should have their soldered cables, before being glues to the engine. continue to solder all the LEDs.
doard for bread, I recuperated. and thus reused for my editing.
it is quite difficult to tidy everything bunch of cables, fiber and another for all find it instead. I got into it several times.
Step 4: First Tests


not much on this stage. I simply pursue what I started in the previous step. then I test my setup.
Step 5: For Finih


this model is of great precision and asked a huge work, time, 636 strands of optical fibers, for a total of 127m in a single paquette revell bought in a store.
my second model will have when it has requested many moin Demps. and yes, a force partiquer, it ended up being lapped

Participated in the
Space Contest 2016

Participated in the
DIY Summer Camp Challenge


