

Introduction: Make Your Custom Sticker Using Label Paper


Hello there! This is my first instructable. Are you stuck at home due to covid-19 and you want to do something creative without spending lots of cash? Then you are in the right instructable. There is an easy way to make your custom sticker without using Adhesive or gloss varnish and the supplies are easily available at home.
So, let’s get into making.
Supplies
Label
Chart Paper
Glue
Sketch Pens
Transparent Tape
Pencil
Scissor
Step 1: NOTCH IT!


I had my school labels lying around my home from a long time, since I no longer want them and it had one side sticky, I thought of using it to make the stickers so I took them and cut the labels using a scissor without removing the sticky surface.
Tip: You can use any label just note that it must be sticky enough to remain intact on the surface.
Step 2: Pasting the Paper


As you know all the labels have details in it but we want to sketch on it to make a custom sticker so I decided to paste a chart paper over it, I then cut that of same measurement as of the label but the label is too glossy for the paper to stick.
To overcome this issue, I took sandpaper and scratched the surface of the label and made it rough. I then pasted the chart paper over it and it worked pretty well.
Tip: You can use different color papers if you want a different background. I prefer white as it gives a cool white border at the end.
Step 3: Splash the Colours


Let’s choose the design now. I referred google and found Old good memories of Rick from Rick and Morty. I then made the outline of it on the paper.
Now it was time to fill colors but unfortunately my sketch pens weren’t working and I didn’t want to step out of my home during this pandemic. I had no choice but to paint them. I didn’t expect that but the outcome was pretty good so I made more stickers.
Step 4: Cut It!


The design had to be cut from the label but I wanted to make it more realistic so I left a thin border and since the background is white, the cut out looks extremely good.
Step 5: Glossy Finish

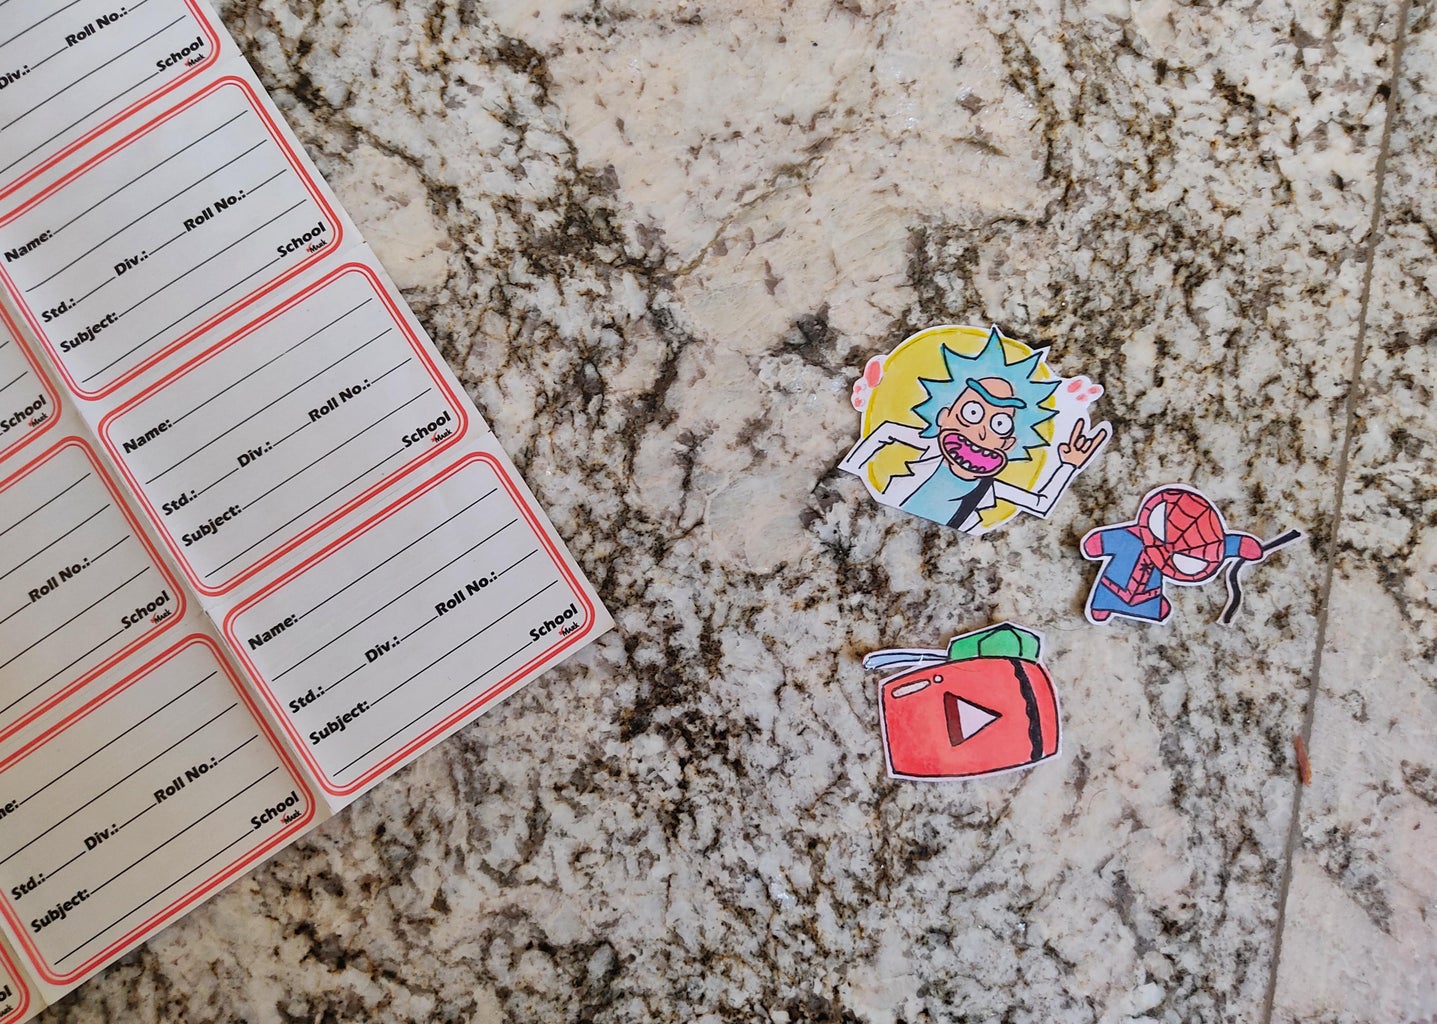


If you have ever looked at a sticker you would notice that it has a glossy finish. Neither did I have gloss varnish at my home nor have I ever used it. I soon figured a way out. I took transparent tape that was wider than usual cello tape. I cut it of required length and pasted over the sticker. This gave the sticker a glossy finish.
Note: I made a mistake by cutting the cello tape first and then pasting it over the sticker because it formed bubbles so, first paste the sticker on the tape then cut it.
The outcome was really satisfying and the idea worked extremely well.
Hope you enjoyed the build :)
Participated in the
Sticky Stuff Speed Challenge


