

Introduction: Mechanical Automatic Light Switch

This is how to make your lights remote control or automatic. It is controlled using an arduino and an IR receiver, along with an old TV remote to turn on or off the lights. You can adjust the Arduino code if you would like your lights to turn on or off at the same time every day, or even connect it to Alexa through an IoT if you download the Alexa drivers and wifi connectivity for your Arduino. But for this instructable I'm just going to show you the basic remote control light switch design. I tried to keep it as cheap as possible using mostly parts you would normally just have sitting around anyways, so its a pretty easy build and a great way to put extra parts to use.
Supplies
- 3d Printer
- Filament
- IR Reciever
- Micro Servo
- Old TV remote
- M2 Screws
- Wire
- Arduino Nano
- Arduino Power Supply
Step 1: Design
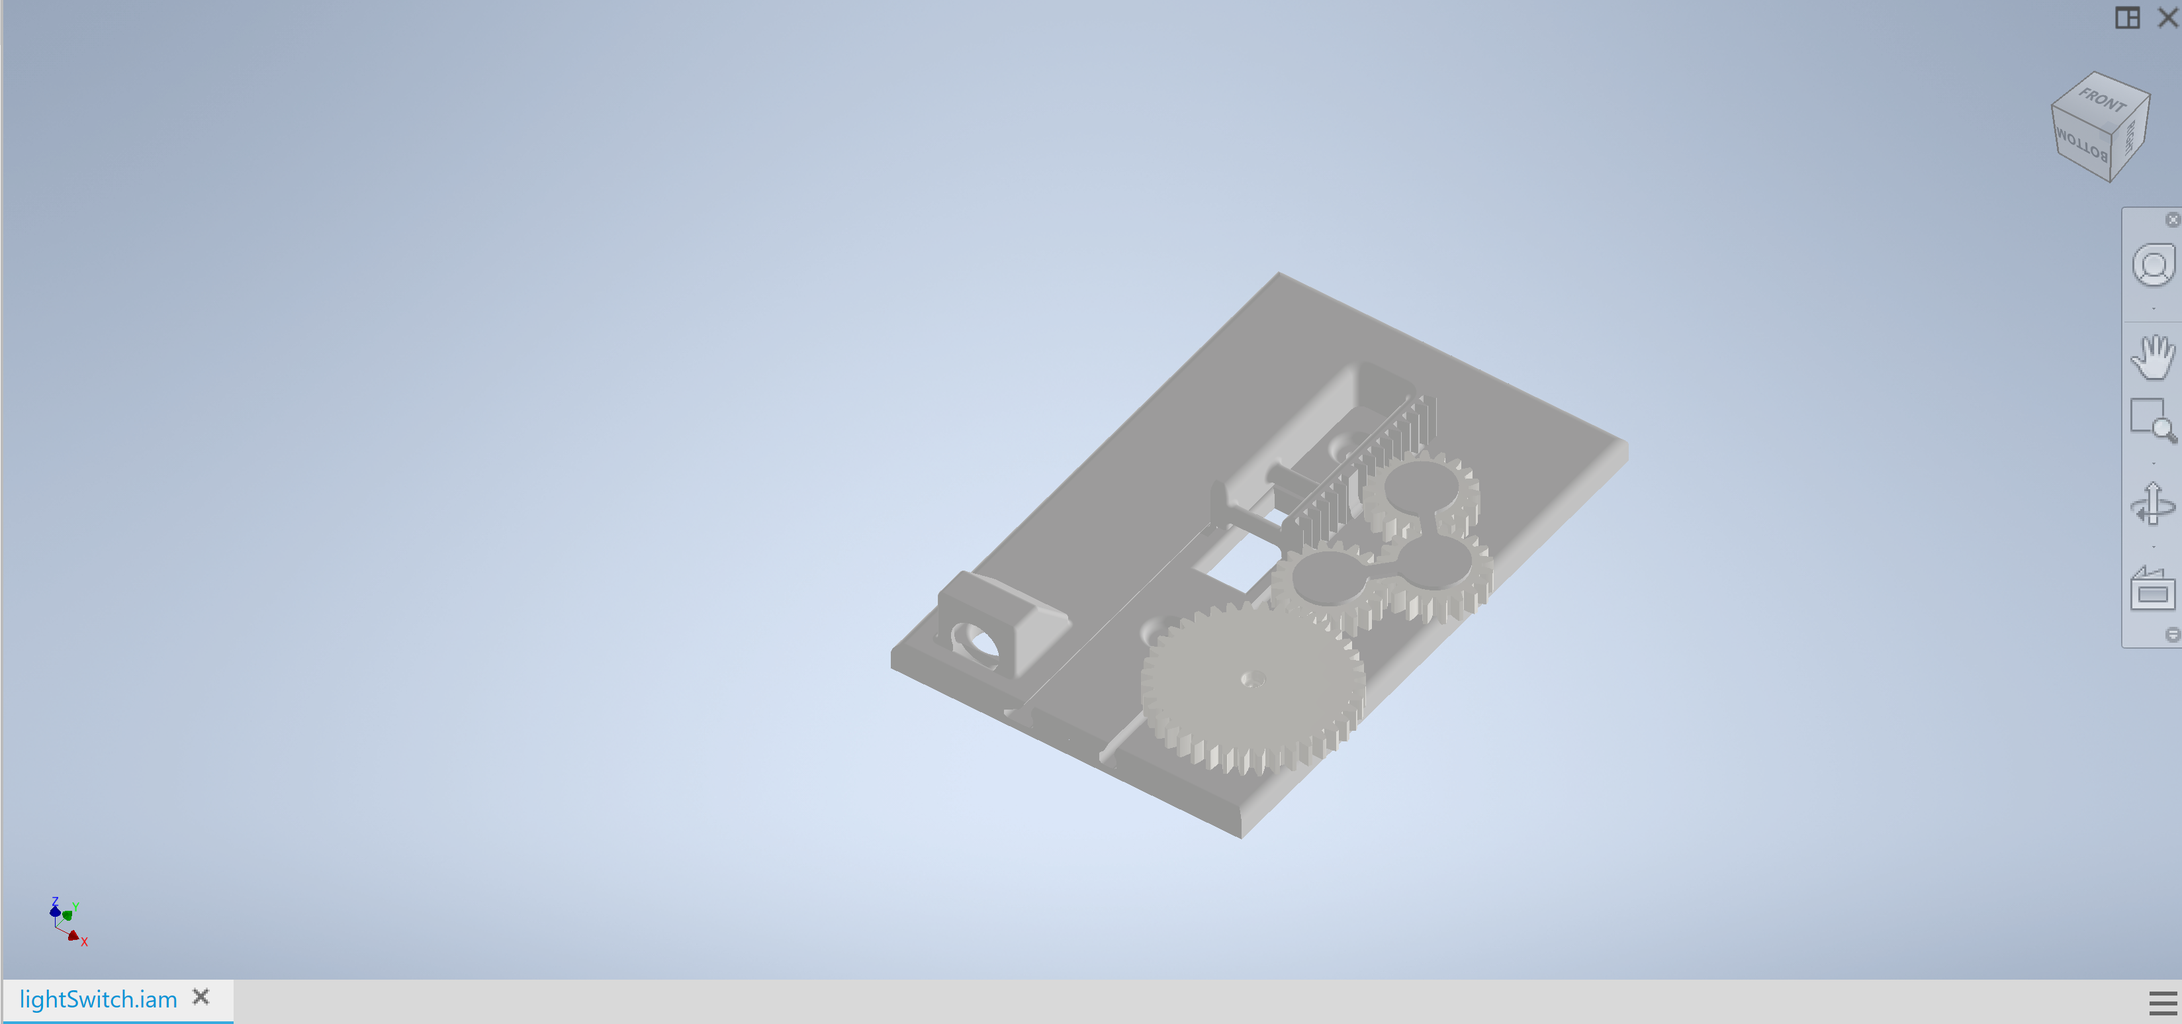
I designed this in Autodesk Inventor with a set of gears to run a slide moving the light switch to the on or off position. If I wanted a simple design, I could have just put a relay back behind the switch, but I thought it look cooler to have gears move the switch.
Step 2: Printing the Parts


The next step is to 3d print all the parts. I have a Prusa Mk3s and they printed just fine with only supports under the bridge on the "arm" file. It is a pretty big bridge on the main light switch cover piece and the back side gets a little messy, but that doesn't show on the final design because its on the back side. Just print 3 of the small gears, and one of the rest of the parts attached.


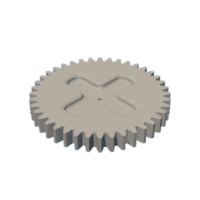

Step 3: Assembling the Switch Cover


Next take the servo and screw it on to the back side of the light switch cover using the m2 screws. Glue the plus shaped attachment to the large gear, the screw the gear on to the servo through the cover. Then put the IR Receiver at the top of the cover and run all the wires so that they can go out the bottom without getting in the way of the light.
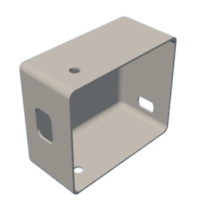
Step 4: Assembling the Control Box


You can get the Arduino in the box however you would like, but I put my Arduino Nano on a small breadboard and glued it into the bottom of the box. The hole on the bottom is for programming, the holes on the sides are for wires coming in, and the hole on the top is for a power source. Just get an Arduino in the box and be sure to still be able to connect wires and program it. After it is wired and programmed, then you can glue the top on the box. I also put some blue tape on the lid of the control box to keep the red light from the Arduino from showing through.
Step 5: Wiring
Run the wires from the light switch down to the control box. I connected the box to the power supply to keep it out of the way and looking clean. Connect the right pin of the IR receiver to 5V, the middle to GND, and the left pin to number 3 of the Arduino. Connect the red servo wire to 5V, black to GND, and signal wire to Arduino pin 2.
Step 6: Programming

First upload the code to the Arduino and open the serial port. Then point your remote at the IR receiver and press the button that you want to use to turn on or off the light. You can use more than one button if you would like. When you press the button, take note of the numbers that come up in the serial port. Then type these numbers in the code in place of my numbers that are already there to turn on or off the light. There is a comment in the code on the line behind where you need to type in the numbers for your remote. Then re-program the Arduino and seal up the control box.
Attachments

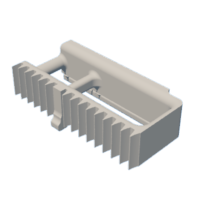
Step 7: Mounting
Be sure to shut off power to the light switch before this step to avoid getting shocked.
Take off your old light switch cover and put the new one in. Make sure that nothing is touching the terminals on the actual light switch because that could be a fire hazard if you shorted out the light. You have to slide the arm onto the light switch and up to the top of the cover before putting the light switch on so that you can assemble it with the arm of the light switch through the cover. Be sure not to tighten the screws in the light switch too much to avoid warping the light switch cover and binding the arm from sliding. The arm has to slide freely, if it doesn't, you could try adding some silicone grease or Wd-40.
Step 8: Turn on the Power and Test
Congratulations, you have a finished remote controlled light switch. Just connect the rest of the small gears while the light is in the off position and turn back on the power.

Participated in the
Make it Move Challenge


