

Introduction: Orrery (Earth, Moon, and Sun)


This Instructable describes the design and construction of an orrery – a clockwork mechanism depicting the motions of celestial bodies. This particular orrery is a type of "tellurion" because it features the Earth, Moon, and Sun. I've designed it to accurately predict the date of future eclipses and differentiate between annular and total eclipses. Nearly all the parts were fabricated from brass on a CNC machine (using some very tiny cutting tools). The base is made from a piece of cherry that I cut and glued into a book-matched pattern.
I started designing the orrery shortly after the "Great American Eclipse" of 2017. I had a chance to see the eclipse in the "path of totality" somewhere outside St. Louis – it was the first total eclipse I'd ever seen, and to say it lived up to the hype is a massive understatement! Total eclipses occur when the Moon moves exactly between the Earth and Sun. By chance, the Moon (a close, but very tiny object) and the Sun (a distant, but very large object) are approximately the same size in the sky to observers on Earth. Because of this, the Moon is big enough to block out all direct sunlight, but small enough to give us a glimpse of the hot gasses that make up the sun's atmosphere – the corona. The contrast between the black center of the eclipse and the wispy corona around its edges are part of what make total eclipses so awe-inspiring.
What fascinates me about total eclipses is how lucky we are to be able to observe them at this moment in Earth's history. The distance between the Earth and the Moon is gradually increasing each year, meaning the apparent size of the Moon in the sky is shrinking over time. In fact, if we went back billions of years the Moon would appear so large in the sky it would block out the corona, and a billion years from now there will be no more total eclipses! Even now we are balancing on a knife's edge, the slight shift in the distance of the Moon from the Earth caused by its elliptical orbit is enough to produce "annular" eclipses – where the Moon does not completely block out the Sun and a ring of direct light is still able to reach Earth (you can't look directly at annular eclipses).
My main intention with this design was to accurately depict the relative motions of the Earth, Moon, and Sun to both predict future eclipses and differentiate annular eclipses from total eclipses. The arm of the orrery swings around once per year as indicated by a large calendar dial. This motion drives five separate gear trains that depict various things:
- The Moon revolves around the Earth and is tidally locked to the Earth (only a single side of the Moon is visible from Earth).
- The tilt of the Earth points toward a fixed point in space (the north star) as it revolves around the Sun.
- The Moon glides along a cam, giving it a slightly tilted orbit. Eclipses only occur at two locations (the "nodes") along this tilted orbit when it crosses the plane of the Earth's rotation around the Sun (the ecliptic plane). The orientation of the tilt slowly precesses (rotates) over time.
- An arrow indicates the position of the Moon's closest approach to Earth, allowing you to differentiate between annular and total eclipses. This also precesses slowly over time.
- A century dial marks off 100 years.
Since starting this project I've moved across the country, changed jobs, and worked in 3 different shops to fabricate parts. I finished version 1 in 2019 and gave it to my sister, then made some improvements for version 2, which is documented here. As you'll see in this Instructable, I made this version for me and my husband, and marked our anniversary (the one we celebrate is when we first met) with a tiny silver tooth on the calendar dial to make it more personal.
I've included everything you would need to make this yourself: CAD files, toolpathing, bill of materials, and lots of pictures and descriptions of the process. A lot of this info is also located in a companion Github repository. This is not an easy project (though it could be made easier using a laser cutter / 3d printer), but the end result is well worth the effort. Please let me know if you end up building this!
For those on Instagram, a nice compilation of the build process can be found in my "orrery" story.
Supplies


I made almost all the parts for this project, but I aimed to keep the amount of separate processes down and use off the shelf components where possible. Most of the parts are made in a 3-axis machining process, some (simple) parts are made on the lathe, and a few additional parts are laser cut (could also be made other ways if necessary). I didn't use any brazing, soldering, or etching steps to avoid the whole cleaning/chemical disposal process associated with that. Additional post processing steps include:
- turning two brass shaft collars
- turning an aluminum rod to 1/4" OD on the ends and boring to 1/8" ID
- drilling and tapping set screw holes in several parts
- drilling angled holes in two parts (using some 3D printed jigs)
- drilling center bore of crank arm to 1/8"
- drilling ID of worm wheel to 1/4"
- drilling holes in mounting plates (these are fit by hand)
- dimensioning rods and tubes
- knurling 1/8" rod (if needed, to secure press fits)
- filing away tabs from flat stock
- cutting flats on several shafts
- applying engraver's wax to brass etchings
- sanding, tumbling, cleaning, and lacquering brass
- sanding and finishing wood
- bending the year dial pointer to 90 degrees
The complete BOM for this project can be found in this spreadsheet and an archived version can be found in the Github repo.
Step 1: Design and Gear Ratios


The orrery design consists of 4 interconnected gear trains that control the relative motions of the earth, moon, and sun, and a fifth gear train that ticks forward a dial marking 100 years. I wrote several scripts to calculate a set of optimal gear ratios for each of the five gear paths in my mechanism (more details about that process in the Github repo). I chose gear ratios that minimized the angular error in each gear train to less than 1.5 degrees after the mechanism has been rotated around the sun 100 times. I also optimized for gear diameters that stacked on top of each other coaxially on fives vertical axles and minimized the amount of scaling I had to do to the gear teeth to get everything to fit.
To begin the design process, I studied some existing orrery designs. The simplest design for a Tellurian is probably James Ferguson's (also called Ferguson's Paradox Orrery), made in 1773. Ian Coote has written a great article about building a replica from Ferguson's sketches here. In this design a static sun gear drives a thick secondary gear, which drives three more gears of the same diameter but different tooth number. Here is a model of the orrery built by Staines and Son (makers of many amazing orreries):
https://www.youtube.com/watch?v=vxwhGU4pU2o
The sun gear of this orrery has 39 teeth and remains fixed relative to the wood base (a "fixed reference frame"). The thick secondary gear has 39 teeth and rotates twice ccw for every ccw turn of the mechanism relative a fixed reference frame. The three stacked outer gears have 37, 39, and 44 teeth.
- The outer gear with 39 teeth stays stationary relative a fixed reference frame – this is what will keep the Earth's axis pointed in the same direction as it moves around the sun.
- The gear with 37 teeth will rotate cw relative to a fixed reference frame – this controls the regression of the nodes of the moon's orbit.
- The gear with 44 teeth will rotate ccw relative to a fixed reference frame – this controls the precession of the apogee of the moon's orbit.
I also spent some time looking at this Tellurion orrery by Staines and Son, I ended up basing a lot of my design from theirs:
https://www.youtube.com/watch?v=CM92JnbMg8o
I'm not sure exactly what gear ratios they're using in their design, but I liked the way they mirrored the first two stages of the moon orbit gear train to produce the ecliptic train. I decided to use the same trick in my design. (As you'll see later, I also borrowed the sliding cam they used to allow the moon to rotate along its angled orbit.)
My tellurion design contains five gear trains - all five gear trains start from the same central sun gear and must also end up coaxial with each other (other than the year train, which is coaxial with the center shaft of the mechanism). For each ccw rotation of the earth around the sun
- ecliptic - the ecliptic train must complete 1 cw rotation relative to the arm of the mechanism
- moon orbit - the moon's orbit must complete 12.36874634 ccw rotations relative to the arm of the mechanism
- nodes - the moon's nodes must complete 1.053764597 cw rotations relative to the arm of the mechanism
- perigee - the moon's perigee must complete 0.8870107566 cw rotations relative to the arm of the mechanism
- year - for each cw rotation of the mechanism arm, the year dial must tick cw by one increment
I decided not to include the rotation of the Earth in this design because it rotates so quickly compared to the other motions that it would accumulate too much error to be meaningful for very long. I also think orreries that include Earth's rotation are a bit stressful to watch, like watching time slip by very quickly – its a bit too heavy in my opinion.
My code for calculating the gears was done quickly without much thought for reuse - but I've added documentation and all the code in the Github repository.
Step 2: CAD


All the Fusion360 CAD models used in this project are freely available, you can find an index of all the models in the Github repo. I've archived copies of the models on Github as well, but please refer to the links in the README for the most up-to-date files. The 3D model for the orrery is viewable online here. The Fusion360 file for the orrery also contains all the toolpathing required to machine the brass parts and the wood base, any additional design files can be found in the Github repo.
Most features in the CAD model originate from a single sketch located at the very beginning of the design history (the timeline at the bottom of the Fusion file); any changes made to this sketch will propagate out to the rest of the design. Additionally, my model has been set up parametrically, so many parameters can be edited in the Modify>Change Parameters menu in Fusion (screenshot of parameters above). The involute gear profiles were generated using the Spur Gear generator in Fusion.
Note that throughout this project, the photographs of the parts I've made may not line up exactly with the CAD model. This is because I've been updating the CAD model as I've been going, fixing any problems that I ran into along the way. Refer to the CAD model as the ultimate source of truth in these cases.
Step 3: CNC Milling Brass


I did all the machining for this project on a Tormach 3 axis CNC, but have also cut some of these parts on a Shopbot Desktop in the past. The main consideration here is that you need something with enough clearance to allow you to use a drill chuck for the various sizes of drills used. You'll also want to be able to slow the spindle down to ~2000 RPM for the reaming and drilling with the larger diameter drills. Bed size needs to be at least 6" x 12".
To mill the brass you will need to install a spoilboard (at least 1/8" thick, thicker if it needs to structurally support the milling operation) on the bed of your cnc. This spoilboard should be made of something you don't mind drilling into, since you'll use several 3/4" screws to hold the brass in place during machining. I used a piece of HDPE, which was mounted in the vise of my mill. A piece of mdf would also work and be a bit cheaper (I can't use wood in my current setup because it would clog up the coolant system). I've gotten a lot of use out of this same piece spoilboard for many machining projects, I just plane the surface to clean it up in between, which makes the material cost less of an issue.
Start by planing the spoilboard to ensure that you have a flat surface to mount your brass. I cut four holes at the corners of my brass stock (as close as possible so the mounting screws won't be hit by a tool later), and screwed the plate to the spoilboard with screws. I have tried machining these parts with double sided tape and a combination of double sided tape and screws, and found that the tape tends to gum up in the small endmills too much, so I prefer to use no tape for this job and fixture with screws and tabs alone.
I zeroed the x and y axes of the machine in the bottom left corner of the material. My stock was a little undersized, so I was careful to get the zero point dead on. Each tool was zeroed off the top surface of the brass (as indicated in the CAD model's toolpathing).
I used this speeds and feeds calculator as a starting point for my machining settings. After some trial and error on a scrap piece of 360 brass I found some good settings for my setup. You'll have to look at my Fusion CAM setups to see the exact details of the toolpaths I ran. I cut these parts on a Tormach machine with a max rpm of about 5K. For many of the smaller diameter tools, I would have liked to use a higher RPM and faster feed rates, if that is possible in your setup I would recommend it.
The tools I used are listed in the BOM. Note that for metal you should always use tools with straight or up-cutting flutes (no downcutting) for proper chip clearance.
In general, these were my settings:
Facing:
I started by facing off the spoilboard so I had a flat surface to start with. I used a 3/8" endmill for this, you could use the 1/8" endmill if needed, just be sure to change the diameter in the toolpath.
RPM: 5000 RPM
feed rate: 40 ipm
Drilling
I did two center drill passes on all the holes before drilling them - I used a small center drill for the 1/16" holes and a larger one for the larger holes. Drills are prone to wandering on the surface of a part, and center drilling prevents this wandering from happening and keeps your holes where they're supposed to be. After predrilling, I added a slight chamfer to the holes with a hand countersink tool – this helps the drill center itself in the hole.
I used a partial retract peck drilling strategy for all the drilling operations – this probably wasn't totally necessary as these are shallow cuts, but it gives me more time to see how things are doing and pause if necessary.
RPM: ~5000 (max on my machine, could increase rpm for drill sizes smaller than 1/8"). For the larger drills (closer to 1/4"), I slowed it down to 3000 - 4000 RPM.
plunge rate: 10 ipm, 5 ipm for 1/16" drill
Reaming
I used Fusion's reaming (feed out) setting to add reaming paths to my design for the 0.124" holes. Before reaming I went through each of the starter holes (cut 1/64" undersized) and added a small chamfer to the top edge of the hole using a hand countersink. I also stuck the reamer out of my drill chuck a fair amount so that it could bend slightly if needed to better align to the existing hole.
RPM: 1500 RPM
plunge rate: 5 ipm
Tabs/Fixturing
Every part needs to have at least two tabs and ideally an additional screw clamping it down. Once all the holes were drilled and reamed (if necessary), I screwed in several additional pan head screws to help clamp my parts down. The positions of some the fixturing screws are indicated in the 3D model. I also added screws in the center bores of any part where there was enough clearance, you can see all the screws I used in the image above.
You'll notice I also run a clearing pass to clear out excess material between the parts. I found that without this, the loose pieces can break free or get in the way of the cutter and cause excess chatter or even large bites to be taken out of your workpiece – better to turn these hazards into chips.
1/8" end mill (two flutes, up cutter):
In general I used a maximum cut depth of 0.04" (for parts where I didn't do a separate finishing operation, I went more conservatively with a 0.02" stepdown). I set the depth of cut 0.03 below the bottom of the model to ensure that I cut all the way through the material. Around the boundaries of gears I left 0.004 stock to leave in the radial direction.
I used the 1/8" endmill to cut the large scale features of the parts and rough out the profile of the gear teeth. I finished off the gear teeth in three passes, with progressively smaller diameter endmills.
RPM: 5000 (max on my machine, could go 2-3x higher than this and bump up the feed rates)
feed rate: 30 ipm
plunge rate: 15 ipm
1/16" end mill (two flutes, up cutter):
I used an adaptive strategy with rest machining turned on, 0.165" cut depth, and optimal load of 0.01". I set the bottom height to 0.03" below the bottom of the model to ensure that I cut all the way through the material.
RPM: 5000 (max on my machine, could go higher than this and increase feed rates)
feed rate: 20 ipm
plunge rate: 20 ipm (we're not actually doing any plunges, this helps keep things moving when cutting gear teeth)
3/64" end mill (two flutes, up cutter):
I used an adaptive strategy with rest machining turned on, 0.125" cut depth, and optimal load of 0.003". I set the bottom height to stock bottom since the flutes aren't long enough to cut into the spoilboard.
RPM: 5000 (max on my machine, could go higher than this)
feed rate: 10 ipm
plunge rate: 10 ipm (we're not actually doing any plunges)
1/32" end mill (two flutes, up cutter):
I used an adaptive strategy with rest machining turned on, 0.125" cut depth, and optimal load of 0.001". I set the bottom height to stock bottom since the flutes aren't long enough to cut into the spoilboard.
RPM: 5000 (max on my machine, could go higher than this)
feed rate: 3 ipm
plunge rate: 3 ipm (we're not actually doing any plunges)
Step 4: Post Processing Parts


The flat stock needs some extra post processing to get it ready for tumble polishing. When the parts come off the CNC, all the pieces are connected to each other through a network of tabs. I cut out the brass parts from their tabs using wire cutters and filed down the tabs by hand. I used a small needle file to finish off the tabs on the gear teeth and a bigger, flatter file to finish the tabs on round edges and flat sides.
It turned out that my stock was a little thicker than 1/8", so I had to plane off a tiny bit of webbing between the gear teeth that the smaller endmills could not reach. I mounted my parts on the table of the mill using some finger clamps and planed off about 1/32" off the thickness, see pics above. For the small gears, I just ran them over a big file a few times to get them to the right thickness, turning them occasionally to keep my filing even.
Before throwing the parts in the tumble polisher, I sanded the flat surfaces to 300, 600, then 1000 grit. The tumble polisher will leave the parts with a burnished finish, but it won't be able to remove machining marks and larger scratches. When sanding the parts, be sure to use water to help wash away debris and keep (lead containing) dust to a minimum. If you want something closer to a mirror finish, you can only achieve this by sanding down to a very fine grit by hand.
For the fleur-de-lis pattern on the end of the orrery arm, I used some sand paper to open up the features that the endmill could not reach and better define the shape. I laser cut some parts from plywood to help serve as a guide for this sanding.
Step 5: Drilling and Tapping Set Screw Holes

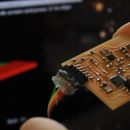
Several parts require a small (M2, M2.5, or M3) hole to be drilled and tapped to make room for a set screw. My preferred way to do this is on the mill using a tap wrench with a small center hole cut in the top of it and a spring loaded centering tool (tap guide) mounted in the drill chuck. this way I can make sure everything is lined up perfectly straight and apply a constant preload on my tap as I cut the threads (sorry the pic is out of focus, but you get the idea). Be sure to throw in some lubricant while cutting the threads and turn the tap backwards every few turns to cut/clear your chips.
For parts with only 1/8" of thickness that could be drilled and tapped, I opted for the M2 screws, but used the M2.5 or M3 where I had space on some of the thicker parts. I had to use a bottoming tap to cut the threads of the smallest part – the shaft collar for the moon rod. You could also use Loctite 603 here to bond the shaft collar to the shaft and avoid buying another tool, but you won't be able to make adjustments to the position of the shaft collar later. If you use superglue instead, you should be able to free up the joint with a bit of heat and a tap of the hammer.
Step 6: Drilling Angled Holes


Two parts (the earth mount and the mount to hold the moon tilt shaft collar) need angled holes drilled into them. To do this I designed some jigs in Fusion and 3D printed them (STL files in the Github repo). Once the part is in the jig, it will be held at an angle relative to the bottom surface of the jig. I clamped everything together in a vise (resting the bottom surface of the jigs on the bottom of the vise or on some parallels) and used a regular drill press to make the holes. Be sure to use a center drill on both these parts to get the holes started. The moon tilt cam shaft collar was additionally tapped with an M2 thread using the same jig.
Step 7: Turning Shaft Collars and Press Fitting


I cut two shaft collars on the lathe, both press fit into 0.25" holes in other parts. I intentionally left the cut surface of my parts about 5-10 thousands larger than 0.25" since the holes they will be fitting into were drilled (not reamed), so they are possibly oversize. I figured that if the press fits give me trouble, it will be easy to open up the holes with a file, so I'd rather err on the side of a too-tight fit to start.
I also made the height of the non-shoulder regions of the shaft collars a little bit taller than what is indicated in the model. This way the shaft collars will stick out a bit and give me some room to sand them down flush with the mating part.
Before doing the press fit, I hand chamfered the inside edge of the mating parts so that they would not get caught on the small fillet in the internal corner of my shaft collar's shoulder. I also cleaned the mating surfaces with mineral spirits. Be sure to drill and tap the shaft collar before press fitting.
Once pressed, I sanded everything down flush. When finished, the seam between the parts is barely visible.
Step 8: Depthing Gears


I made a quick gear depthing tool based on the design by Clickspring:
https://www.youtube.com/watch?v=q6xovvpuMQo
This tool allowed me to precisely measure the optimal distance between gears for proper meshing (which may be slightly different than the CAD model due to error in the machining process). The pointed ends of the tool allow me to scribe that distance onto my mounts so I could drill the final pivot holes in the correct position.
I wanted to use as many off-the-shelf parts as possible for this tool to keep the momentum going through the project, though I would love to one day build a version as solid as the one Clickspring has made. I laser cut and epoxied the body of the tool together from 1/8" acrylic and used an M3 screw and nut for the fine adjustment. I used a 1/2-13 vented screw with an 1/8" hole through the middle of it and some of the 1/8" stainless rod for the tool axes.
I used the flat side of a carbide cutter to turn the 1/8" stainless rod to a point. The angle of the cut doesn't really matter, just that the point is concentric with the OD of the rod. I found that I could get a nice sharp point by turning most of the point at one angle and then increasing the angle of the cutter slightly so that I was just hitting the point (and taking off a very small amount of material) for a final finish pass – it's kind of like the "ruler trick" if you're familiar with that from sharpening blades. I mounted the rods in a cordless drill and used some 300 grit sandpaper to slightly decrease the OD so that the rod would have a sliding fit through the undersize holes on some of my gears.
I was surprised to see that the vented screws I bought from McMaster had raised letters stamped on them (see pic). I didn't feel like I could get them square enough in the lathe to face them, so I just sanded down the letters, being sure to turn the screws often in my hand so that the sanding was fairly even and flat. Instead of fussing with tapping set screws into the stainless steel bolts, I used a dab of super glue to fix one of the rods in place in its bolt - this can be removed later with a tap of the hammer. The other rod had a sticky sliding fit in the bolt, so I just left it as is – this was useful so that I could lower the rod a bit to drop into into a bearing in cases where one pivot hole had been established and the other still needed to be scribed. For gears with ID > 0.125, I cut short pieces of the brass tube to center them on the shafts of the depthing gauge.
The laser cutting files for the gear depthing gauge can be found in the Fusion 360 model or as DXFs in the Github Repo.
The result turned out pretty well, I took some measurements and found the axes to be fairly parallel (about 0.002" error over 1" of length). I think my center punching and drilling will likely result in more error than the tool itself.
Step 9: Drilling Pivot Holes and Test Fitting


After scribing the placement of the pivot holes with the depthing gauge, I started drilling holes in the mounting plates of the orrery, starting with the center pivot and moving outwards. Be sure to clamp the upper and lower mount pieces together as they are drilled so that the holes line up (I didn't do this for some holes and it was a problem).
As I drilled each hole to 1/8" first (be sure to center drill as well), I loosened up the depthing gauge, flipped it upside-down, and used the undersized shafts to do a quick test fit of the gears in the mounts. If everything looks good, open the hole up to 1/4" (if needed, see CAD model), and do another test fit of the gears with the bearing in place. Otherwise, it might be necessary to adjust the hole spacing with a file before opening it wider. Do this incrementally, until all the pivot holes have been created.
Step 10: Cutting Shafts and Tubes


Referring to the CAD model, I cut several shafts from the 1/8" steel rod and 1/16" steel rod, and several brass tubes of various diameters to length. I also cut a 3/8" aluminum rod to 1/4" OD on the ends and bored a (slightly oversized) 1/8" hole through the center on the lathe.
I cut flats into the 1/8" steel rod (just the primary axis and crank axis) to help the set screws seat on the rod. I marked off the location of the flats with a sharpie and used a jig to clamp the rods in place (3D model of jig here) during the machining process. Note that you should only cut flats for the following parts:
crank axis: worm screw, shaft collar, crank handle
primary axis: bottom mount (the piece that screws into the wood base)
Other parts with set screws will need to be rotationally aligned in a final step, so there needs to be some flexibility in their final rotational position.
At this point you should also drill out the square hole of the crank arm to a round 1/8" diameter so that it can receive the crank shaft. No special jig needed for this, just clamp it lightly in a vise and drill. Also bore the ID of the worm wheel to 1/4" if needed.
Step 11: Engraving and Shim


Since my engravings were fairly complicated, I used P5.js to make the vector files so I could adjust layout parameters (diameters, spacing, etc) programmatically. All my scripts and dxf files are located in the engravings folder of the Github repo. I've included more information about the designs and toolpathing as well as instructions for how to run the design scripts there.
I first tested cutting and engraving these designs with a fiber laser using very thin shim stock. It was quick to produce, but I found that it was difficult to get a consistent depth of engraving across the large workpiece (because the material is not perfectly flat in the bed of the laser). I also did some tests using a diamond drag bit, but found that very little depth was achieved and many passes would be required to get the line thickness I was looking for – the drag bit can't remove material, it can only push it to the side, so its effect is small. Instead, I did the final version on a 3 axis mill using an engraving v-bit.
While I was cutting and engraving the calendar and year dials and the nameplate that goes on the bottom of the base, I also cut the other shim parts – the parts for the bearing track around the outside edge of the orrery, the year dial pointer, several tiny shaft collars to hold the earth in place (I made extras), and the piece of decorative shim on the crank shaft. Everything was cut from a single 6"x6" piece of 1/16" engraver's brass.
The tools I used are listed in the BOM. Note that for metal you should always use tools with straight or up-cutting flutes (no downcutting) for proper chip clearance.
Facing:
Be sure to plane your bed first to get everything perfectly level before engraving. I used an 1/8" endmill for this. I planed a piece of acrylic as a sacrificial layer and taped the brass down with scotch double sided tape. No screws were needed to keep things attached, but I did use tabs in a few key spots.
RPM: 5000 RPM
feed rate: 60 ipm
Engraving (v-bit):
For this step, you'll want to use a very narrow bit so that you can get enough depth in your engraving without making the line too thick. I used a cheap v-bit with a 30 degree tip, but you could also try using a small endmill. Because my cutter was so narrow, the tip tended to break off as I made my first cuts. This was fine and I just continued cutting with the broken tip – you may want to file off the tip of your endmill if you want more control over the tip radius.
I zeroed my tool about 0.003" below the surface of the brass and did an engraving test using one of the shorter toolpaths in the design. After checking the depth, I took it down to 0.006" below the surface and ran the whole engraving pass.
One thing that helped me a lot was to run the engraving passes twice at the final depth to remove burrs. I didn't do this the first time and had to spend a lot of time sanding away burrs, eventually sanding my engraving too shallow, forcing me to start over on the reverse side of the material (see pic of bad burrs). The good news is that there's enough thickness in the stock to give you a second try, I even "erased" my mistakes off the year dial by planing off a small amount on the mill (see pic).
RPM: 5000 RPM (go higher if possible)
feed rate: 10 ipm
plunge rate: 5 ipm
cutting and drilling (1/16" endmill)
Since the material is so thin, an endmill will work fine for the drilling operations (and it saves you a tool change) – just be sure to go slow on the plunge.
RPM: 5000 RPM (go higher if possible
feed rate: 10 ipm
plunge rate: 5 ipm
Step 12: Post Processing Shim


For now, hold off on getting the dials down to a final finish. You still need to melt engraver's wax into these, and you want to preserve the depth that you have in your engravings (oversanding may make them shallow). Just get them cleaned up enough so that the burrs are removed.
To reach a final finish for the shim pieces, I sanded the parts down to 300, 1000, 2000, and finally 3000 grit. I didn't run any of these parts through the tumble polisher, but did go over everything with 0000 steel wool to give it a final brushed appearance. I machined a small jig from acrylic that helped me guide the sandpaper in a circular path along the engravings so that I could sand them more evenly and leave a consistent grain orientation.
After sanding, I bent the end of the year pointer to 90 degrees (I used a small file to remove some material to make bending easier). The part was small enough that I was able to bend it by hand using the table surface to press against.
Step 13: Darkening Engraving Lettering


I tried a few methods for darkening the lettering in my engravings. First I tried using a dark patina like Jax Black, but I found it left the brass with more of a dark brown color (not dark enough) and it was difficult to get a consistent result across the whole piece. In a pinch on an earlier version of this project I just colored in the lettering with black sharpie –that ended up looking ok and it was extremely easy, but I'm worried about how well it will hold up in the long term.
For this pass I'm doing it "properly" by melting black engraver's wax (basically black shellac) into the lettering. This is a technique that I picked up from Clickspring, you can see how he does it here:
https://www.youtube.com/watch?v=qpy5O0b7cL8
Another video with more detail about the waxing process (I followed this technique pretty closely, especially the part about using a piece of acrylic to scrape most of the wax off):
https://www.youtube.com/watch?v=U3Kx9TVBEvM
One thing to note about the wax is it has a slightly blue/green color if it does not go on thick enough, so the engravings need to be deep to receive adequate wax. I had some trouble with this initially and ended up flipping my parts over to engrave the other side a bit deeper. In the end the final result was really nice and I'd definitely recommend the wax method above all else.
Step 14: Silver Tooth


An extra touch I added to the calendar engraving was a single silver tooth to mark a special date. I removed the existing tooth very carefully by filing it away (it would have been smarter to do this with the CNC using the engraving bit, I've actually added the toolpaths in the CAD file for this). I cut a small aluminum tooth from a scrap piece of metal I had (I just used some wire cutters and a file to shape it) and "glued" it into the engraving using the same dial wax that I used to darken the letters.
I very carefully filed and sanded everything flush, making sure not to apply too much force to the tooth. I used tape to protect the other parts of the engraving during sanding. In the end, the dial wax held up really well (much better than the epoxy and other glues I tried), and I had no problems getting this tiny piece to stick. The end result is intentionally very subtle (especially after the brass is cleaned and lacquered), but it adds a lot of sentimental value to the piece overall.
Step 15: Tumbling

I ran all my small parts through a tumble polisher for a few hours with water, some Dawn, a dash of white vinegar, and 2lbs stainless steel shot to burnish the surface. I used shot with an assortment of shapes to get in all the nooks and crannies of the parts. The vinegar removes oxides from the surface of the brass – other people use a product called lemi-shine, but lemon juice or white vinegar will work just as well.
Make sure you do all your sanding before tumbling; the tumbler will help even out the finish and fillet the sharp edges, but it can't remove large scratches and dents. I liked the burnished finish coming straight out of the tumbler, but if you're looking for a mirror finish, you can check out this video from Clickspring for more info (jump to 8:16):
https://www.youtube.com/watch?v=J3ZGlpDa-0g
When I removed the parts from the tumbler, I handled them with gloves on (to keep them clean) and immediately dried and lacquered them.
Step 16: Cleaning and Lacquering


After pulling the parts out of the tumbler, I rinsed them thoroughly and then left them to soak in acetone until I was ready to apply lacquer. For the bigger parts that could not fit in the tumbler, I sanded them down to 2000 or 3000 grit, used 0000 steel wool to add a satin finish and uniform texture to the metal, wiped down with white vinegar, cleaned with mineral spirits and a cloth, then applied acetone with a cloth for a final clean and to dry them. Wear gloves during this process to protect yourself and the parts (maybe even double gloves if you're getting a lot of solvent on you, gloves are semi-permeable).
Note: don't apply acetone or lacquer thinner to any parts with engraver's wax applied - it will melt the wax! I learned this the hard way... no worries though, you can always re-wax.
After pulling the parts from acetone and letting them dry, I used a spray lacquer by Mohawk to do the final finish – I sprayed outside in the shade in an area shielded from wind. I used a satin finish spray, but probably would go for the Mohawk ultra flow glossy next time, as it goes on really nicely and you can always buff to satin with some 0000 steel wool. I applied three coats, waiting a few minutes in between each coat. I recommend doing some tests first to see if you like the result. If needed, remove any surface defects in the finish with 0000 steel wool once the parts have fully cured. You can even apply some additional paste wax on top of the lacquer.
I debated for a while between doing a wax coating (e.g. Renaissance Wax) vs a lacquer finish, but decided on lacquer since it is more durable and I don't plan on taking this mechanism apart to polish it in the future. In the end I was really happy with this decision because I had to handle the parts so much to get the final assembly working – there's no way the wax would have held up to that. It will be interesting to see how the lacquer finish ages in the coming years, so far it still looks perfect in the 3 months since I applied it.
Another product you might check out for polishing is RubNBrite (which Clickspring uses). I've had success using this on large, flat pieces, but for gears with lots of little teeth, I've found that I don't have the patience to properly rub out all of the polish. Any extra RubNBrite that's left on the surface will form a green oxide the brass. You'll notice when using the RubNBrite that it leaves a blue/black residue on your polishing cloth and the metal is noticeably whiter after – I believe there is some acid in the polish that helps to get the last bit of oxide off the surface, but when excess is left on it can create problems. In general, I've found that the Renaissance Wax is a bit more forgiving as far as the rub on polishes go.
Step 17: Laser Cutting Acrylic and Delrin Parts

I've put copies of all the laser cut vector files in the Github repo. There are two main things to laser cuts: 1/8" acrylic pieces for a sliding adjustment mechanism for the crank axis, and delrin thrust bearings used all around the design. All units are in inches.
After cutting the acrylic pieces, I epoxied three bearings into their corresponding holes. You may have to make some adjustments to the hole depending on the kerf of your laser cutter so that the bearings fit properly.
Step 18: Hardwood Glueup


I made the wood base from a pice of 5/4" cherry, but any hardwood will work. I've made a few versions of the wood base, and my biggest tip is to not cut this directly from a single slab. When you cut a circle in a slab of wood, you end up with a mix of side grain and end grain on the sides of the workpiece, which is a nightmare for applying a finish. The end grain tends to soak up a lot of the finish and will have a dark appearance compared to the side grain. Not to mention that a single orientation in the grain of the wood base likely causes a lot of expansion and contraction in one direction when the piece is moved to different climates, which may pose problems.
Instead, I cut my board into equilateral triangles and glued those up into hexagons before cutting out the base on the Shopbot. I arranged the pieces so that the sides of the workpiece will be made from mostly end grain, and I mirrored the side grain on the top in a symmetric pattern. This has a bonus of creating a subtle diamond pattern in the end grain on the sides, matches up with the 6 segments of the brass outer race, and makes the seam between the top and bottom portions of the base less noticeable. Just make sure to plan things out before you cut and you'll be able to make something nice that fits the board you're working with. I planned out my cuts in Fusion to make sure everything would fit in my stock dimensions.
I was a bit impatient and didn't do the greatest job cutting perfect triangles, so I ended up having to do the glueup in two steps: first glueing up half hexagons, then cleaning up the mating faces after they dried and then gluing up into a full hexagon.
After the glueup, I had two hexagons with a large enough diameter to cut the top and bottom rounds. I used a drum sander to clean up the top and bottom surfaces and bring the thickness to 1" (a little thicker is ok too).
Step 19: CNC Machining Hardwood (Shopbot)


The wood base looks simple from the outside, but it has several internal features in it that allow the crank and other hardware to be mounted to it. I machined the top and bottom halves of the base on the Shopbot, all the toolpathing is located in that CAD file. Both parts will also need a flip, I've included some additional toolpathing for helping with alignment.
I screwed the material to the spoilboard on the shopbot with several wood screws around the outside. I also used some double sided scotch tape to help secure the material. When cutting out the outside perimeter, I clamped the material down in the center with some screws and washers, and took very light passes so that the workpiece didn't get thrown to the side. See pics for more details.
For the flip of the top side of the base, the exact rotational orientation of the workpiece doesn't matter, just make sure the holes for releasing the calendar dial don't line up exactly with where the pockets for the magnets will go. But for the bottom half of the base, the features cut into the bottom need to line up with those cut into the top. To do this, I cut some slots into the spoilboard that mirror the slots cut into the workpiece, then I used several pieces of 1/8" acrylic to line up the mating pieces before clamping the material down and cutting the bottom side. See the "Wood Flip Fixturing" toolpaths for more info about getting this set up.
One thing I've changed about the fixturing in the CAD file is I found it's easier to get the center alignment of the flip if you cut a bit of the outer perimeter into spoilboard, so you can match the perimeter in the spoilboard to the perimeter of the workpiece. In the pictures above you'll see that I tried to fit the workpiece in a pocket of exactly the right size. This did not give me great alignment (because there was a little bit of wiggle room) and was very difficult to remove after I was done cutting. See CAD (and final image above) for more details for the new fixturing method.
Have your hardware handy when cutting side 2 of the top piece; this way you can gradually adjust your toolpaths until you get a perfect fit (see pics).
The tools I used are listed in the BOM. Note that to minimize tearout in wood you should use a downcutting tool when cutting near the top surface of the material, and an upcutting tool for cutting all the way through the material. I based the feeds and speeds I used for cutting the hardwood on the settings indicated in the Shopbot docs.
1/8" drill (peck drilling)
RPM: 3000 RPM
plunge rate: 30 ipm
1/8" endmill (downcutter)
RPM: 16400 RPM
feed rate: 30 ipm
plunge rate: 10 ipm
1/4" endmills (downcutter, upcutter, and ballnose)
RPM: 12000 RPM
feed rate: 60 ipm
plunge rate: 20 ipm
Step 20: Finishing Hardwood


I screwed the two halves of the base together and sanded the outside until it was smooth. There was a little bit of tearout in the grain, so this step took some time using an orbital sander. I also finished off the top and bottom surfaces to 220 grit. I brought the endgrain to a slightly burnished finish so that it (hopefully) wouldn't get too dark when oil is applied.
I finished the wood with two coats of tung oil, rubbed in with a cloth. I started with a half dilution of tung oil in mineral spirits for the first coat, and then pure tung oil for the second coat. This was extremely forgiving and I recommend over something like polyurethane, as the results are way nicer.
Step 21: Add Hardware to Base


After finishing, I added hardware to the wood base. To start, I epoxied the 6 pieces of the brass race to the outer perimeter of the upper surface of the base. I lined up the seams of the race so that they matched the wood sections in the base. The top of the brass should be flush with the top surface fo the wood.
Next, I epoxied six threaded posts for the feet into the underside of the base. I did this by screwing the post into the brass foot all the way, then loosening it by a turn or so, covering the exposed post in epoxy and dropping it into the hole in the wood. This leaves enough of the post exposed so that the foot can be tightly fastened flush to the base. There is a little pocket cut into the wood around each of the mounting holes to catch any excess epoxy without allowing it to adhere to the brass foot – the feet of the orrery should be removable if this all goes according to plan.
I also added the threaded inserts to the base at this point. I had to open up the receiving hole for the inserts to 19/64" diameter to get them to fit without putting too much stress on the surrounding wood. I've updated the CAD model to add a little pocket around the opening to help the fit as well – without it, I ended up marring up the bottom surface of the base a little bit (see pic).
Using a pin vise, I carefully predrilled holes for mounting the nameplate to the bottom of the base and screwed it on with some decorative brass wood screws.
I cut several pieces of steel shim and epoxied them to the backside of the calendar dial so that it could be attached via magnets to the base. I also glued 6 magnets into pockets in the wood. After curing, the dial snaps into the wood beautifully. (There are holes drilled under the dial that allow it to be easily popped out with a screwdriver.)
Step 22: Interference Fits


For this project, I wanted to experiment with using an interference fit (also called friction fit or press fit) to connect many of the gears to their shafts. The basic idea is to make the bore in the gear slightly smaller than the diameter of the shaft so that there is enough pressure at the interface between the gear and the shaft to bind them together through friction. I used an arbor press to apply a large force on the gear to get it into position on the shaft.
For the diameter range I am working with (1/8" - 1/4") I'll need an interference of about 0.001" for a good press fit. Most of the press fits in the design are for 1/8" diameter stainless rods inside undersized holes in 360 brass, so I used an undersized (7/64") drill followed by a 0.124" reamer to cut the holes in my brass stock. One thing I leaned from this process is that reaming (esp at these small diameters) is a bit of an art and not always 100% reliable – any runout in the reaming operation will easily add a thousandth or more back in the hole diameter. Some techniques I used that I think helped were hand chamfering the holes just before reaming (so that the reamer seats in the hole better, you can also use the tip of a large drill bit for this) and sticking the reamer out of the spindle a fair amount so that it can flex a little bit in case it is not perfectly aligned with the starting hole (I used an 1/8" collet to run the reaming rather than a drill chuck). I also slowed the RPM of the reaming operation down from what I would use for drilling. Also use lots of lubricant.
Most of my press fits worked well when I ran them on the CNC mill (I was less successful on the drill press), but in some cases during fitting I had to press parts on and off the same rod and ended up opening the hole enough to loosen the friction fit. Since my mechanism is not experiencing a lot of force, I used a dab of Loctite 603 in these cases to secure the joint.
The one place that I was a little bit concerned about is the large, central gear that drives the entire mechanism. It has to be pressed on a long rod to get to its final position, and I was worried the travel might burnish the hole enough to open it slightly. In this case I knurled the portion of the 1/8" rod that receives the gear to help increase the OD a tiny bit and reinforce the fit. I used a hand knurler with fine, straight-toothed forming knurls (see pics above). Technically, this is not the best way to do a press fit, since knurling reduces the amount of contact between the two parts, but this isn't a life-threatening application, so I figure it's ok – I did some tests and found this worked very reliably for the kind of forces I'm expecting.
Step 23: Assembly


Once all the parts are ready, assemble the gears by pressing them onto their shafts/tubes, using the CAD model as a guide. Have the Loctite 603 handy to help bond any press fits that seem a little iffy – most of these (with the exception of the central drive gear) are not experiencing a lot of torque and should hold fine with Loctite.
Make a plan for how you're going to approach assembly and give yourself plenty of time. I started with the second axis and moved my way to the fifth axis, then came back and finished off the central axis. The only part that gave me a little bit of trouble was pressing on the gears for the calendar dial that sit on the central axis: because I'd already assembled the second axis, there was not clearance to press the gears into their positions (see last image). I solved this by temporarily popping out the bearings for the central axis out of their mounts and using the little bit of extra room available to slide the central axis over a bit and do the pressfit.
Once parts are pressed together, it's possible to press them apart in case you made a mistake, but should be avoided as it is difficult and could cause damage to the workpiece. Be sure to leave a little bit of vertical gap in the fit so that the gears can rotate freely, and don't forget to add the washers indicated in the design. I used a bit of paper on the arbor press to help keep the surface of my lacquered parts from being scratched. Be sure to also add grease to the interfaces between telescoping tubes as you are assembling them.
Step 24: Mounting Earth


I cleaned up two of the small shaft collars (the other two are spares) and epoxied them to a 1/16" post to act as end stops for the earth bead. I left enough room for the earth to freely rotate on its axis.
Step 25: Final Adjustments


When screwing the base together, be sure to include the acrylic pieces for the sliding mechanism that adjusts the meshing of the worm drive. These are indicated in the 3D model and should be assembled with small springs to act as a restoring force. Once assembled, this mechanism will allow you to make small adjustments to the horizontal alignment of the crank axis via three M3 set screws on the underside of the base.
When fully assembled, the central 1/8" shaft should be fixed to the base via the bottom-most mount on the underside. The crank drives the worm drive, which rotates the orrery's arm via the drive tube. It takes some time to get the adjustment right so that everything is lined up – it's extra challenging because the worm drive is embedded inside the base and not easy to access. Remember to add some grease to the interface between the central 1/8" shaft and the central drive tube as well as on the teeth of the worm drive to reduce rubbing/friction.
Step 26: Alignment

Finally, you'll need to do a final alignment of the parts to get the orrery into the correct position to start measuring eclipses. To start I lined up the year dial so that the marker passes a tick mark when the calendar rotates toward January 1. Then I used a lunar calendar (date of full and new moons) to line up the moon's orbit with the calendar dial. Finally, I set the positions of the nodes and perigee. Each of these features can be positioned independently and locked down via various set screws in the design. Some references:
- Lunar Perigee and Apogee + Moon Phases Calendar - Use the date of the new moon to set the position of the moon's orbit. Also position the perigee pointer.
- Node Passages of the Moon 2001-2100 - Position the ascending/descending lunar nodes.
- Solar Eclipses 2021-2030 - Check your accuracy.
Be sure to account for backlash when you make these alignments – drive the mechanism in the forward (time increasing) direction each time to take a measurement or check an alignment (always approach from the same direction). Don't lock down any of the set screws on the tubs too tight, or you'll risk deforming the tube walls and causing a pinch point in the mechanism. After you've set things, drive the mechanism forward several years to see if the dates make sense for future lunar events.
Finally, to orient the earth's axis, you should position it so that the northern part of the axis points away from the sun on ~Dec 21 (winder solstice) and toward the sun on ~June 21 (summer solstice) - this article has a nice image for reference.
Step 27: Gear Meshing Fixes


Since this design co-locates several gear trains across the same pivot axes, it's possible that you may have some extra backlash in some of your gears in order to give other parts of the mechanism enough clearance. I noticed this a bit in the two large gears that drive the moon's orbit. I've included some extra toolpathing in the CAD file ("Meshing Fix 1" and "Meshing Fix 2") to recut either of these gears with a slightly larger outer diameter. You can also change the amount of extra radius applied via "MoonGearMeshingOffsetFix" in the Modify>Change Parameters panel. I haven't done this myself, but I'm leaving it as a possible upgrade in the future.
Step 28: Mistakes Made / Lessons Learned / Version 3


This was one of the first big mechanical engineering projects I've done start to finish, and I made a ton of mistakes along the way. (This instructable is actually documenting version 2 of my design.) Here are my notes about things that went wrong during this build and what I learned along the way:
shaft coupling - Because I was trying to keep the dimensions of the assembly very small, my options for coupling gears to the 1/8" shaft were limited. In a lot of places in the previous version of the design I cut and tapped my own brass shaft collars, used a dowel to couple them to an adjacent gear, and used a set screw to couple them to the shaft. This worked well enough (though I changed to press fitting the shaft collar in v2). In other places I didn't want to add the bulk of the shaft collar, so I milled a D shaped profile in my shaft and a corresponding D shaped hole in my gear. There were a number of problems with this. First of all, since the center hole for the gear was a weird shape it required me to use a 1/32 end mill to cut the hole (see section below on using an endmill for cutting holes). Also, because the D shaped hole has sharp interior corners, I had to open up the inside corners more to allow space for the tool to get there. Unfortunately, the way I did it allowed the shaft to move around a ton inside the D shaped hole. Also, it's nearly impossible to cut the profile of the shaft to perfectly match the profile of the hole. In retrospect this is obvious, but it was not obvious when I was first designing these parts. I ended up stuffing some shim stock into these gaps in the final assembly, and it all worked out, but it was a bit messy and sometimes still had a tiny bit of play. In version 2 I changed to pressfits which both simplified the design and was functionally superior.
end mill for cutting holes - When I was doing this on a shopbot originally, I didn't have enough z height to mount the drill chuck on the shopbot and also be able to hit the depth I needed with the 1/32" endmill in a collet. So I decided to cut most of my holes with a smaller sized endmill and move X and Y to get to the desired hole dimension. This mostly worked after I ran a few tests to determine how much I needed to compensate for backlash in the XY drive system, but there was a large degree of variability in my hole sizes. In version 2, I cut these parts on a tormach (with more z travel) and used the correct drill sizes for each of the holes (and center drilled first) – the results were much better.
precision ground shafts - I really wanted to go for more of an all brass look my first time around and used 1/8" brass rods in the assembly. McMaster doesn't stock precision ground brass rods in that size, so I got the regular tolerance ones. It turned out that they were a bit oversized, and I had to do a lot of sanding to get them to fit through the 1/8" bearings. In my second pass on this project, I used precision ground 1/8" stainless steel rods and was a lot happier. Be sure to get the tight tolerance (+/-0.5 thousands) and not the tight, undersized (up to -0.5 thousands undersize only). Not only are these rods precision ground, but they are also more stiff than brass rods and should be less prone to deflection. Also, I came around to liking the look of the mixed metals more than the all brass look in the end.
hand fit gears - It's really important to hand fit the meshing of the gears on their mounts, and this is standard practice in clockmaking. In general, I've found that you always meed to have some ability to make adjustments to your assembly based on error in the fabrication of the parts – you have to anticipate that the parts aren't exactly to spec. In version 2 I laid out the positions of the 5 axes by hand rather than going by the dimensions in the CAD file. Where possible, I've included mechanisms for making slight adjustments to the meshing of gears.
cutting a deep hole in the wood base - In the first version of this design the base was made from a single piece of wood, with a giant hole bored into it to make room for the crank shaft. I did not anticipate how much a deep drilling operation would deflect, and it was nearly impossible to get it straight enough to function properly. Additionally, I had no mechanism for making small adjustments to the worm drive meshing in this design.
have a plan for assembly - I ran into some trouble during assembly with getting the gears of the fifth axis into position (see image above). I ended up with a puzzle situation where gears that I'd already pressed on were getting in the way of others I still needed to add. I ended up having to disassemble the pressfits (so annoying) and put it back together in a slightly different configuration. I've updated the CAD model to fix this issue – there should not be any ambiguity with assembly order anymore.
Going forward, here are some changes I would make for version 3:
higher ratio worm drive - I've updated the model and BOM to use a larger (30T) worm wheel so there would be more room to bore it out to 1/4" and it would slow down the motion of the mechanism in response to the crank by 50% from what I originally used (I used 20T, I found mine went a little too fast). You may even consider going to 40T (or higher), just make sure you update the CAD model with the new dimensions because it will affect the position of the crank axis.
better mechanism for moon cam - by far the stickiest part of the mechanism is the sliding motion of the moon along its cam. Lateral forces on the moon's shaft cause it to pinch slightly in the hole that guides its vertical motion. I'm still thinking about better ways to design this in the future that aren't too complicated. The nice thing for now is that since the CAM is removable via 2 screws, this is an alteration I can make later without changing too many parts.
Hope you enjoyed this instructable, please let me know if you end up making this project!


