

Introduction: Phoenix Bird Wall Sculpture


Hello everyone.... Today I'm going to make a 3d Phoenix Bird wall sculpture.. Just using some basic items.... As always I have keep this project simple....
I could have used a 3d printer... But... I think that everyone doesn't have that kind of expensive things... And DIY is basically for everyone....
So without further a do... Let's gets started...
Step 1: Things We Gonna Need...


For this project... We will need..
- Sculpting clay..
- Sculpting tools
- Cardboard/ masonite board
- Coping saw / any cardboard cutting tools
- Fabric
- Parchment paper /baking sheet
- Black fabric colour
- Golden, silver, red, orange, yellow acrylic paints
- Brush
- Sand paper(fine grids)
- Finishing coat
- Glue
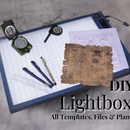
- Templates (files are in the next step)
The items may be vary depending on your project.... Don't mind to make changes in the process.
Step 2: Print the Templates and Cut a Cardboard Piece


Firstly print the given templates on a4 papers....
Take a thick sheet of cardboard..... I took masonite board..... Mark the back piece design on the cardboard....
Now start cutting the cardboard....
I used my coping saw for cleanly cutting the board...... You may use whatever you have...
After the cardboard is cut to final size.... Use a sandpaper and smooth the edges... It will give a clean look...
**Templates....(Pls print the files on A4 Paper)

Step 3: Glue the Fabric on the Cardboard


Take a piece of fabric and mark the base plate on it leaving around 2 cm in every side...
Now take some craft glue and apply a media layer of glue.... Then place the fabric on top
.. Using a brush... Smooth out the surface... Whole removing any excess lumps of glue...
After the glue is dried.... Flip the base... And stick the sides in the back side...
For this part... Just cut some areas... As shown in the pictures... And then fold and glue them...
You may use clips to hold the piece while the glue dries...
Step 4: Start Sculpting the Model


Now while the glue is drying... Take the printout.... And take a slightly bigger piece of parchment paper....
Fold the excess paper under the a4 sheet... Thus the parchment paper will not slide around... You can't use any kind of glue or tape... As those will never stick to parchment or baking paper...
Now here I want to say something.... I used my old trusty clay... M-seal... Which is a repair item... As I'm families with it.... And i don't have any other option.... I could not managed to find any type or good quality air drying clay.. Or baking clay..... I don't know if those are even available in my country....... I had a packer of Mont Marte Clay... Fut it's quality is not upto the mark... It's not even usable....
Whatever... Take your clay... And start applying and filling the drawings.... The parchment paper is transparent... And it will allow to see the pattern under.....
I haven't recorded the whole process... I just took some reference photos....
Use some sculpting tools... Or some random tools as you progress.... As I had a full set of working tools... I have used those....
Step 5: Make the Body


Firstly lay down some clay... In the body area.... I mean start from the body... It will be easy....
Slowly add some pieces... As the tail feathers and other parts...
Step 6: Add the Flames


When you get satisfied with the phoenix.... Start making the flames... It's also the same process.... Take your time and use your creativity to do the job.... It might not look good at first... But.. Keep faith in yourself.... It will be fine later...
Complete all the flames.. Including the outer frame.... Just it...
Step 7: Give a Good Sanding

After the clay is dried and hardened well..... Take a 400 grit sandpaper.. And give a light but good sanding... To remove any odd surface textures....
You may use 2 round of sanding.... It's up to you....
Step 8: Add Some Finer Details...

Now... After all the sanding has been done.... It's the time to add some finer details... Like eye balls... Or some feather texture.... If you want you can skip this step.... But.. I will really suggest you to do this step....
It will make the sculpture more realistic....
Step 9: Start Colouring


Now... It's the fun part.... Colour the flames in golden.... You can use some silver if needed....
For the phoenix body... I will suggest you to use orange red and some yellow.... It will be awesome...
I have used acrylic paints... And a fine brush for the job...
Remember one thing.. The more you will give it time... The more... It will be beautiful...
Step 10: Paint the Base Black... Add Hanging Strings


While the paint is drying.... Take some black fabric paint... And paint the base piece in black colour....
I think... One coat will be enough for the job....
After the paint is dried.... Attach a string... Or a thin rope.... In the back side.... It will help the sculpture.. To be hang on the wall.....
Step 11: Add the Pieces on the Base


Now... Start removing the pieces from the parchment paper.... And arrange then in their respective places....
Using a quite good glue.... Start joining the pieces on the black fabric piece... (base).... Take your time...
Of you have done all the previous steps well..this process will take only few minutes.......
Don't use excess glue... As it will result spillage and... That will ruin the beauty...
Step 12: Cover Any Faults...


Now.... Take your time.... And if there any faults, gaps or any other kinds of issus.... Fix them now....
For that.. You can use more clay.... Colour... Glue... Or any other method....
Use whatever you want...
Step 13: And We Are Done... 😄


And this is how we have made our own easy Phoenix wall art...
This project is a great way of learning some techniques of sculpting and getting a epic project for weekend...
You can decorate your house... Or you can gift this... To your friends and family...
The Phoenix being a symbol of power and rebirth.... I thing... It's a good project to have a try.... Feel free to alter any parts in the project.... Make it...
In case of any doubt... Feel free to ask my anything down below... I will be glad to answer them....
Thanks for having a look on my project.... Have a nice day 😄....

Participated in the
For the Birds Speed Challenge


