

Introduction: Shift: Standard Pin, Bullpup, and Slingshot.


Hello guys! This Akshat21045 with JonnyBGood, in a gun collaboration!
This is a very special type of instructable. In this, we shall make three different types of guns, from nearly the same body! I hope that you enjoy our collaboration!
Here is a quick overview!
- Three guns out of the same body!
- Awesome range (40-50 feet)!
- Looks cool!
- Comfortable, as well as durable!
- Reliable as well!
I hope you got a quick glance at what our i'ble is all about!
Please vote for me and Jonny in the K'nex Rods and Connectors Contest, as well as our other entries! Please leave some feedback as well. Add a few images of your own, and I'll be sure to add it to the intro.
Continue on to view our collaboration Instructable!
Step 1: Step 0 Planning


Well as many great guns go, you can't start without a plan. We first had to decide what we wanted the gun to do, so we decided on a gun that could be outfitted with different mechanisms and format styles while also being compatible of connector or rod ammunitions. This would give the builder complete control over how he wanted the gun to look, perform, and what ammo is fired. Like every plan goes, some things are followed and others are dropped. We originally planned six versions of this gun, but only got around to three. These three though follow the general basis of our original idea of multiple mechanisms while using a similar body.
Moving forward after the planning, we grabbed our knex and started building. We started with the general idea of creating the first layer because this is what guides the guns' appearance. We also placed a pre-built handle and a black rod to give us an idea of firing pin and handle placement. This allowed us to visualize the trigger mechanism and how much space we'd have to build it in.
We now moved on to building what we thought the gun should look like. JonnyBGood was first to produce a working prototype which strayed from the original design, but it was a plan with the purpose of laying down a physical idea of shape and not a final idea. After sharing pictures of the gun, Akshat 21045 created his own version of the gun using his ideas of how it should look and work. So after we shared internal pictures, we realized we have two versions of the same style gun, so JonnyBGood combined the two into one final version where he eliminated broken pieces by using his trigger mechanism. He then used the more ergonomic and piece conservative styles that were in Akshat 21045's version for the final combined version.
So that's how we built just the standard pin version of Shift. We then split up to conquer the other two styles. (akshat 21045- slingshot / JonnyBGood- bullpup) The main purpose of this step was to explain and show the amount of work that goes into the planning and building of a knex gun. We don't just wave our hands and "Poof!" a great looking knex gun appears on our table, and we don't just build the final version the first time either. Building a knex gun is really just the understanding of a pattern and with Shift we're hoping you will see this repetitive pattern in the multiple versions. Once you realize this pattern of making a knex guns you can invent some great guns yourself!
Now with planning out of the way, let's build a version of Shift!
Step 2: The Gun Types


Now, on this Instructable, we will teach you how to make three different types of guns-
a. Standard Pin Gun: These are the most common guns that you can find here on instructables. The mechanism is simple, you just have to pull the pin back until it locks into place, then you have to pull the trigger, which is connected to the mechanism which locks the pin into place. All the steps having 'a' in front of them are related to this type of gun.
b. Bullpup Pin Gun: These guns are not that common but still, you may find hundreds of these guns on this site. But, in this gun, there is a twist! The magazine, fits in behind the handle. They work the same like standard pin guns, pull back the firing pin and pull the trigger. All the steps having 'b' in front of them are related to this type of gun.
c. Slingshot Gun: These guns are one of the easiest to make and are most effective out of all three types of gun. Their mechanism is a bit different. You have to take a rubber band, and pull it back, to hook it to the ratchet at the back of the gun. Then just load the bullet and fire! These do take a long time to reload, but that isn't much of a problem. All the steps having 'c' in front of them are related to this type of gun.
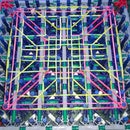
Step 3: 1a. Internals


So this step is just basically there so you guys can have an overview of the gun, and experienced players can even try to make it (although it would not be too tough) without moving onto the next few steps!
Step 4: 1b. Standard Version: Body Panels


Alright guys, now we will be building the two body panels! They are what will make the base of the gun. They are what gives the gun its shape. Of course, build two (one with the blue rods, the other without). Don't worry, there are many pics showing the details. Be sure to read the notes too!
Step 5: 1c. Building the Magwell, the Firing Mechanism and Trigger


This part of the gun holds the mag in its place, the mechanism keeps the firing pin on its course to hit the bullet, and of course, the trigger allows us to have control when we want to shoot the bullet. The pictures should be clear and they should be easy to follow. Just comment if you have some problem.
Step 6: 1d. Building the Pistol Grip


This is the pistol grip/handle. You hold the gun from here. This is the exact same handle used in JonnyBGood's Buzzsaw (with just a bit from the bottom changed). It isn't that hard to make. The placement may be a bit hard, but is necessary since you want the mechanism to stay in its place.
Step 7: 1e. Building the Stock and Handle Guard


The stock is what makes you steady your shots, hence increasing your accuracy. It also increases mobility (according to Call Of Duty XD). The handle guard is there just for looks.
Step 8: 1f. Finishing Up, Adding Bands and Sights


Now we are going to just add the other panel, and get a pair of sights! Also, we will be adding rubber bands to the gun so it can fire! Remember to check out the mags on step 20, and the firing pin on step 21!
Step 9: 2a. Bullpup


Alright now its time to make a bullpup! A bullpup is a very cool futuristic gun that has the magazine and firing mechanism behind the grip, giving you a more compact firearm. In knex guns a bullpup is one of the hardest types of knex guns to build due to the trigger mechanism being behind the magazine, but it always gives you a shorter more piece efficient gun. So lets start building!
Step 10: 2b. Body


Like all of our guns in this ible', they are all based on the same body design. I found the front part of the regular body to be a waste of parts, so I removed it. build this to get your base started!
Step 11: 2c. Internal


Even though you won't end up "c" ing the internals of this gun when you done, this is very impotant (=3 Okay I'm done with bad jokes). Regardless you can see how I make the trigger mech very close to the top of the gun to allow it to fit over the magazine well and onto the block mechanism. Continue building and you'll be almost done!
Step 12: 2d. Grip


Well as Akshat has said earlier this is literally a modified grip from my Buzzsaw. Regardless it's a comfy grip, and it fits the gun well. Build it and continue on.
Step 13: 2e. Finish It Up!


Finish these steps to complete the gun!
Step 14: 3a. Internals


Again, just an overview of the gun. I guess that you guys must be able to build this gun now, just from the pictures. If not, continue to view the instructions. Sling-out!
Step 15: 3b. Slingshot Version: Body Panels


The body panels, just remember to make two, one with, and one without the blue rods.
Step 16: 3c. Building the Rail, Ratchet and Trigger


Just as simple as it sounds, this is the meat of the gun. The pictures should be clear and they should be easy to follow. Just comment if you have some problem.
Step 17: 3d. Building the Pistol Grip and Trigger Guard


The famous grip from the buzzsaw, make note of the trigger guard, it is longer than usual. The pictures should be clear and they should be easy to follow. Just comment if you have some problem.
Step 18: 3e. Building the Stock


This will provide support to your shoulder to prevent recoil. Again, the pictures should be clear enough to follow.
Step 19: 3f. Finishing Up and Adding Bands


Alright! You're done! Now it's time to add bands and shoot some targets! Have fun with this gun, and be sure to leave a picture of the finished product!
Step 20: Making the Magazine!


Finally what you need is some magazines to fit in your guns (well, wherever applicable). Make it quick, so that you can finish your gun!
Step 21: The Firing Pin


Here is the step where you make the firing pin. It helps you to shoot the bullets! Add some size 64s or 117s and have a blast with your new guns!

Second Prize in the
Community Contest: Toy Rods and Connectors


